

DIY boiler
Indirect heating boiler - popular among owners of private houses, but at the same time quite expensive unit. A storage water heater will cost significantly less if the owner of the house hands grow from the right place, in addition, there are suitable materials and tools. Do-it-yourself boiler is an affordable business. You will learn about how and from which to assemble it from the article.
to contents ↑What does he look like?
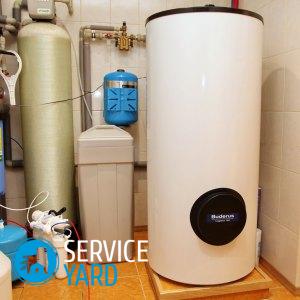
Before you make a boiler with your own hands, it makes sense to imagine how it looks. This is a large tank with a lid that is connected to the boiler. Water is heated in the boiler and enters the tank through a pipe that enters in the middle of the lid. Externally, a home-made indirect heating unit is similar to that made at the factory and sold in the store, but it also has some differences. In fact, this is a drive that can work in both winter and summer:
- It crashes into the heating circuit.
- The coolant is supplied directly to the tank, and not to the coil, as in factory models.
- After turning off, warm water continues to flow.
- There is no circulation of hot water - instead of it, a coil is built in, the pressure is provided by the pump, respectively - the water is heated when passing through the tube.
In branded models, the opposite is true:
- Hot coolant enters the coil.
- The water in the tank is heated.
How much do craftsmen rarely make boilers like in a factory? Just because the factory construction is more complicated, more fittings are required, and no tangible effect is obtained - well, unless branded units work more stably. A do-it-yourself boiler from a gas cylinder or a plastic barrel can have its own characteristics, which it is better to get rid of right away - craftsmen often neglect thermal insulation, as a result, the coolant consumption increases. Plus, not all home-made models allow you to provide a house with hot water without heating. In addition, at home-made aggregates, sometimes it breaks the top. To cope with this, it makes sense to pay special attention to the design of the cover. It must be convex.
to contents ↑The benefits of homemade heaters
Why do the owners still often prefer to make a boiler with their own hands? A home-made boiler has a lot of advantages over factory ones:
- It is connected to the heating system.
- It is placed next to the boiler.
- It costs much cheaper than purchased
- Allows you to save energy.
- Allows you to maintain a constant temperature of water.
If we talk about the minuses of the boiler with their own hands, then they are:
- You need a fairly spacious room to put or suspend a heater.
- If the device is not powerful enough, the water heats up for a long time.
- Scale forms quickly, so it’s better to soften water
to contents ↑Important! A homemade unit is also good because during the heating season it works from central heating, and in summer from the mains.
What to do?
If you decide how to make a water heater with your own hands, first take care of the material. The unit experiences a lot of negative effects that can destroy a variety of materials:
- he is constantly in contact with water;
- he heats up.
Metals
Accordingly - there are certain requirements for the material, which must be resistant to corrosion and well tolerate the effects of high temperatures. Therefore, for the manufacture of such heaters are used:
- Aluminium alloy;
- stainless steel
- some plastics.
Important! You can make the tank and ordinary steel, but it must first be coated with enamel.
Plastic
Do-it-yourself indirect heating boiler from a plastic barrel is a good idea if the unit is small. Plastic does not always withstand a lot of pressure.
Important! Do not take an ordinary wide heating pipe. The cylinder, of course, will be seamless. But here it is quite difficult to securely fasten the bottom and the lid in this case, and this is the main problem - the seams should not leak, and the lid should bend and break. In addition, pipes in systems are often susceptible to corrosion, so it is better to look for something that does not really rust. For example, food grade AISI304 steel. The unit will cost no more than if it were made from a finished pipe, but such material does not contain substances harmful to the body. If you have one standard sheet, it will make a tank 1 m high, this is quite enough. The diameter of such a cylinder is a little more than 60 cm, and it will weigh about 16 kg.
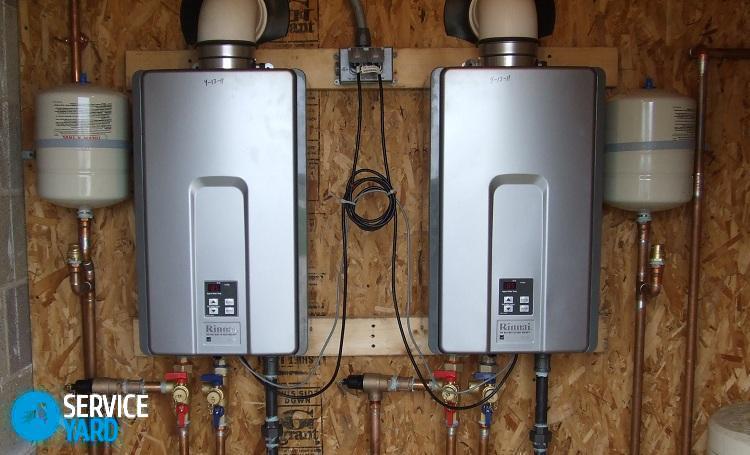
Gas bottle
A great option is a gas bottle. True, in this case there are several requirements:
- The cylinder must be new.
- The metal must be completely cleaned.
- The surface has to be covered with special primer.
- During cutting and drilling, the cylinder should be filled with water.
to contents ↑Important! The old bottle is not very suitable, because the water in it will have a gas smell for quite some time.
Volume
Before choosing this or that material, decide how much water you have to heat up. The usual calculation is 50-70 liters per person.
to contents ↑Coil
One of the main details that ensure the accumulation of hot water is the coil. It can be done:
- from metal;
- from metal plastic.
The tube should be of small diameter, which, like the length, depends on the volume of the tank. The best options:
- copper;
- brass.
You can easily find both in the plumbing or construction goods store.
Important! When buying, please note that the maximum amount of water should be in contact with the coil.
We make a coil
For work you will need:
- a log or pipe of suitable diameter that is even along its entire length;
- clamp.
Both copper and brass easily bend. The main thing is to make smooth turns. To do this, the free end of the tube is well fixed, and then wound it on a log or pipe. The turns should be smooth and without kinks.
to contents ↑Thermal insulation
So that your tank does not cool down too quickly, you need to provide reliable thermal insulation of the boiler with your own hands. Any heat-insulating materials that are at hand are suitable for this:
- polyurethane foam;
- foam;
- polyurethane foam;
- Isolon
- mineral wool.
to contents ↑Important! From above it is necessary to make an outer shell of material with a foil layer or of tin.
Make capacity
To make a tank for a boiler with your own hands, you need:
- gas bottle, plastic barrel or sheet steel;
- welding machine;
- 2 ball valves;
- drill with drills for metal;
- TEN.
If you have a gas bottle or a plastic barrel - great. In all other cases, you will need to weld the body to make the boiler yourself:
- Drill 2 holes in the upper part of the finished cylinder with the bottom - hot water will fall into one, cold water into the other.
- Fit ball valves into these holes.
- Drill 2 more holes on the side to install the heat exchanger.
- Connect the nozzles to the inlet and outlet of the heat exchanger.
- Drill a hole for the drain tap at the bottom.
- Install heating elements, or better, two or three, one above the other, at the bottom of the tank.
- Isolate heat elements from water.
- Install thermostats (from the same heating elements).
Number of heating elements
The number of heating elements in your boiler with your own hands depends on their power and on the desired power of the device itself:
- Calculate the amount of water - it is equal to the volume of the cylinder times density, that is, 1 liter.
- Determine the time for which you would like to heat the water.
Here's what to take into account when installing the heaters in the boiler with your own hands:
- Note that a heater with a power of 6 kW can cope with heating the tank in 300 l of water to a temperature of 100 ° C in about 3 hours.
- Based on this, you can calculate how many household heaters with a standard power of 2 kW will need to be installed in your tank.
- Usually it takes 2, but for especially impatient residents it is better to take 3 heating elements.
- Fix them with brass nuts - they are sold in electrical goods stores. Place the heating elements in a way to ensure circulation.
Warm water rises. If one heater is at the top, the warm stream rises higher, flows to the other wall, and then begins to descend smoothly, since it is replaced by new heated water. Thus, the water below will also begin to heat up.
to contents ↑Important! If you have only 2 TENs, one can be placed at the level of the lower third of the height, the second - at the level of the upper third, above the first.
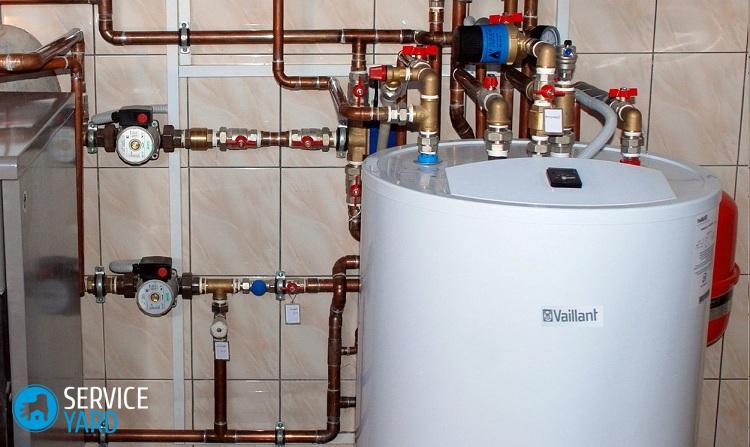
Install the tank
After the boiler tank is assembled with its own hands, a lid is mounted to it. At first it is not tightly welded, because the first thing is to do all the tests - just fill the tank with water and warm it up to see if there is a leak. Check the pressure. In the water supply network, it is usually 3 atm., This is more than enough. If necessary, install the gearbox. After all the tests are carried out, the question arises: how to install a boiler with your own hands?
For this you need:
- tin;
- tree (you can take children's wooden cubes);
- tools for working with metal and wood.
Next, the process of assembling a boiler with your own hands is as follows:
- Assemble a tin barrel that has a bottom removed.
- Cut holes in the same place where different protruding parts are located at the tank - pipes, etc.
- Turn 5 cubes with a side of about 4 cm (can be borrowed from the children's building constructor).
- Set the cubes to the bottom.
- Place a tank on them.
- At the bottom, fix the wiring of the heating elements.
- Install a tin cylinder on this entire structure.
- Make the wiring of the electrical circuit - for this you need, of course, terminals and pads.
- Around the holes for the heating elements, install tin cylinders.
- Connect all tubes and hoses.
- Close it all with a lid.
- Fill the gap between the tank and the can with a heat insulator.
Important! The ideal option is to weld all the elements with argon welding, but in the absence of suitable equipment, much can be soldered.
The rest of the work
Do-it-yourself wiring of the electrical network for the boiler should be carried out strictly according to the scheme. Be sure to make grounding. In addition, for houses with old wiring, such a device will not work, additional power can damage all wiring.
Important! It is best to lay a separate cable, in much the same way as for a washing machine.
The simplest grounding
When deciding how to make an electric water heater yourself, do not forget about safety. If the unit is in your basement, the easiest grounding can be done like this:
- Dig a stainless steel frame in the area - it should go underground about 2 m.
- From this frame to the water heater, lay a steel strip.
Thus, to make a simple and reliable do-it-yourself boiler that will work in summer and winter is quite possible at home, if only you have access to the welding machine and you have already learned how to work with it. However, now you can buy any equipment in stores, and you can learn how to use it in the process.
- How to choose a vacuum cleaner taking into account the characteristics of the house and coatings?
- What to look for when choosing a water delivery
- How to quickly create comfort at home - tips for housewives
- How to choose the perfect TV - useful tips
- What to look for when choosing blinds
- What should be running shoes?
- What useful things can you buy in a hardware store
- Iphone 11 pro max review
- Than iPhone is better than Android smartphones
 (No ratings yet)