

Bath installation
Particular attention during the repair in the apartment requires a bathroom. The choice of plumbing is now very large. Installing a bath is a rather complicated process, because the bath is a very large and heavy plumbing item, and it requires very careful handling. Installation depends on the material, shape, size and location in which it will be installed. High-quality installation requires certain skills. Cope alone is almost impossible. You will need a strong and skillful assistant. When installing this equipment, it is necessary to take into account the design features and the material from which it is made. How to do it right - we will tell you below.
to contents ↑Which bath to choose?
Before moving on to the question of how to properly install a bath in a bathroom, you need to figure out what types of them are and what you need to buy:
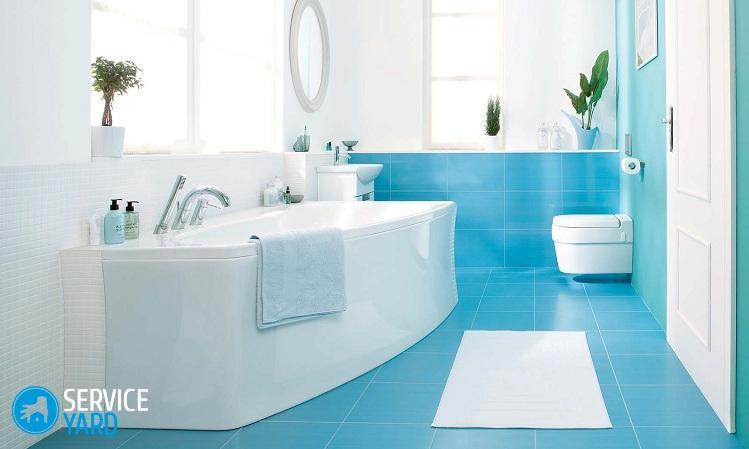
- Steel or tin is inexpensive, and men with certain skills of such work can even install it on their own. Suitable for small rooms and can be installed close to three walls. Such baths are short-lived. Heats up quickly, but also gives away heat quickly to space.
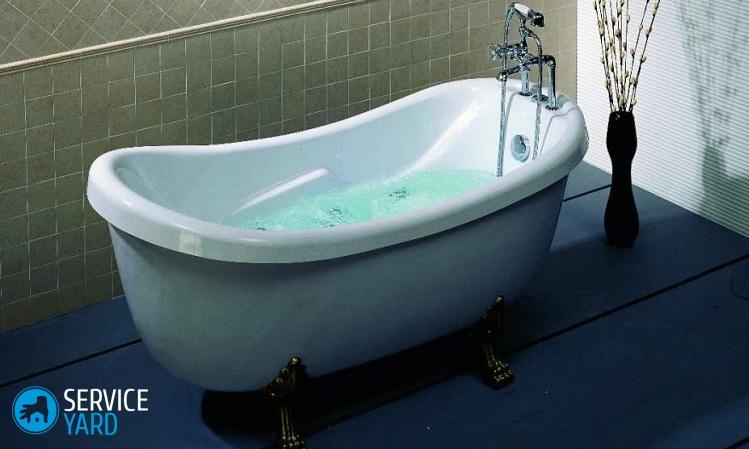
- Cast iron is expensive, but when handled properly it is eternal. Installing it is very difficult - it is heavy. The installation of such a bathtub on adjustable legs is best set only when installed on three walls. It warms up for a long time, but at the same time it keeps the water warm much longer.
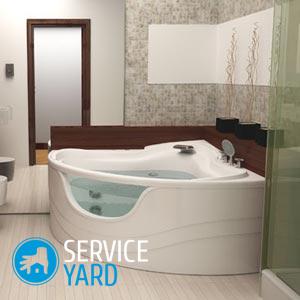
- Acrylic or plastic - cheaper than cast iron, but their price is also rather big. It will last 15-20 years. Installation is best done together. Such bathtubs are an excellent option: if the coating is damaged, then it is easier to restore than enamel. It warms up very quickly, the water in it cools much more slowly.
to contents ↑Important! Getting into the acrylic bathtubs with aggressive cleaning products is unacceptable.
Room preparation
Before proceeding with the installation of plumbing equipment, it is necessary to prepare the room. The quality of the preparatory work will be done, and the correct installation and functioning of the bath will depend.
Walls
If you are doing repairs in the bathroom, then first it is better to install a bath, and then go to the wall cladding. This is done to reduce the likelihood of mold and rot. How?
After mounting the bath to a bare wall, it is necessary to waterproof the cracks. Laying the tiles starts from the bottom of the bath, and the overhanging lower edge above the bath forms a teardrop - it also needs to be waterproofed after installation.
If you just change the old bath to a new one, then install at least 2 cm higher than before to hide the deposits and dirt that cannot be washed.
Floor
The floor under the bathroom should be very strong and even. If you install a cast-iron bath, then the tile should not be laid on the “comb”, but on solid cement with extrusion.
to contents ↑Selection of fittings for draining
When choosing drain valves, pay attention to such characteristics.
Material
Two types of plastic are mainly used - polypropylene and PVC.
Polypropylene is more expensive, but has advantages over vinyl fittings:
- Stronger several times. Less likely to damage the siphon during installation.
- Longer and more resistant to hostile environment.
- Less prone to clogging, because it is smoother.
- Hydraulic resistance is one and a half times lower.A polypropylene hose with the same cross-section passes more water through itself than PVC.
Drain
Do not buy bolt drain. Sooner or later, it will rust, and it will be almost impossible to disassemble the drain after a short time - you will have to break, buy and put in a new sink.
Drain mesh:
- The best option, but also expensive, is a grid of oblique profiled slots. In the bathtub with such a drain, you can wash carpets, calico, flannel and not worry that the drain will clog.
- A good option would be a grid of round holes arranged in a circle.
- A grid in the form of a cross - catches hair well, but pulling them out is very unpleasant and difficult.
Overflow pipe
Use a flexible corrugated hose - it has more clearance than a rigid pipe, and this indicates that the probability of overflow is less.
to contents ↑Bath installation
First you need to think about what you need to install a bath.
Necessary tools and materials:
- The rule.
- Fork key for tightening exhaust parts.
- Rubber mallet.
- Screwdriver.
- Silicone sealant.
- Insulating tape.
- Polyurethane foam.
Sewerage Preparation
The pipe inside and the sewer pipe must be dry so that the seal is reliable. For this, it is impossible that there is a drain from the kitchen.
Important! It is not necessary to clean off the plaque, but you need to carefully dry the pipe and the pipe about half a meter to the sides with an ordinary hair dryer.
Cast iron bathtub installation
The cast iron bath is stable due to its heavy weight. Installation of the bath can be done on legs without support. Upon completion of all preparatory work, transfer the bath to the installation site.
Important! Due to the heavy weight, it is impossible to do this yourself, find an assistant and protect places that may be damaged during the transfer of this equipment.
The process of installing the bath on the legs:
- Put the bath sideways on the floor - the drain should be directed to the place where the sewer will be connected in order to install the siphon conveniently.
- Fix the supports on the upper side.
- Turn the bath over onto the other side and install the supports in the same way.
- Gently place the bath on its feet.
- Using the adjusting bolts and level, set the bath so that a slight slope forms towards the drain side.
- Slide the bath against the wall.
- Cover the gap with foam.
- Attach the corrugated drain to the installed harness.
- Lock the connections using a special nut.
Important! When tightening the bolts on the supports, use moderate force so that the plastic base is not damaged.
- Check the quality of the work done. Close the drain and draw a full bath of water.
Important! Carefully inspect for leaks at the overflow installation site.
- Seal the gaps at the joints with silicone sealant.
- Make grounding - for this, attach a piece of wire to the bathtub body and bring the second edge to the metal structure nearby.
- Proceed to the finishing work.
Mounting a cast-iron bath on a brick
Metal legs deform over time, while brick supports will last for decades.
It is recommended for installation to first screw the legs, and then install the entire structure on a brick base in which holes for the legs are made.
Important! You can use two brick foundations, but, given the large weight, it is better to make a large support.
Sequencing:
- Mark the floor according to the configuration and size of the bath.
- After laying in two bricks, add half a brick on each side, forming a recess for the bottom. Let dry for a day.
Important! The height of the brick base for the front should be 17 cm, and for the back - 19 cm.
- Apply a layer of mounting foam to the brick support and install a bathtub on it. This procedure will securely fasten the support to the device.
Important! Cover the sides and bottom of the bathtub with foam - this will enhance its heat and sound insulation.
- After mounting on the foam, connect the sewer.
- Close the drain and draw water to the middle of the bath so that the foam sags correctly correctly.
Important! Do not forget that there should be a slight bias towards the drain.
- Open the drain, check how quickly the water leaves. The bath is right if this process is fast.
- Seal all joints with silicone sealant.
Steel bath installation
It is much easier to enter and turn over the steel structure than cast iron. You can do it yourself.
Installation of the bath is as follows:
- Put the bath upside down.
- Try on the supports to the installation sites. The first pair of supports is two centimeters from the outlet, and the second is the closest to the opposite edge on a flat platform of the bottom.
- Unscrew the supporting channel so that the supports to the bottom fit snugly.
- Degrease the joints with acetone or alcohol.
- Put the supports in the right places and press firmly.
Important! Warm the pad with a hair dryer before this procedure.
- Screw the tips to the supports using the fixing nuts.
- Put the bath on its feet in the right place.
- Use the bolts to adjust the position of the bath.
- Connect the sewer and faucet. Seal all joints.
- Fix with the help of four narrow wedges driven between the walls and the ends of the bath the correct position of the bath.
- Paste over the edges of the bathtub with masking tape, fill the slots with mounting foam.
- Remove wedges, excess foam and tape after drying.
- On the fourth side, make a brick supporting wall.
Important! The bathtub strengthened by means of a brick support will be reliable and will serve for a long time.
- Install a decorative screen or tile a brick support.
Important! To keep the bath longer warm and reduce the noise of pouring water, treat the outside of the bottom and sides with mounting foam.
Installation of an acrylic bath
One of the advantages of acrylic bathtubs is low weight. Installation of the bath is easily done independently.
Procedure:
- Mark the guide rail mountings according to the instructions.
- Attach to the bottom of the product guides (tool holders) for the legs across the bottom with the help of special screws that come with the kit.
Important! Mark in the places for drilling and drill holes for tool holders, perpendicular to the longitudinal axis of the whole structure.
- Turn the bath over on its side, attach the drain fittings. Pre-grease all gaskets with silicone. The drain gasket must be installed externally. The gasket between the overflow hose and overflow in the section is wedge-shaped, it must be put to the edge of the hose with a point.
Important! Do not over tighten threaded connections.
- Turn the bath upside down, attach the legs.
- Place the bath in the space provided for it, and slide it tightly against the walls.
- Level the bath and seal the outlet.
- Tighten the joints with a fork wrench until the sealant hardens.
- Check for leaks after the sealant has hardened.
- If everything is fine, seal all gaps between the walls and sides of the bathtub with silicone glue.
- Install a decorative screen.

Installing an acrylic bathtub on a frame
The easiest option is to install an acrylic bathtub on the frame.
Step-by-step instruction:
- Prepare the walls, floor and necessary tools and materials.
- Attach a flexible pipe to the sewer outlet, a siphon to it, treat the joints with sealant. Let dry for at least 4 hours.
- Mount the frame. To begin with, the guide is installed on the wall, aligned in level, then - side, then vertical racks from the floor are attached to them. Use bolts or welding to connect.
- Measure the level of corners, fix with angular metal strips.
Important! If the frame is not level, raise the angle that is lowered.
- Install a bathtub in the frame and attach the overflow from the siphon and exit to the sewer.
- Check for leaks.
- Close the gaps between the walls and the side rails with the baseboard.
- Close the wireframe screen.
Stock footage
To properly install the bath, regardless of the chosen method, materials, type of construction, the main factor is reliable support and the correct slope of the entire structure. The literacy of connecting all communications and sealing at the joints will be important. If you adhere to these principles, independent installation of the bath will not be difficult for you.
- How to choose a vacuum cleaner taking into account the characteristics of the house and coatings?
- What to look for when choosing a water delivery
- How to quickly create comfort at home - tips for housewives
- How to choose the perfect TV - useful tips
- What to look for when choosing blinds
- What should be running shoes?
- What useful things can you buy in a hardware store
- Iphone 11 pro max review
- Than iPhone is better than Android smartphones
 (No ratings yet)