

DIY plastic windows installation

So, you planned to replace the old window structures with new ones, and you are interested in the question: is it possible to install plastic windows with your own hands? According to professionals, this work can be attributed to the medium category of complexity. With the ability to handle the tool and the presence of this tool, the duration of the work is 3.5-4 hours, given the dismantling of the old window. The fact that the master will do the job better is a myth. The vast majority of professionals prefer not to waste time on trifles, and then flaws pop up one by one. Therefore - to work!
to contents ↑Design features
To successfully complete the installation of a PVC window with your own hands, you need to know what structure this structure has. For the manufacture of plastic window structures used polyvinyl chloride - PVC. Frames are made of multi-chamber profile. They are divided into cameras - separate cells. The more of these cells, the better the thermal insulation properties of the window.
The insert in the middle of the structure is a reinforcing element designed to give the window the necessary stiffness and strength. The insert can be plastic or metal (most often, aluminum).
Profiles of plastic windows are divided into 3 categories:
- Economy
- Standard.
- Premium
The best choice in terms of the relationship between quality and value is the standard class. The economy class is distinguished by too thin partitions. Such windows freeze almost immediately after installation. Premium class - pathos, expensive windows. But here the price increase is mainly due to additional functionality that not everyone needs.
Important! The choice of the company, as practice shows, is not fundamental. It is only important that these are well-known brands. This is a guarantee that products are manufactured using certified equipment. Windows from reputable companies are standardized without exception.
The profile color is usually white, but painted options are also possible. However, the cost of a painted profile is much higher than white.
The components of the window structure:
- The frame is what forms the basis of the window.
- Impost - a vertical component that divides the window into parts. If the window consists of 2 parts, it has 1 impost. If there are 3 parts, then the impost will be 2.
- Parts of a window are called differently. The fixed part is called “capercaillie”, which opens - the sash.
- Double-glazed window - a construction of glass, which is used in plastic windows. A double-glazed window is a design of 2 or more glasses hermetically connected to each other. Double-glazed windows with energy-efficient and tinted windows are popular. Helps to deal with heat loss and inert gas, which is pumped between the glasses.
- Lock fittings. Installed on window sashes. Designed for opening and closing the window. The locking hardware provides the installation of the window sash in different positions (ventilation, opening, closing, micro-ventilation). Rubber seals. Available on sashes, frames and imposts. Give the construction additional tightness.
- At the bottom of the frame there are drainage holes designed to drain condensate into the street. The reason for the formation of condensation on the windows is the temperature difference in the room and on the street.
In addition, the window is equipped with a tide and an internal window sill. On top and sides at the end of the installation, the slopes are cut.
to contents ↑Measurement Production
When ordering a window construction, you need to provide 6 measurement results:
- Width, height of the window.
- The length, width of the slope and window sill.
Window opening - quarter or not?
Fourth is a window opening when the outside of the window is narrower. Measurements are taken in a bottleneck, at several points (the geometry of window openings is rarely impeccable). From the measurements taken, select the smallest and add 30 mm. The height of the opening is measured as is.
In the case of an even opening, the measurement is done in a slightly different way:
- Measure the width and height.
- Subtract 30 mm from the resulting value and 50 mm from the height. The resulting numbers will be the width and height of the window

Low tides and window sills
Take the window sill and low tide with a margin of 50-100 mm, since these parts are recessed into the walls during installation. If the width of the ebb tide is standard, then the width of the window sill is chosen at the request of the owner and according to his taste. Some people use the window sill as an additional countertop, while others prefer it to be almost flush with the wall. As they say, "they don’t argue about tastes."
to contents ↑Important! When ordering a window, do not forget to specify:
- how many parts it consists of;
- is there a capercaillie (if any, how exactly is it located);
- how many wings does the structure have, how do they open;
- type of fittings (for normal ventilation or micro-ventilation).
Preparatory work
Preparation for installing a plastic window with your own hands is the dismantling of the old. Breaking - not building, so this stage, as a rule, passes without problems. After the opening is cleared, carefully inspect it and remove anything that may fall off over time. Remove protruding parts - with a hammer or power tool. After all the planes are aligned, collect construction waste. Ideally, remove all debris thoroughly, including dust. Otherwise, the mounting foam will seize worse.
Important! Coat excessively large cavities with cement mortar. The smoother the window opening, the better the installation of the new product will go.
If the wall is formed by loose material, then it is desirable to treat it with a penetrating adhesive-primer.
to contents ↑Choosing an installation method
There are 2 options for installing window structures - with or without unpacking the window:
- Unpacking involves making through holes in the frame. Holes are used to drive anchors into the wall. This is a more laborious but very reliable method.
- Installation without unpacking is as follows. Metal plates are fixed to the frame from the outside. With their help, mount to the walls. Such a frame mount is fast enough, but it cannot be called reliable. The frame may not withstand strong wind loads - sag or deform.
Important! Installing a plastic window with your own hands without unpacking justifies itself in such cases:
- The window is small.
- The mounting plates are wide, thick and reliable.
- Significant wind loads are absent.
For apartments in multi-storey buildings (high floors), as well as with strong wind loads, only installation with unpacking is advisable.
to contents ↑DIY plastic windows installation
Consider both installation methods:
- Mounting on an anchor is advisable in panel or brick houses.
- Installation on plates is used mainly in houses made in accordance with the “layered” technology (insulation layer between two concrete layers).
Important! If the installation of the window falls on a soft layer, it is advisable to fix it on the plate.
How to install a plastic window with your own hands with unpacking?
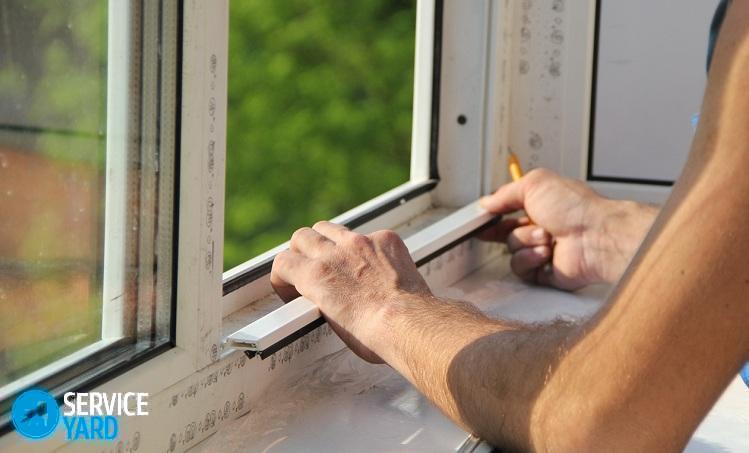
Installation work begins with measurement. Make sure the frame and window opening are compatible. The procedure is as follows:
- Remove the window sash.At the same time, the window is closed (the handle is pointing down). Remove the hinges of plastic on the hinges. Press the pin in the upper loop until it extends from the bottom. Grab it with side cutters or pliers and pull it out. Open the lock by placing the handle horizontally. Having rejected the sash slightly towards you, lift it and remove it from the lower pin. Sash removed.
- Remove a double-glazed window on a wood grouse. It is fixed on glazing beads. After the glazing beads are removed, the double-glazed window will be removed without problems. Remove glazing beads, starting from the long side, prying them with a spatula. Remove the double-glazed window carefully so that it does not fall out. Now, if necessary, you can do the installation of a double-glazed window with your own hands.
- Paste the freed frame around the outer contour with a special self-adhesive tape.
Important! Self-adhesive mounting is recommended by GOST. This is one of the measures for thermal insulation of a window.
- Remove the protective tape on which the logo of the manufacturer is applied. You do not need to leave her. Under the influence of sunlight, the tape fuses with the frame, and then it can be much more difficult to remove it.
- Insert the prepared frame into the window opening using the mounting wedges. Install wedges under the impost and in the corners. Expose other wedges in those places where it is necessary. Control the correct installation of the window using the building level.
- Make holes for the mounts. The distance from the top edge to the first hole is 150-180 mm. The distance from the bottom corner to the second hole is the same. Install an intermediate anchor between the two fixtures. The maximum permissible distance between adjacent fasteners is 700 mm. The algorithm is as follows: make a hole - check the position of the frame, hammer and tighten the anchor.
Important! Do not overtighten the anchor to avoid deformation of the frame.
- Establish external ebbs. First attach a waterproofing adhesive material to the outside of the frame. From the sides of the window opening, arrange small strobes to establish the edges of the tides. Apply construction foam to the part of the opening where the tide will rest on the wall. Bring the tide under the ledge of the frame and secure with screws. Apply foam along the lower edge of the tide.
- Close up construction window foam with construction foam. On the perimeter of the frame, attach a heat-insulating film in accordance with GOST. Fill the gaps with foam.
Important! If the gaps are large, apply the foam in several steps.
- Gather all the details of the window. Do-it-yourself installation of double-glazed windows will not cause difficulties. Now there are finishing works, but they can be done when the window is fully assembled.
- Mount a vapor barrier under the windowsill. The window sill rests on wooden support blocks. The interval between the pads is 400-500 mm. Make the windowsill about 5 degrees tilted toward the room.
Features of installation without unpacking:
- Installation begins with the installation of mounting plates. There are U-shaped plates and linear ones. It is important that the metal is sufficiently strong and thick.
- The distance between the mounting plates is the same as between the anchors.
- The plates are screwed to the profile for self-tapping screws. further window installation technology is the same, only anchors are not used, but dowel nails.
Stock footage
How to install plastic windows - you know. Now is the time to put knowledge into practice!
- How to choose a vacuum cleaner taking into account the characteristics of the house and coatings?
- What to look for when choosing a water delivery
- How to quickly create comfort at home - tips for housewives
- How to choose the perfect TV - useful tips
- What to look for when choosing blinds
- What should be running shoes?
- What useful things can you buy in a hardware store
- Iphone 11 pro max review
- Than iPhone is better than Android smartphones
 (No ratings yet)