

DIY solar water heater

The sun is a powerful and endless source of all thermal energy for our planet. Based on the fact that solar thermal energy is provided to us absolutely free of charge, the idea arose to use it for the benefit of man. Unfortunately, devices that convert solar radiation to heat are very expensive, so few people have the opportunity to purchase them. Nevertheless, if you want to make a solar water heater with your own hands, absolutely anyone can. In this article we will tell you how to make such a device at home, and also reveal all the subtleties and nuances associated with this process.
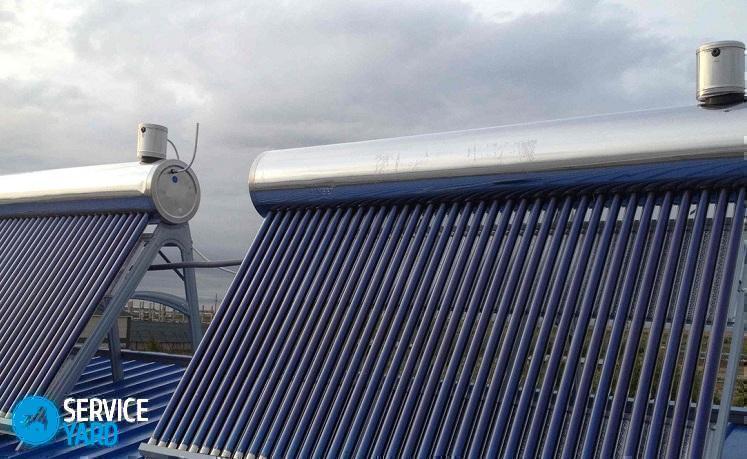
to contents ↑How is a solar water heater arranged?
Before you begin the process of manufacturing a solar water heater, it is very important to know its basic configuration. Most standard models consist of the following elements:
- Collector. These are the main parts, which are a network of hoses or tubes.
Important! Due to the fact that the diameter of the tubes is small, the water that is in them has time to fully warm up.
- Pressure-generating equipment. Most often, a pump is used for these purposes. Some models generally use natural convection or gravity, while doing so without a pump.
- Pipeline elements. Their quantity and availability completely depends on the model you have chosen.
- Tank, if provided by design.
to contents ↑Important! To increase the efficiency of the entire device, most often specialists use the following techniques:
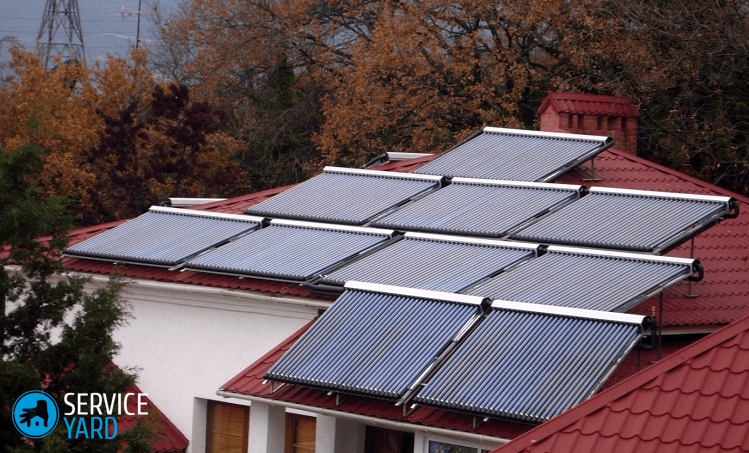
- The collector is tilted at an angle. This is done in order to get the greatest amount of sunlight.
- Directly beneath the collector is black or dark material. This is necessary so that it attracts more heat and additionally warms water from below.
- The collector is covered with film or glass. This creates a greenhouse effect, which further increases the rate of heating water.
Types of Solar Water Heaters
Depending on the pressure of the water, solar water heaters can be divided into:
- Passive. In passive devices, water flows solely under the influence of gravity, or circulates due to convection. As a rule, the pressure in this case is small. Such devices are made quickly, and the budget spent on them is small. Accordingly - the return on these water heaters also wants to be the best.
- Active. Active solar water heaters are equipped with a pump, controllers and valves. They can be either open or closed loop.
In addition to the above characteristics, during the manufacture of a solar water heater with your own hands, the construction of diagrams and drawings, special attention should be paid to the main parameter, according to which these devices are classified. They are accumulative or flow type.
Accumulative type water heaters
In this case, the sun heats the water that is in a special tank, and after heating to the required temperature, the consumer immediately receives a large volume of water. The most commonplace example of such a water heater is a tank, which is mounted above a summer shower.
Its capacity can be arbitrary, and the walls on the outside are painted black.Below, a hole is made with a nozzle in the form of a spray for the shower.
Important! Instead of a plastic barrel, you can use a container or a welded metal cube.
Flow type
The essence of such a water heater is that the water flows down through a system of long hoses or tubes, passing through which it manages to warm up. For the independent manufacture of such devices, you can use the most simple and improvised materials, for example, roofing material, polystyrene or used plastic bottles.
to contents ↑How to make a solar water heater at home?
We bring to your attention detailed instructions for making a solar boiler with your own hands. The process is quite laborious, but the result is worth it.
First you need to prepare the necessary materials and tools for the job. You will need:
- Glass 3-4 mm thick;
- Wooden slats 20x30 millimeters;
Important! Pay attention to the fact that the wooden slats should already be with the selected quarter to build the frame.
- A beam measuring 50x50 millimeters;
- Boards 20 mm thick and 150 wide;
- Tin strip or pipe fittings;
- OSB sheet or plywood 10 mm thick;
- Metal corners;
- Furniture hinges;
- Tin strip or pipe fittings;
- Insulation with a metallized coating;
- Galvanized sheet;
- Mineral wool;
- Metal and copper pipes with a diameter of 10-15 millimeters and 50 millimeters.
Important! You can also use plastic pipes with a diameter of 20-25 millimeters.
- Connecting collars and couplings;
- Sealant;
- Black paint;
- Rubber seal for doors and windows;
- Aquamarkers;
- A plastic barrel or a metal tank with a volume of 200-250 liters.
Once everything necessary for the work has been prepared, you can proceed directly to the manufacture of a solar water heater. The process itself is divided into four stages, which we will discuss in more detail below.
Stage 1. Production of the box
At the beginning of the whole process, you need to make a casing for the future water heater. This should be done based on the following sequence of actions:
- From the cooked boards, collect the box of the size you need.
- Sew the bottom of the case with a sheet of plywood or OSB.
Important! For a more reliable fixation, the bottom of the casing should be pre-coated with silicone sealant.
- At the end of the assembly of the box, seal all joints and cracks.
- Cover the inside of the case with a heat reflector. This way you will avoid heat loss.
- Coat all surfaces with a layer of mineral wool.
- Cover the finished insulation layer on top with tin sheets and treat all the cracks with sealant.
- Treat the inner surface of the casing with black paint.
- Install the glazing frame from the wooden frames. To do this, cut the slats in the dimensions you need and connect them using metal corners for these purposes.
- Install glass on both sides of the frame, after having pretreated one fourth of the rails with a liquid-sealing material.
- Attach the frame to the base of the cabinet with furniture hinges.
- Glue the strips of rubber sealant to the ends of the case.
- Prime and paint all exterior surfaces of the heater body.
That's all, the assembly of the case is completed. Now you can safely proceed to the next stage.
Stage 2. Production of a radiator
You can make a radiator for a solar water heater, observing the following course of action:
- Prepare two pieces of pipe with a diameter of 20-25 millimeters and the length you need.
- In a large diameter pipe, drill holes with a distance of about 10 centimeters from each other.
- Insert the pieces of previously prepared pipes into the holes so that the ends extend 5 mm from the back.
- Brew or solder joints.
- Diagonally to the ends of pipes with a diameter of 50 millimeters, weld threaded bends for external connections. The remaining ends must be drowned out.
- Paint the radiator with black heat-resistant paint in several layers.
Important! Pay attention to the fact that for the manufacture of a radiator it is best to use copper pipes, since they have high thermal conductivity. Their disadvantage lies only in the complexity of installation. Also for these purposes, you can use polypropylene pipes, which are soldered in a special way.
Stage 3. Collector Installation
Immediately before mounting the radiator in the box, first you need to outline the places in its walls through which the bends will pass to connect the water supply and intake pipes. After that:
- Holes of the required diameter are drilled through these marks.
- Next, install the radiator in the housing close to the bottom and fix it along the entire length of each element. This should be done in 4-5 places with the help of strips of tin or other fasteners intended for these purposes.
- Now the collector body is covered with a frame and rigidly fixed with screws or angles.
- Further, all cracks are sealed.
Important! The solar collector must be installed at an angle of 45 degrees to the vertical on the sunny side.
The final stage. Arrangement and connection of a solar water heater:
- Insert threaded bends into the container that you intend to use as a heat accumulator. One point must be made at the bottom of the tank for supplying cold water, and the second should be arranged at the top for heated liquid.
- After - the container must be insulated using mineral or stone wool for this purpose, as well as other heat-insulating material.
Important! In order to make the insulation of the tank more convenient, it is better to put it in a box of a suitable size.
- An aquacamera complete with a float valve is mounted 0.5-0.8 meters above the tank in order to constantly create a constant small pressure in the system. In addition, half of one pipe should be used to mount the pressure pipe from the water supply to the aquacamera.
- After the tank is completely filled, water will pour from the drainage hole of the aquacamera. Then you can turn on the water supply from the water supply and fill the tank.
That's all, your solar water heater is ready!
to contents ↑Important! Installing the tank at a height will provide good hot water pressure.
Stock footage
Despite the complexity of the process, the independent manufacture of a solar water heater is worth the effort and money invested in this enterprise. We hope that our article will help you in your endeavors, and the finished result will exceed all your expectations.
- How to choose a vacuum cleaner taking into account the characteristics of the house and coatings?
- What to look for when choosing a water delivery
- How to quickly create comfort at home - tips for housewives
- How to choose the perfect TV - useful tips
- What to look for when choosing blinds
- What should be running shoes?
- What useful things can you buy in a hardware store
- Iphone 11 pro max review
- Than iPhone is better than Android smartphones
 (No ratings yet)