

Installing a sink in the bathroom

During repair work in the bathroom, the need to replace plumbing equipment arises quite often. There are situations when it is better to entrust the installation of a bathtub, toilet bowl or washbasin to professionals. But in most cases, the owner, who knows how to handle tools, can cope with a similar task himself. Installing a sink in the bathroom - what are the features? Read about it in our article.
to contents ↑What are washbasins?
Construction stores offer customers a variety of different models of washbasins. They differ in a number of characteristics:
- material
- size;
- form;
- design
- installation method.
Materials
Before you install a sink in the bathroom, you need to decide what exactly you want to put. Washbasins are:
- metal:
- earthenware;
- porcelain;
- stone;
- glass;
- plastic;
- ceramic.
Important! Knowing the characteristics of the material is important so as not to damage the sink during installation. If it is rather difficult to crush or break a steel sink, as well as granite, then porcelain, earthenware, ceramics, and even more so plastic, require careful handling.
Dimensions, shape, design
The choice of washbasin depends on the size of the room, the style that you have chosen, as well as your financial capabilities. Sinks are:
- rectangular:
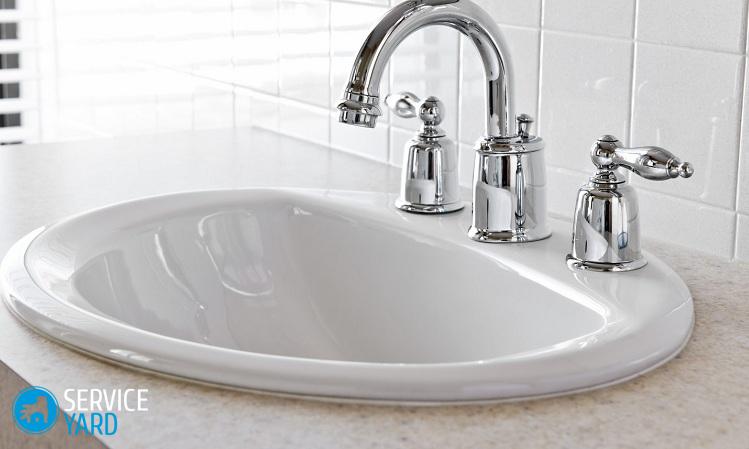
- oval;
- round;
- in the form of a trapezoid with beveled corners.
to contents ↑Important! On sale you can find other options, and the most unexpected form. But still, the most popular are oval, round and trapezoidal. Rectangular and square are often placed in kitchens.
Mounting method
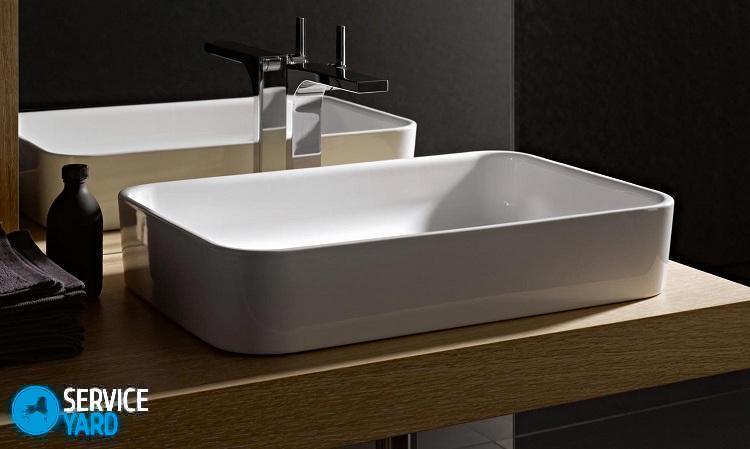
The installation of the sink in the bathroom is very little dependent on color, shape and size. The most important thing is the mounting method. Washbasins are:
- outboard;
- recessed;
- semi-recessed;
- waybills;
- on the leg.
Outboard
The hanging sink is fixed to the wall in two ways:
- on the bracket;
- on stilettos.
Important! The option depends on the size and weight. A small light washbasin can be mounted on studs; for large and heavy, it is better to use brackets.
On the tables and countertops
Built-in and semi-built-in crashed onto a countertop or pedestal. The difference between them is that the first fits exactly into the surface of the support, and the individual parts of the second protrude beyond the edges.
For the overhead sink, support is also needed, only the sink does not crash, but is placed on top. As for the now popular “tulips”, they usually have two supports - a leg and a wall.
to contents ↑Important! Sometimes there are models that rely only on the leg. In fact, such models can also be considered semi-integrated to some extent - they simply have very narrow supports.
What are you up to?
Installing a washbasin is not always difficult, but responsible and requires accuracy, as well as careful adherence to the technology. Otherwise, troubles may arise, and a constant puddle on the floor is the least that can happen.
The whole process can be divided into several stages:
- Dismantling of old equipment.
- Wall marking.
- Actually installation.
Cooking Tools
Installing a washbasin in the bathroom will be much faster and easier if everything is prepared in advance.You will need some tools and fasteners:
- hammer drill or hammer drill;
- concrete drills;
- a set of screwdrivers (or a screwdriver);
- spanners;
- gas key;
- dowel screws;
- sealant (usually silicone is used);
- windings;
- building level;
- marker;
- long ruler or tape measure.
Equipment dismantling
The first thing, of course, is to turn off the water. It is great if this can be done in an apartment - in the vast majority of cases it is possible.
Important! In some very old houses you have to turn off the entire riser, and then it is better to call the plumbing.
The equipment is removed in the following order:
- The mortise mixer should be removed by unscrewing the fastening nut.
- Disconnect the mixer from the water supply.
- Remove the sink.
- Remove the siphon by first unscrewing the nut from the back of the sink, with which the siphon is attached to the drain.
- If you want to replace the siphon, the old one must be disconnected from the pipe, and plug the holes for the duration of the work so that the smell of sewage does not enter the apartment.
- Remove the brackets or stand.
to contents ↑Important! Eyeliner tubes are best placed in a basin or in a bucket - there could be water left.
Determine the height
How to install a washbasin depends entirely on how many and what supports it will be necessary to mount. Begin by determining the height. The standard distance from the floor is 85 cm. However, there are exceptions if the growth of the adult inhabitants of the apartment is very different from the average. Plus or minus 5 cm in one direction or another are quite acceptable.
to contents ↑Installation of a hanging sink
To install a hanging sink, you need to determine the place where it will be. It is not difficult to do this, since installation is the final process when sewer pipes are already connected. The sink drain must be strictly above the sewer outlet.
Place a dot on the floor below the connection point with a marker:
- From this point, draw a vertical line on the wall at right angles to the floor.
- Mark the height of the sink on this line, put another mark.
- Using the building level, draw a horizontal line through this mark, strictly parallel to the floor - the upper edge of the washbasin will be at that height.
- Attach the sink to the wall so that the edge aligns with the line.
- Mark the holes for the fasteners.
- Drill holes.
- Drive in the dowels.
- Insert the studs.
- Put down the sink.
- Lock the fasteners.
- Mount the mixer.
- Connect the sink to the sewer.
Important! If the sink is heavy, it is better to place it on brackets that are attached to the equipment on one side and to the wall on the other. Such fastening is more reliable, but the procedure will be almost the same as with the studs.
Mixer installation
If you do not change the faucet, but simply removed it so as not to interfere, there is no problem - it is mounted on the old place in the reverse order to the one in which you removed it.
Important! When dismantling, it is best to sketch or photograph each step.
If you haven’t done this, or if you change the built-in faucet with the sink, it’s best to act like this:
- Insert the mounting studs into the mixer.
- Insert hoses for cold and hot water.
- Pass the hoses into the hole in the sink.
- Lock them on the back - to do this, find the pressure washer with a sealing cover.
- Screw the hoses to the supply pipes.
- Check how tight the connection is.
Connection to the sewerage
Fixing the sink on the wall is not all. It must be connected to the water supply and sewerage. To connect the equipment to the sewer pipes, you need a bolt - usually it is included:
- Attach a grill to the top of the drain hole.
- Align the bottom of the hole with the drain pipe.
- Secure the entire structure with a bolt.
- Connect the hose from the siphon or corrugation to the sewer.
- Remember to check for leaks.
We put a tulip
How to install the sink in the bathroom if the equipment is placed on a vertical support? Such shells are called tulips. They are of two types - with fastening to the wall and without it.
Important! In the first case, the installation is very similar to the installation of attachments. However, there are differences. You don’t have to determine the height yourself, it is already set - the leg cannot be extended or cut, so you should think about the distance between the sink and the floor in advance.
We act:
- Define a place for support.
- Install and fix the leg as indicated in the instructions.
- Put the sink in the same way as the hanging.
And if you are considering how to put a sink in the bathroom without mounting it to the wall, it’s even easier - you won’t have to hammer the wall. But there is one feature. All pipes are inside the support, so you need to connect the elements very reliably and accurately.
to contents ↑Recessed or semi-recessed sink
Such designs are often installed in kitchens than in bathrooms. In fact, this is also a sink on the foot, only the support is wide and closes not only the siphon and sewer pipes, but also hides part of the space.
Important! As in the case of the tulip, you need to think about the height before starting the installation.
The designs of the cabinets and countertops are different, but in any case, the procedure will be the same as in the case of a tulip without fastening to the wall:
- Remove the mixer.
- Disconnect the siphon from the sink and drain or just the sink.
- Install the cabinet - as a rule, it opens the front door, so that you still have access to the pipes.
- If necessary, attach the cabinet to the wall (this is done with dowels).
- Insert the sink into the hole in the countertop or cabinet.
- Connect the siphon.
- Connect the mixer.
Overhead sink
It differs from other models in that the pipes in the bathroom are not hidden in the cabinet, but in the wall, and closed with a decorative panel. It is beautiful, fashionable, but almost always requires serious preparation - the transfer of sewage and water supply. Therefore, the installation is best entrusted to a professional plumber. In any case, it makes sense to consult with him - it is quite possible that you will have to do a special channel in the wall and carry out welding work.
to contents ↑The final stage
After the sink is installed and all connections are checked, it is necessary to check the tightness of the entire system. This is done simply:
- Close the drain hole with a plug.
- Pour a full sink of water - this will make it possible to check how secure the mounts are.
- Drain and see if it starts to trickle through the joints.
Stock footage
Now you know everything about how to install the sink in the bathroom, regardless of which model you prefer. We hope you managed to do the job well, and there are no complaints during the operation of the plumbing either from households or from neighbors.
- How to choose a vacuum cleaner taking into account the characteristics of the house and coatings?
- What to look for when choosing a water delivery
- How to quickly create comfort at home - tips for housewives
- How to choose the perfect TV - useful tips
- What to look for when choosing blinds
- What should be running shoes?
- What useful things can you buy in a hardware store
- Iphone 11 pro max review
- Than iPhone is better than Android smartphones
 (No ratings yet)