

DIY Pillow
It is difficult to meet at least one house in which there is no sewing kit with threads and needles. Unfortunately, these details are so small that they can easily be lost, but they are incredibly dangerous for the residents of the house and those around them. So that the needles are not lost, it is better to store them in a needle bed. You can buy such a device in the store, but it is better to make it yourself, so that it looks aesthetically pleasing and unusual. Do-it-yourself pillow for needles made with care cannot be compared to any store item. Master classes and useful tips presented in our article will turn the making of a needle bar into an interesting and fascinating activity.
to contents ↑Simple homemade needle beds
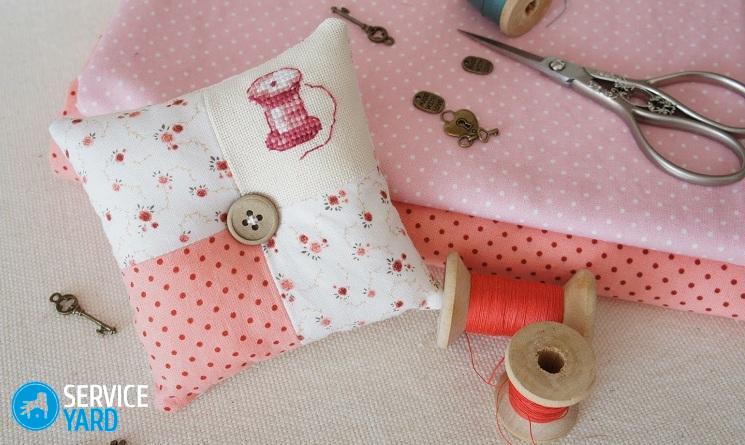
The simplest option can be called a needle-pillow, which you can sew on your own without special tools and patterns.
You will need:
- a small piece of fabric;
- cotton wool or synthetic winterizer as a filler;
- needle with thread.
Important! But even here you can show imagination, for example, decorating the product with beautiful braid, buttons or beads.
Here is the easiest way to sew a pillow for needles:
- Cut a circle out of cardboard to provide extra stability for the stand.
- Take the fabric a little larger than the cardboard circle, slightly pull along the edge of the circle with a simple seam.
- Place the synthetic winterizer in the fabric, on top lay a circle of cardboard.
- Using manual stitches, connect the parts to fix the product around the cardboard frame.
- Decorate the needle bar with braid, beads or beads.
Other ideas:
- A variation on this topic may be a product in the form of a flower or pumpkin. Only here the frame is no longer required. Just two round details of the same shape are sewn together, filled with a soft cloth and decorated with large stitches.
- Another convenient and interesting option is a needle bar with a tape for fixing on a hand. Use for its manufacture can tape with Velcro or a thick elastic band.
Important! In shape, such devices can also be different - square, round, in the form of handbags, butterflies, boots, or animals.
Next, we will consider more complex variations in the manufacture of structures for storing needles.
to contents ↑DIY needle-hat
Now you will learn how to make a very unusual outward needle box. In just 30 minutes you get a great tool for pins and needles.
It will take a few simple steps:
- Prepare a circle made of cardboard and a circle made of fabric two times larger in size to produce future hat fields.
- Gently fix the fabric on the cardboard blank, trying to make uniform folds.
- Cut a circle of fabric so that it matches the size of the cardboard pattern.
- Fill the fabric with a synthetic winterizer and sew.
- Join, stitch or glue the two parts together.
- Decorate the product with small flowers of beads, beads, ribbons or a beautiful bow.
to contents ↑Important! If you use a fabric of an unusual color, you get a real masterpiece that you will enjoy forever. Hats can be created aristocratic, delicate, athletic, modern. A lot of options.
Homemade needle needle from a can
Many needlewomen have already managed to take advantage of this master class, because it attracts attention by the fact that improvised tools are used to make the needle bed. It can be jars - it is important that they are small, whole, beautiful. But if such houses were not found, you can use ordinary jars of baby food or mustard. The main thing here is to skillfully decorate the product.
Important! Why are such devices considered convenient? The fact is that in addition to needles, you can store small beads or buttons in them. That is, at the same time the dual task is performed - external beauty and practicality.
Will be needed for work:
- jar with a lid;
- dense material for pillows;
- glue;
- synthetic fluff;
- decor elements in the form of paper flowers, linen ribbon, silk or lace;
- cardboard.
You must do the following:
- Wash the jar with the lid thoroughly, then dry.
- Prepare a needle pillow to decorate the cover with it.
- Cut out a material circle a circle twice the size of the diameter of the lid, as well as a circle of cardboard, corresponding to its diameter.
- Put a little fluff on a cardboard circle for a firm hold.
- Firmly tighten with stitches, fasten the fabric around the cardboard, maximally pressing down.
- Glue the finished pillow to the cover. It is better to clean it beforehand for a more snug fit.
- Use a ribbon or braid and glue to decorate the jar.
to contents ↑Important! So that you get the most functional pillow for needles with your own hands, do not glue the place where the jar is in contact with the lid while decorating it. It is quite beautiful to decorate the pillow with braid or an embroidered flap.
DIY felt needle cactus
In the field of needlework, felt and felt are a very popular material today. They are pleasant and soft to the touch; they are incredibly comfortable to sew; they look original and bright. Naturally, needle beds were no exception - products in the form of plants, animals and household items always cause emotion and a smile. Cacti are considered the most relevant models, because sewing needles replace real thorns in them.
Perform a few simple manipulations to get such a beautiful assistant in needlework in the form of a cactus:
- Cut out all the elements of the needle bar from felt.
- Make a pattern yourself or use the ready-made version by enlarging it and printing it on a printer.
- Leave seam allowances on the finished parts.
- Sew all the details, twist, fill with foam rubber, tissue residues or cotton.
- To get the whole product, connect all the elements.
- Decorate the cactus with felt bright flowers.
to contents ↑Important! It is incredibly convenient to work with felt, because it does not crumble, it does not need to be further processed on an overlock. It glues perfectly, bends, it has no front or back side. Crafts are a little fleecy, soft and pleasant. Due to this, felt needles stand out with a warm homely atmosphere, they allow you to create real comfort in the house.
Homemade needle book
Now we will consider how to make a pillow for felt needles in the shape of a booklet. Such devices are unusual and roomy enough. The main thing here is to think over what frame to make of and with what elements to decorate the product. The needle bed can be solid, halved, sewn on a sewing machine or manually.
The main condition is the presence of soft felt in the middle of the book, because it is needed for fixing needles.
Important! Such books are popular today, externally decorated with embroidery. The drawing, as a rule, is selected compact, small, ornamented. These are mainly floral and plant motifs.
Here are some helpful tips for designing such a product:
- The product is often connected with a silk ribbon, and from the inside the felt is sewn or glued.
- The title page can be decorated with such decorative elements as miniature scissors, pins or coils, which are sold in needlework stores. With the help of such ideas, you can refresh the craft, give it a touch of personality.
- If desired, the clasp can be made in the form of buttons or loops. Pages in such a book can be as much as you want.
to contents ↑Important! It is convenient to take such a needle bed with you on the road or even give her daughter lessons in labor. Needles are safely hidden inside the product, and this is its main advantage, because almost all other models are made in the clear.
DIY mannequin needle needle
The most difficult, but attractive option is the dummy in the form of a mannequin. Such figures are made in a vintage, romantic style, so they look delightful and elegant.
In this section, we will tell you how to make a pillow for needles with your own hands in this style:
- Such crafts are made on the bandwagon or in full silhouette, using a large number of additional accessories. Such a product is guaranteed to decorate your interior.
- Of the materials you need velvet, silk, cotton, velveteen, tulle, flannel and stylized accessories.
Sew such a wonderful needle bed by following these instructions:
- First, make a pattern of the future product on paper.
- Cut out the halves of the fabric parts from the pattern.
- On the wrong side, grind the details, leaving about a third of the pattern unwired.
- Turn the product on the front side, fill it with a padding polyester, carefully sew the rest of the craft with a hidden seam. At this stage, you can slightly adjust the silhouette of the mannequin.
- Fill the needle bar tightly with a padding polyester to give it the desired shape.
- Make a bottom out of cardboard, cover it with a cloth and attach to the product.
- Decorate the mannequin with laces, beads, tulle, beads, or a homemade hat.
- If your dummy will be mounted on a rack, then you will need gypsum and a wooden skewer. Or you can buy a finished workpiece in the store.
Stock footage
You see how easy and simple it is to sew a pillow for needles, the main thing is to choose a suitable model, material and not give up, even if something does not work out right away. If you have little experience in needlework, then you can try to tie a needle bar, and you will get a wonderful turtle, snail or chicken.
- How to choose a vacuum cleaner taking into account the characteristics of the house and coatings?
- What to look for when choosing a water delivery
- How to quickly create comfort at home - tips for housewives
- How to choose the perfect TV - useful tips
- What to look for when choosing blinds
- What should be running shoes?
- What useful things can you buy in a hardware store
- Iphone 11 pro max review
- Than iPhone is better than Android smartphones
 (No ratings yet)