

DIY fireplace

What makes a home cozy? - First of all, its residents. From the way all family members are used to behaving, in what perspective they build their relationships, the atmosphere will also change. Secondly, it is the repair and decoration of rooms. You must admit that well-executed room decoration and thoughtful furniture can provide appropriate comfort, and vice versa - careless attitude to all components of the interior will distort and alienate guests even from the most spacious, but tasteless home. And of course, a fireplace. Its soft glow gives a special flavor to the entire arrangement of the living room or bedroom, where most often it is planned to install it. We will figure out how to make the house brighter and brighter by creating a small fireplace with your own hands.
to contents ↑Kinds
Of course, a large fireplace looks very impressive, but often the size of the room does not allow it to accommodate. Do not despair, because the mini version is also very elegant and brings an atmosphere of warmth and comfort to any home.
Important! The difference between large and small versions of fireplaces is not only in size, but also in structure.
We will deal with models of mini-fireplaces.
Steel
There is always an option to purchase a ready-made cast-iron version or a steel fireplace. These are compact models that can be installed even on the second floor of a private house, if a chimney is foreseen in advance. Often these products have unusual shapes, and you can decorate them with molded elements and a glass door, which also performs a protective function.
Also today, among such models, you can find small cooking units, similar in size to a stove that easily copes with cooking, helps to warm the room and fascinates with its flame.
Important! The only drawback of such models is their greater weight compared to other versions of small fireplaces.
Electric fireplace
A mini fireplace can be with a real flame, or it can be electric.
Modern electric fireplaces are safe, and thanks to the latest technology, it is very difficult to distinguish the imitation of combustion from real fire.
Bio fireplace
There is another interesting option - a bio-fireplace. This is a small device powered by biofuels. Perhaps this is the most environmentally friendly type of fireplaces today. It does not smoke the room, has absolutely no smell, and does not harm the decoration of the room.
Important! The appearance of such devices will appeal to everyone who loves unusual geometric shapes, and their compact size allows you to install them in any room: bedroom, living room and even in the kitchen.
Decorative option
If you do not have the opportunity to make a real furnace, you can create an artificial version of it. To do this, you need a cardboard box, glue, cutter and a little imagination.
Classic
You can assemble a fireplace in the classic version: from stone, and make the same natural cladding or decor from metal. In this case, a small version of the fireplace will be very similar to a large one.
Such mini-versions are a bit simpler than their big brothers, and their design is similar to a stove.
Main elements:
- camera;
- an ashpit;
- chimney.
Typically, this scheme of mini-fireplaces is limited. In large versions, there are additional blind cameras, a filter system and other devices.
to contents ↑Important! The mini-fireplace, like a large one, warms well and gives room for its decor. A brick mini-fireplace is an ageless classic. The shape, size and decor of such a hearth depend only on your choice.And you can create such a furnace yourself.
How to place a fireplace?
Before you take on a small fireplace with your own hands, you should understand where you can place it. In any room, it is important that all elements are not cluttered, but make the space more integral. So, consider the basic placement tips.
Recommendations:
- If there is very little room in the room, pay attention to the corner models - they save space perfectly.
- Do not place the fireplace near the bed, as strong heat will interfere with healthy sleep.
- Also, do not place fireplaces next to work areas - the heat from them relaxes, and does not set up for the work process.
- A great option would be to place a fireplace in the hall.
- Do not place a fireplace in rooms where children often play or sleep. It is not safe.
When the choice of place is made, you can begin construction.
to contents ↑We build a fireplace
Do-it-yourself small-size fireplace stoves are much easier to build large ones. It will take him less time, effort and money, and if a mistake was made during the construction of the furnace, it will be much easier to remake it. Let's talk more about the construction of a brick oven.
Determine the size
First you need to find out the necessary dimensions. The size of the firebox can be easily calculated if you know the area of the room. To do this, the total area must be divided by 50.
If the size of the room is from 15 to 25 squares, and the height is no more than 3 meters, it is good to keep the temperature in the room will be a firebox 60 cm wide and 50 cm high. At the same time, the back of it will be 30 cm high and 40 cm wide. For a fireplace of this size, you need from 180 to 200 bricks.
Important! But these are approximate calculations. On site, check all dimensions with a tape measure and calculate the exact values for your future product.
Next, you need to prepare materials and tools.
Training
For construction you will need:
- Furnace and refractory bricks - when ordering them, be sure to add about 10 percent for broken bricks.
- The sand is coarse-grained - before use, it must be sieved to prevent small debris from entering.
- Clay - choose blue clay to create a good fireplace.
- Crushed stone - about two or three buckets.
- Level and ruler.
- Armature with a diameter of 10 mm and a total length of about 10 meters.
- Water.
- Cement.
- Tanks for mixing.
- The mixer is construction.
A ready-made drawing of the future fireplace is also needed.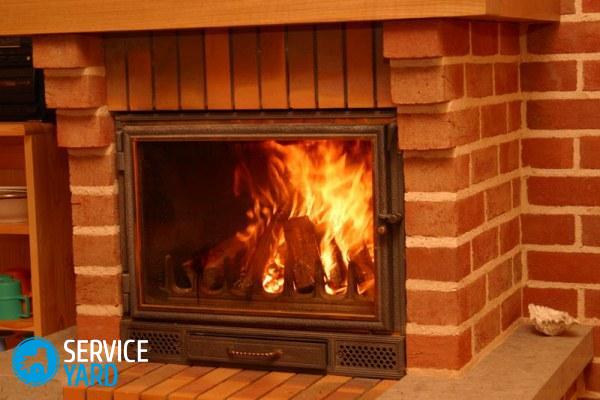
Drawing
How well the work will be done depends on the quality of the drawing. The drawing must indicate:
- Location
- The size of the fireplace and chimney in meters and bricks.
- Laying scheme.
- Dimensions of parts.
Important! It is best to make a drawing in different planes, or draw up a three-dimensional model in accordance with the dimensions of the brick and room.
After preparing the materials and the drawing, you can begin work on the construction of the fireplace.
Preparing the foundation
Do it yourself with a foundation to start building a small fireplace with your own hands. The role of the foundation is to protect the floor from damage. If we talk about the fireplace in the room, then:
- The foundation will be one layer of refractory bricks, refractory tiles or other material with high fire protection.
- The foundation should be laid so that it protrudes on the выступ part from the fireplace itself.
After laying, you can proceed to the back wall.
Back wall
The rear wall of the firebox is laid in two layers: from the bottom to the beginning of the chimney. Refractory bricks are placed inside, and the usual one outside.
Important! Masonry should be done on wetted material, otherwise it will dry out and may fall apart very quickly.
The standard size of the wall is 40 cm, after which the masonry is made at an angle of 20 degrees, which allows you to raise it after another 20 cm. This part is called the “smoke tooth”. After its assembly, the entrance to the chimney begins, where the masonry ends.
The rest is laid out in accordance with the developed drawing.
Important! Do not forget about the place for the ash pan, the combustion chamber and the blower.
Let's take a closer look at an example.
Example
If we talk about the ranks, the scheme can be built as follows:
- Continuous rows: first and second.
- Rows forming an ashpit: third and fourth.
- The third row also includes the installation of a support for the door.
- Fifth row - installation of the grille.
- Sixth row - installation of the furnace door.
- After masonry continue according to the drawing.
- Row 12 - installation of the cooking chamber.
- Row 19 - Insert into the chimney.
- End of masonry: 30 row.
Important! The initial rows are laid on a mixture of clay and cement. The higher the rows, the lower the clay content should be in the strengthening solution.
After - install the chimney according to the drawing. Already on the street part of the chimney, you can use not only brick, but also pipes. After laying out the chimney, a visor is installed on it.
Stitching
After laying it is necessary to grout the fireplace joints with sand and wet clay. Be sure to carry out the work carefully, wash the clay that has fallen on the brick.
After that, you can proceed to the installation of equipment.
Mounting
In order for the fireplace to work, you need equipment. Its a little, but all the components are very important.
Fireplace insert
You can buy a ready-made version or make a fire chamber with your own hands. This is one of the most important elements of the fireplace, so experts recommend not saving and putting a good store option.
Connecting pipe
This part is used to connect the chimney and the furnace. During installation, the pipe is sealed with refractory materials.
Chimney flue
It is mounted on the firebox from above. It is better to choose a metal option, since it does not need to be additionally sealed, and it is also easier to install.
Important! The chimney pipe must be covered with insulating material so that it does not heat up and does not destroy the masonry with its heat.
Pressure equalizer
This is a grating device that can be purchased, but not difficult to do by yourself.
For self-creation you will need:
- Cut a 5x5 cm door from a stainless steel sheet.
- Install it in the side wall of the fireplace 10-15 cm below the ceiling. T
Important! Such a device will help regulate the pressure in the fireplace. If it is weak, the door is closed; if it is strong, it is opened.
The following are the work on facing the fireplace.
Decorative work
The main facing material is recommended to choose natural stone or other refractory material. A fireplace with molded figures and patterns will look wonderful. After facing, you can check the fireplace and start.
If you decide to make a small fireplace with your own hands, do not neglect the clarifying recommendations from practitioners.
to contents ↑Advice:
- In order to do everything right, browse videos on the Internet, write down the main points for yourself.
- Be sure to change the ordinary brick to refractory when designing an ashpit and a combustion chamber.
- During operation, do not forget to clean the fireplace from ash and soot from time to time.
- There are masters who lay clay with their hands, but if you prefer, use a trowel.
- When working, be sure to keep a drawing nearby.
- Also, write a work plan for your convenience.
- Be sure to mark the laid out rows.
- Do not forget about sealing. For summer cottage options, roofing felt canvases folded on top of each other overlap.
- To ensure complete tightness of the structure, check all angles in advance. They should not have cracks or chips.
- When working with clay, it should be soaked 2-3 days before work. Add a little water every morning and mix.
Stock footage
If you doubt your abilities or do not understand at all how to make a fireplace - it will be better to purchase a ready-made option, or consult a specialist. But we hope that our detailed instructions have clarified this situation for you, and you are quite ready to implement your idea yourself.
- How to choose a vacuum cleaner taking into account the characteristics of the house and coatings?
- What to look for when choosing a water delivery
- How to quickly create comfort at home - tips for housewives
- How to choose the perfect TV - useful tips
- What to look for when choosing blinds
- What should be running shoes?
- What useful things can you buy in a hardware store
- Iphone 11 pro max review
- Than iPhone is better than Android smartphones
 (No ratings yet)