

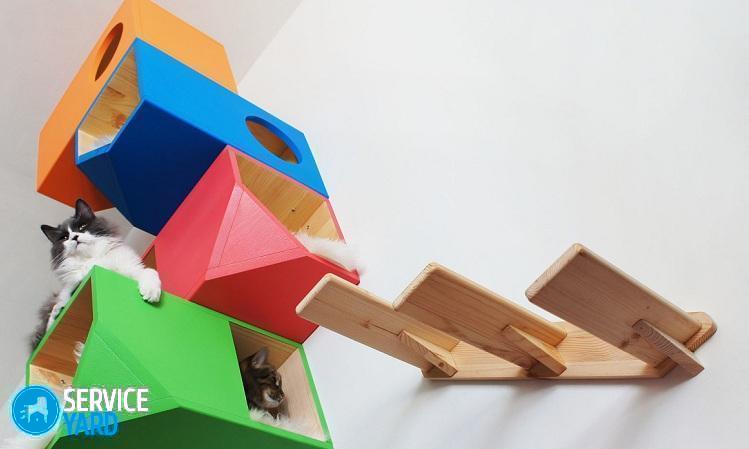
DIY cat ladder

The cat is a predator, therefore it spends a significant part of its time climbing trees. Living conditions for a small climber in a city apartment are much poorer than, for example, in rural areas. In the city, the domestic cat lives hearty and comfortable, but its own space is sorely lacking. Therefore, caring owners purchase sets of furniture and accessories for the pet: shelves, houses, hammocks or bridges. In addition to their functionality, these items are quite beautiful, they enrich the interior. And the happy kitty gets its own mini-gym, where excess energy can splash out. However, the cost of such products is quite high. You can make these things yourself. Ladder for a cat with his own hands - this is quite realistic with a minimum skill in working with carpentry tools.
to contents ↑Shelves for cats
The choice of product design depends on the size of the apartment. If the room is small, then 1-2 wall shelves are enough for it. If you have several fluffies, and the area of the apartment allows, then you can equip a real mini-complex for the animal.
Important! Do not make the surfaces of the shelves too smooth, otherwise - a pet that has fallen on your head will become a common occurrence.
Place the shelves around the perimeter of the room, at such a distance that there is enough to jump. Then the fluffy mischievous person will be able to travel on the shelves without going down to the floor.
to contents ↑Home master note
There are many materials on sale that are suitable for the manufacture of such products. The costs will be minimal:
- For the manufacture of columns and columns, cardboard cylinders from the sale of linoleum are excellent.
- And for the manufacture of a cat's house, it is advisable to stock a sheet of plywood or chipboard.
- To make it convenient for the animal to climb, it is advisable to cover the products with carpet or a dense fabric. In addition, they look much more fun and elegant. You can combine a claw-cat and a cat house in a single complex.
to contents ↑Important! For a small apartment, where there is very little space, a good solution would be to combine an ordinary bookshelf and a cat lounger. At the same time, shelves must be placed in the form of a “ladder” so that the domestic animal can move freely.
Where to begin?
Before you start work, you need to determine the dimensions and shape of the product. If the shelves for cats on the wall with their own hands are intended only for the pet, the task is greatly simplified. The shelf can be made of natural wood or chipboard. In the latter case, you don’t have to do anything special. You will cut a sheet and stick the edge where you purchased chipboard. It remains only to connect the details with the help of confirmations and hang them on the wall.
Important! This option has one drawback - the material is sold in sheets, so there will be a lot of waste, and the costs will be large.
If you make wooden shelves for cats with your own hands, then you will take as much material as you need, and the consumption will be much more rational:
- Cut the board into pieces of the desired length.
- Connect the parts with self-tapping screws, confirmations or use special wood glue.
- After the structure is assembled, cover it with varnish or paint so that the shelf fits into the interior.
- You can hang the finished product on the wall using dowels or brackets.
- A hanging ladder can be made of furniture lamellas, cut into pieces of various lengths, and ordinary rope.
to contents ↑Important! So that the segments of the lamellas are at the same distance, you can tie knots on a rope or use large beads and nuts as limiters.
Complex of a house, shelves and a climbing frame
So, to make shelves for cats with your own hands, you will need:
- Paper pipes after the sale of carpet. It is better to take pipes with thick walls, since self-tapping screws go better.
- Particleboard or plywood for shelves. You can use the old doors from the cabinets.
- Carpet, rope made of natural material. The rope looks prettier, but will cost more.
- Corners for hanging (10 cm is enough).
Of the tools useful:
- Electric jigsaw.
- Furniture stapler.
- Screwdriver or screwdriver.
- Knife (scissors) for cutting carpet.
- Drill with a drill of 10 mm.
- Set of screws.
Shelves
Procedure:
- Cut the pipe to the desired length, wrap it with carpet. Trim the excess material and secure along the edge with a stapler. Fasten the second edge in the same way. You should not save on brackets.
Important! The stronger you fix the material, the better. It is advisable to fix the carpet with a slight overlap.
- Cut out the shelves. What kind of form they will have - it all depends on your imagination. The simplest option is rectangles.
- Measure the diameter of the pipe. Draw a slightly larger diameter circle on the shelves. Cut holes with a jigsaw.
- Cover the shelves with carpet. Cut the material with a margin so that you can twist and fasten with brackets. In the area of the hole, cut the carpet with “petals” and fix it with the same stapler.
- After the work is finished, cut out the carpet and fix it to the structure from below.
- Slide the shelves onto the pipe and stiffen with self-tapping screws.
Cat climbing
To make a ladder for a cat with your own hands, you will need such materials:
- Particleboard or plywood.
- Shank from a shovel.
- Rope.
- Carpet.
- Self-tapping screws.
Algorithm of actions:
- Cut two sidewalls out of plywood. Dimensions and shape are determined individually.
- Wrap the sides of the stairs with carpet, secure the material with a stapler. First, from the outside, and then from the inside.
- From the shovel handle, cut the steps of the same length and screw them to the sidewalls using self-tapping screws.
- Screw the rope on the steps, secure with furniture staples? and the magnificent ladder for the pet is ready.
We will build a cat's house
From the materials you will need:
- Sheet of plywood or particleboard.
- A block of wood 20 x 30.
- Carpet.
- A piece of faux fur or fabric with a long nap.
- Foam rubber.
- Hardboard.
Operating procedure:
- First, determine the dimensions of the product and make a sketch scan.
- Cut two circles from plywood: this will be the upper and lower parts of the house.
- Then cut a rectangle from hardboard. One side is equal to the height of the “cat house”, and the other is the circumference of the “pancake” cut out of particleboard or plywood.
- Mark and cut the “climbing frame” in hardboard in advance.
- Cut the planks from the wooden beam to the height of the house. How many do you need? Practice shows: the more of them, the stricter the design. Seven stiffeners are enough.
- When installing the bars around the perimeter, screw them to the "floor" and "roof" of the house. Do not forget to leave a hole for the cat's hole.
- Now take the hardboard and wrap the resulting frame. Do not forget to make sure that the hole is in a pre-planned place. Fix hardboard with staples to stiffeners.
- Tighten the house with carpet, and fix the foam and faux fur on top.
Cat's house is ready!
to contents ↑Stock footage
So, your pet will have more than enough imagination, skill, and personal space. That means - he will also do much less harm, and more to please you with his softness and purring.
- How to choose a vacuum cleaner taking into account the characteristics of the house and coatings?
- What to look for when choosing a water delivery
- How to quickly create comfort at home - tips for housewives
- How to choose the perfect TV - useful tips
- What to look for when choosing blinds
- What should be running shoes?
- What useful things can you buy in a hardware store
- Iphone 11 pro max review
- Than iPhone is better than Android smartphones
 (No ratings yet)