

DIY leather key holder
Any girl should have order not only in appearance, but also in her favorite handbag. Money is in the wallet, powder and lipstick are in the cosmetic bag, and the keys, of course, are in the key holder. Especially if they are not one or two, but a whole bunch - from the apartment, car, office. In addition to functionality, this thing can become your favorite exclusive accessory. In this article we will tell you how to make a key holder from leather with your own hands, we will give several options for making such a product from a fabric. Here the choice is entirely up to you.
to contents ↑The key keeper is a beautiful accessory
A keychain thrown carelessly into a bag can leave scratches on the phone screen or tear the lining. If you are used to folding them in your pocket, then the chance is great to lose them altogether. But if they are hidden in a key keeper, then these problems are not afraid of you. In addition, keys will no longer ring nastily when walking or running. So it's time to pick up a needle with a thread and sew a key holder, especially since this does not require special skills. A little time and perseverance.
to contents ↑The key keeper with a zipper can be made without even using a sewing machine. It takes only 2 hours
A very simple and convenient model that you will definitely like with its appearance and practicality.
Create a pattern
Before starting work, you need to make a simple pattern of a key holder from the skin with your own hands. For this, the following formulas will be needed:
- The length of your bunch + 1.5 cm (so that the keys fit freely inside) + 2 cm to the seams.
- The width of your ligament + 1.5 cm to freedom + 2 cm to the seams and multiply this value by 2.
To make it clearer, let’s take a look at a specific example. So, the length of our bundle is 10 cm, width - 4 cm. The initial data are obtained as follows:
- 10 + 1.5 cm + 2 = 13.5 cm;
- 5 + 1, 5 + 2 * 2 = 10, 5 cm.
Based on the obtained numbers, it turns out that we need a rectangle 13.5 cm long and 10.5 cm wide. Now we can start work by drawing the outlines of the future key holder directly on the material.
Cooking Tools
In order to sew a key case with your own hands from leather, it is not necessary to go shopping to find the right piece. You can use artificial fabric, or use up your old jacket, cloak, even take the boot of the boot, which you no longer wear, but throw the arm does not rise. It is clear that if you have chosen the latter option, you must first thoroughly wash and clean the material.
In addition to the skin, we will need:
- lining material (thin cotton, satin);
- sewing machine;
- thick needle for dense fabric;
- reinforced threads;
- scissors;
- pins
- zipper on the lock (10 cm will be enough);
- carbine;
- Accessories for decorating zipper dogs.

Start sewing
First, we cut out the same rectangle from the lining fabric as for the main one, the dimensions are already calculated. Then we perform the following steps:
- To sew the zipper, we place the leather part in front of us with the wrong side down, we put the zipper with the front side to the front side of the skin, then we put the lining fabric with the wrong side up (this is a kind of sandwich stuffed with zipper).
- First, gently chop with pins or sweep large sections of sections of all the details. In this case, the lining should protrude 1 cm beyond both edges, because it will be slightly smaller than the main part.
- Lay a seam, making sure that the layers do not move.
- In the same way we attach lightning on the other side of our future case.
- We turn out the sewn parts and on the front side of the product we make two parallel lines along the zipper, departing from the seams for about 1 cm.
- Turn the key holder inside out, fold it so that the zipper is not on the side, but in the middle of the product, and sew the sides. Excessive zippers just need to be cut off.
- It is better to process the resulting seams with the “zigzag” line or manually so that the fabric does not crumble and the keys do not cling to it.
- We turn out the key holder, straighten the corners.
Important! To the zipper dog you can attach a ribbon with beads at the ends or other decoration at your discretion. You can also attach a carabiner and hook it on the dog with a zipper pocket inside the bag so that you do not have to look for a key holder for a long time and so that it does not hang around the entire bag.
Do-it-yourself leather key holder is ready!
to contents ↑Important! Knowing the step-by-step instructions, you can make a key case from any other fabric:
- Selecting silk as the main material, take cotton as the lining so that the metal does not leave puffs.
- Even old jeans are perfect for such an accessory - you can not duplicate them with a lining.
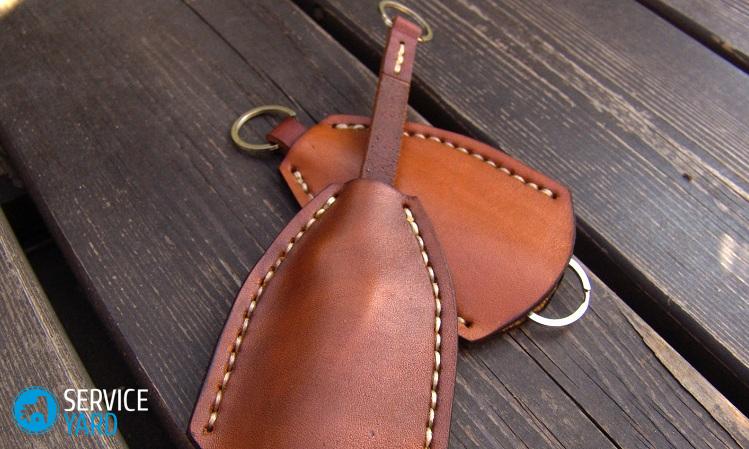
Braided key holder with a strap
This one way to make a do-it-yourself key case with leather is worth choosing for those who have very long keys in a bunch. The mechanism of action of such a cover is as follows: the strap with the keys is pulled out from above (the keys are pulled inward) and attached to the button. This method is more complicated than the previous one. But if you want to make a nice gift to your man, then it is worth a try.
Training
For him we need:
- piece of leather or suede, in this case, it is better to take natural material;
- pencil;
- ruler;
- scissors;
- thick needle;
- strong threads;
- punch for skin;
- magnetic button;
- long cord;
- key ring.
Important! To determine the dimensions of a future product, it is better to focus again on a specific keychain. In order not to spoil the material, in the beginning it is better to draw outlines on paper and only then transfer them to the fabric.
In total, 4 details will need to be cut from the skin:
- Two main ones. They are elongated rectangles, on the one hand the angles are straight, on the other they need to be rounded.
- One long, solid, twice the size of the resulting rectangle. This is the future strap. Draw both ends of the strap in the form of small identical diamonds.
- One decorative rhombus, the size of which depends on the key holder.
Main job:
- The button will be on a separate rhombus. We cut small holes for the brackets in it, insert the buttons and bend them.
- We attach the response part of the button to the strap. To one of the rhomboid parts on the front side. Both parts of the button should be reinforced with glue, as they will be constantly unfastened / fastened.
- We fold the strap in half, the wrong side to the wrong side. We insert a key ring into the bend. Glue the strap from the inside.
- Stitch the strap around the edge with special threads with the seam back. Before this, it is worth making a mark so that the seam is even. It is better to flash from the side that will be the front, that is, from the side where there is no button.
- While the glue dries, take one of the main parts and make a markup at a distance of 0.5 cm from the edge.
- We fold both parts with each other, inside out, fasten with pins so that they do not move.
- Using a punch, gently make holes along the edge of the product. By outline, piercing two layers of skin at once, so that they are symmetrical. The distance between the punctures is 0.5-1 cm.
- Cord braid our future housekeeper around the perimeter. Do not forget to insert our strap inward with the side with which the rhombuses and the button are made, the part with the key ring remains outside.
- We finish the work and understand that using the same technology, you can make a cover with a braid for a mobile phone, book, or even a tablet.
to contents ↑Important! The cord for the braid will look more stylish and elegant if it is made of leather. And it’s not at all difficult:
- On the skin we draw a circle with a diameter of eight centimeters, then in a spiral - from the edge to the center - cut the cord.
- The width of the strip is 3 mm, and the length will come out almost 2 m.
- Do not be alarmed if the cut cord is uneven. To straighten it, just hold the workpiece in hot water and wind it around the bottle.
- When the cord dries, it will become perfectly straight.
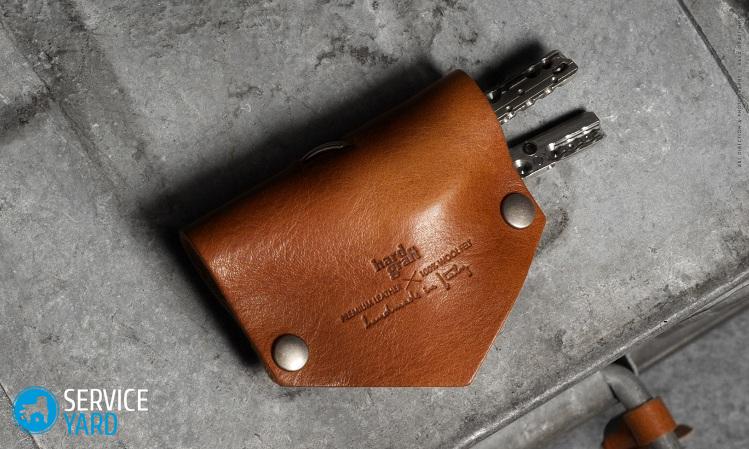
Velcro key keeper
Another version of the key keeper without the use of a sewing machine.
Cooking Tools
To do this, prepare the following:
- leather;
- a piece of thick leather, a wooden board or just a stack of old newspapers;
- ruler;
- ball pen;
- awl;
- strong, preferably reinforced threads;
- scissors;
- Velcro closure.
We are preparing a pattern
This key holder has an extremely simple shape. She will need 2 parts, which depend on the size of your bundle. So:
- The main long part. Its width is equal to the width of the keychain plus 1.5 cm (so that the keys fit freely inside), plus another 1 cm for the seam allowance. Its length is calculated by the following formula. The length of the bundle must be multiplied by two. To this value add another 2 cm (for the bottom of the cover), then another 5 centimeters (for the part of the whole-cut valve) and plus another 1 centimeter (margin so that the key holder valve freely closes).
- The second part is the internal part of the valve. The situation here is much simpler. The width of the inner part of the valve is 1 cm less than the width of the long part of the key holder, and the length is 0.5 cm less than the length of the outer part of the whole valve (in this case, 4.5 cm).
Important! The contours of these parts can be immediately applied to the skin from the wrong side. It is better to do this with a ballpoint pen. When you cut parts, in the area of a one-piece valve on the sides, it is better to cut off the seam allowances, since they are not needed here.
Getting to work:
- Cut off the Velcro of the required length. We put one half of it to the front of the key holder.
- Putting the details on the board, so as not to scratch the surface of the table, with an awl we make punctures in Velcro and leather at the same time. We pass along the entire perimeter of the Velcro, departing from the edge of 2 mm.
- We sew the clasp with the seam “needle back” using special strong reinforced threads.
- We connect the internal part of the valve with the sewn “Velcro” and the external one-piece part of the valve. Having departed 3 mm from the edge, again we make an awl of a hole around the perimeter of the valve part.
- We sew both parts of the valve of the key holder made of leather with exactly the same seam.
- We sew the cover from the inside on the sides with a “needle back” seam, without forgetting to make holes with an awl at a distance of 0.5 cm from the edge.
- Now we proceed to the bottom of our key holder. To make a wide flat bottom, we fold the collarbone across so that the side seam is not in the side, but in the middle.
- From the lower corner of the collarbone we put 1 cm up the side seam and make a small transverse seam in this place. With the same seam, we fix the second lower corner from the inside. The bottom is ready!
- To fasten the keys to the case, cut out a long narrow strip of leather from the skin. Sew one of its ends to one of the lower corners of the clavicle.
- We fold the second end of the cord in the form of a loop - a bundle will cling here, and fix this loop with threads.
- We turn the resulting product from the wrong side and admire the work done.
Key keeper baul
This is perhaps the easiest way to create a key case. The question of how to sew a housekeeper with your own hands, without having a pattern, disappears by itself:
- Cut a circle from a piece of leather - the diameter is determined based on the length of the ligament.
- In a circle with an awl we break through several holes at the same distance from each other.
- Then we pass a lace, a strip of leather or braid into them.
- Bypassing the whole circle, we bring the ends of the cord into one hole, and the cover is ready.
to contents ↑Important! You can decorate it with applique or eyelets.
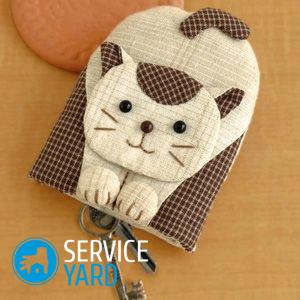
Case for the child
They made a case for their beloved, made a stylish accessory for their man, it’s time for the child to sew something like that. And the option in the form of an owl, cat or panda will come in handy:
- It is better to choose a dense material so that it lasts a long time. For example, leather, jeans or felt.
- The pattern in this case is also quite simple. Cut 2 parts along the contour of the selected animal.
- On one of the front sides we make a muzzle. Eyes, nose or beak, antennae.
- Manually sew the parts on both sides, leaving holes on top between the ears for a leash and the bottom for keys to enter.
- The leash, passing through the ring from the keychain, is folded in half, the ends are pulled from the inside into the upper hole.
- The tips can be sewn and decorated with a bead or button larger than the hole.
Stock footage
As you can see, making a housekeeper with your own hands is not so difficult. With a little effort and our advice, the whole family will have their exclusive accessory. Now a bunch of keys can be put in a pocket or briefcase, without fear that the metal will damage or lose something.
- How to choose a vacuum cleaner taking into account the characteristics of the house and coatings?
- What to look for when choosing a water delivery
- How to quickly create comfort at home - tips for housewives
- How to choose the perfect TV - useful tips
- What to look for when choosing blinds
- What should be running shoes?
- What useful things can you buy in a hardware store
- Iphone 11 pro max review
- Than iPhone is better than Android smartphones
 (No ratings yet)