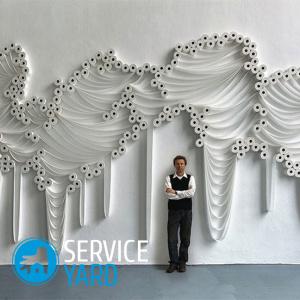
DIY toilet paper paintings

Any creative activity has a beneficial effect on the versatile development of the child. And the use of simple and affordable improvised tools for crafts will teach you to take care of things. When creating various crafts from improvised means (napkins, toilet paper, packages), the child learns to think creatively and find application for absolutely any object in the house. Sharing time strengthens the emotional bond and creates a more trusting relationship between adults and children. In this article we will look at how to create paintings from toilet paper with your own hands.
to contents ↑The painting "Apple tree in bloom" - materials for work
In order to make an interesting picture of toilet paper, you will need the following tools and materials:
- Thick cardboard.
- Toilet paper.
- PVA glue.
- Paint brush and glue.
- Gouache paints.
- Acrylic spray varnish (hair spray can be used).
- A bowl or small capacity.
- Pencil.
A step-by-step workshop on the creative process
The steps for making a mural of toilet paper are as follows:
- To get started, make the main background of the picture. To do this, tear off a piece of toilet paper equal to the width of your cardboard + 3-4 cm. Smear the cardboard with glue and form arbitrary folds.
- Tear off the next segment and glue it under the first segment, laying it on 35 mm on the first. Glue paper joints. Paste all cardboard and leave to dry.
- After the glue is completely dry, make a sketch of the picture with graphite or a pencil on the main background. As spring has come and nature is blooming, draw the sun, a hill, clouds, a river with stones, a tree with flowers and foliage.
- Pour glue into the bowl, dilute it a little with water. Narrow the paper finely, soak it and lay out the clouds and the sun from the mass previously crumpled in your hands. Smooth out the laid out mass with your fingers to make the surface smoother.
- Designate a hill - stick paper, make wrinkles with your fingers. Mark the water with horizontal folds.
- Start laying out trees. Tear off a piece of paper, moisten your fingers with glue, twist the flagella - they should be well saturated with glue. From the thick bundles lay out the trunk, and thin - go to the branches. Also put bushes with thin flagella.
- Lay out the stones from the mass obtained by crushing paper and glue in the hands. Their surface does not need to be smoothed, but you can press it with your finger, creating a hole in the stone.
- Now lay out the soaked paper foliage, flowers. Roll small balls to do this. Having given them a form, lay out on our sketch.
- Make thin flagella, twist them into spirals - this will be the center of the flower.
- After all the layers are laid, dry the picture of toilet paper with your own hands.
Now it's time to transform the volume base, make it truly original, unusual - take the paints and start painting. Since we have a spring picture, the colors should be bright:
- First paint over with darker colors: orange around the sun, then yellow the sun itself, applying strokes to orange.
- Fill the sky with dark blue (mix blue and blue), and then, working in contrast, apply blue and light blue to the folds.
- Paint the trees brown, the stones dark gray and the bushes green, but first color the hill with the color of a sea wave, apply a few strokes to the bottom of the blue sky so that the horizon does not stand out and smoothly transitions from the sky to grass.
- Green tint folds on the hill, bushes, leaves on a tree, you can add a little on the bottom of the horizon.
- Paint the tree light brown and the bottom of the hill brown.
- Now darken the convex areas on the hill and the tree with dark brown. Make some strokes on the grass.
- Color the water in the river with blue. Then paint the more convex places with dark blue, and put the blue color under the folds. On the folds themselves, apply white or light blue.
- Yellow, in tone with the sun, color the middle of the flower.
- Paint the flowers dark pink, and apply a light pink color to the middle of the petal.
- After you finish working with paints, leave the painting to dry. And after drying, cover it with varnish, place it in a frame.
Stock footage
Making a picture of toilet paper with your own hands is a very exciting and interesting process that will surely appeal to you and your child. And the craft created in this technique will be a wonderful decoration for your home.
- How to choose a vacuum cleaner taking into account the characteristics of the house and coatings?
- What to look for when choosing a water delivery
- How to quickly create comfort at home - tips for housewives
- How to choose the perfect TV - useful tips
- What to look for when choosing blinds
- What should be running shoes?
- What useful things can you buy in a hardware store
- Iphone 11 pro max review
- Than iPhone is better than Android smartphones


