

DIY matchstick paintings

Matches can be used not only to set fire, but also to create various crafts. Almost all of them can be made - paintings, a miniature house, furniture, dishes, and even decorative animals. Such an exciting process is suitable for both adults and children. If your kid is tired of toys and nothing to do, then he will definitely like the creation of funny flat paintings. This hobby is especially suitable for hyperactive babies who are so hard to sit in one place. What could be simpler than getting an ordinary matchbox and working together with your child. Stay with us to learn how to make crafts and paintings from matches with your own hands.
to contents ↑Advantages of match art for children
The process of creating crafts from matches is the surest way to get pleasure from the joint process, and a great opportunity to show your baby the possibilities. Absolutely any kind of creativity has a certain developmental value. That is why even ordinary matches can become a reason for quite useful activities.
We list the main advantages of this work:
- Perseverance.
- Perseverance.
- Mindfulness.
- Concentration.
- Discipline.
- Precision movements.
- Coordination of movements.
- Patience.
- Accuracy.
- Cleverness and imagination.
- Understanding of beauty.
- The development of creative abilities.
- The pursuit of a goal.
As you can see, matchstick creativity has a huge list of useful benefits. Therefore, be sure to use this chance to practice with your baby!
to contents ↑Pictures of matches with their own hands - schemes
The match picture consists of cubes, which must first be done separately, and then assembled into a single panel. This master class describes a pattern for creating a picture of matches with your own hands, where you can use absolutely any image.
Materials for work
For work, we need to prepare:
- Matches (3-4 packs of 10 boxes each).
- Stand (you can use a book, packaging from the disk).
- 10 cents coin.
- Printed image.
- Stencil for work.
A huge patience and desire to achieve the desired result should be added to the above materials. It's time to tell how to make a picture of matches.
Working process
First, we need to make a basis for our picture. The basis is cubes that are fastened together. To create a picture you need to learn how to make a cube:
- From 8 matches we make a flooring where all match heads should look in one direction.
- Now we need to put perpendicularly to the first layer - the second, also of 8 matches.
- We make the walls for the cube (according to the principle of the design of the well), laying out 7 brushes on each side.
- We do the same with the upper flooring, making it of two layers, but on the topmost layer instead of 8 matches we put 6.
- We take a coin and put it on the roof of the house. This is necessary so that in future matches do not stick to your hands.
- Having pressed a well slightly, we insert on top 7 more matches around the perimeter.
- Gently squeeze the structure on all sides to make it stronger.
Important! Do not overdo it at this stage, so as not to break the matches.
- When the base is ready, we need to insert another vertical layer of matches - only where there are no chips with heads.
- Turn the house gray down, and after - add the missing matches.
- On top of the structure we put another layer of chips, for a stronger connection of future cubes to each other.
- Well, our first cube is ready. Now we need to connect all the cubes together. To do this, stick 4 matches into the empty space between the chips and put another cube on them. In this way, we do the first row and all subsequent ones.
- We join the ranks of actions already known to us.
- The time has come to lay out the picture itself. With the sulfur-free side we stick the matches into the spaces between the chips of the cube so that contours from the heads of the matches are formed. We continue to insert matches until we see the desired picture.
- Our work is almost ready. To complete it, we need to fill the match picture with varnish so that it covers every match without exception. If this is not done, then the friction between the chips will weaken, and all the work will simply crumble. So your creation will last a long time, and if something happens, it will not catch fire.
to contents ↑Important! You will spend about 15-20 minutes of free time on making one die. And about 4 boxes (about 150 matches). To create the whole picture, we need 30 pieces of cubes.
Match pattern
If you decide to start with the simplest, then this method will help you. Using the technique of laying out matches on a cardboard basis, your child will quickly understand the principles of creating various elements from slivers.
What do you need?
For this craft, you need to prepare the following:
- Matches.
- Thick cardboard.
- Pencil.
- Glue.
- Elements for decoration.
How does this happen?
- A preliminary sample is drawn on cardboard with a simple pencil.
- After this follows the repetition of all the contours with the help of matches, pondering the correct location of a particular image element.
- When styling is completed, the pattern is fixed with glue.
- At the end, the picture can be painted with paints or decorated with volumetric elements.
That's the whole process of making a flat match picture. Such a cute work of art can be placed in a frame or decorated with the help of a pasteboard with your own hands. Such a fake looks very decorative and elegant, so you can leave it to yourself or present it as a gift to grandparents - they will be very happy to see the successes of their little creator.
to contents ↑Choose a plot
Matches can put almost everything. Here is the basic list of living and non-living objects that are fairly easy to recreate with chips:
- House.
- Wood.
- Little man.
- Check box.
- The machine.
- Star.
- Fence.
- Clock.
- Steamboat.
- Some letters and numbers.
- Owl.
- Cat.
- Giraffe.
- Fish.
- Butterfly.
And this is not the whole list. The choice of image depends on the imagination and age of the child. Therefore, do not be afraid to come up with different options together!
to contents ↑DIY furniture from matches
Probably every parent at least once in his life heard the phrase “matches for children is not a toy”. Yes, of course, they must be used very carefully and only in the presence of parents. But we want to say that matches are a worthy toy, if used wisely. We want to share with you several options for creating miniature match furniture.
Chair:
- We cut off the head of the match.
- The rest of the chips are the matchstick.
- We cut off the head of the second match and put two sticks parallel to each other.
- We cut in half one section of a match - slats for the back of a chair.
- Glue the bare matches to the inside of the first two matches - this will be the back of the future chair.
- We cut the crossbar from a whole chip equal to the width of the back of the furniture pour.
- Glue the cross member in the center of the legs. We got the back of the seat, where the rear legs of the chair are located below.
- Now you need to cut the front part for the base, similar in length to the rear base.
- Glue to it the legs of the chair, equal in length to the back seat. We connect the legs to the crossbar.
- We take one more naked match and divide in half. Attach the halves to the back. We got side seat supports.
- Glue the front legs here.
- Now you can put the chair on the legs and secure the front and rear legs with crossbars.
- We cut off from the whole match a part equal to the width of the seat. We need to cut eight of these sticks.
- We put them tightly next to each other (we can say back to back). We strengthen them with two suitable-sized crossbars.
- We lay the seat on the base.
Our high chair is ready!

Table:
- Glue together fourteen pieces of bare matches with two transverse ones. We get the inside of the countertop.
- Now we need to glue two very small matches to the crossbars.
- We put two slivers crosswise - so we get one pair of legs. At the ends we make small bevels for future fixation of the legs.
- According to an already familiar pattern, we make two more pairs of legs.
- Glue a couple of legs to the inside of the large and small crossbeams. We also symmetrically fix the rest of the pair of mounts.
- Glue two crossbars on both sides of the bottom of the table.
- We are waiting for the glue to dry completely.
- We put our creation on its feet.
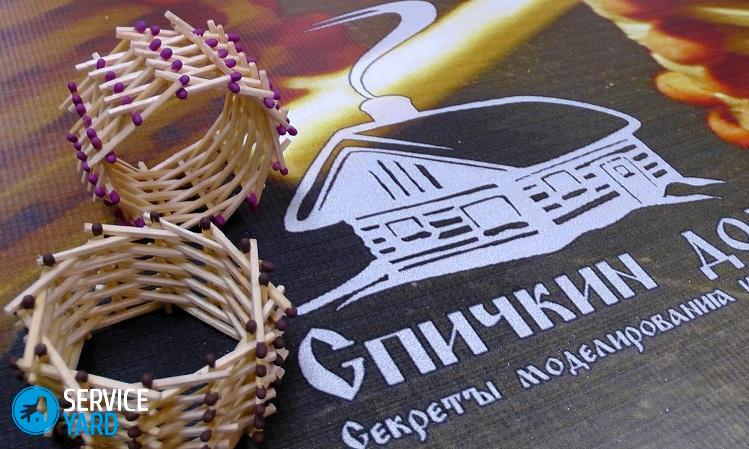
DIY match mug
As we have said, from matches you can create not only paintings, but also other interesting fakes, for example, a mug. The basis for such a match design can be a polygon with a completely different number of angles - from 4 to 8 or more.
Important! Such faces can be decorated not only with matches, but also with chopsticks or braid.
Step-by-step algorithm of actions:
- We cut out a cardboard blank, which will serve as the basis for the mug - a regular octagon.
- Draw on the basis of 4 diagonals (divide the figure into 8 equal parts).
- Glue the matches along the marked lines.
- Now we need to completely fill the base with slivers. We glue them so that no gaps are visible - all segments will be of different lengths according to the principle of an asterisk.
- We put the finished base on a rubber mat and cut off the excess edges of the matches that protrude beyond the borders. Ready for our mug!
- Next, you need to cut the part out of cardboard in order to make the octagonal case of the mug. Length is the sum of all sides of the base of the cup. Height is up to you. Divide the rectangular blank into 8 equal parts, making small cuts to form faces.
- We bend the cardboard blank along the notches, and after that we glue the body to the already created bottom.
- We start making pens for our crafts. To give shape, you need to bend the handle in two places as it really is.
- We glue our holder on any of the faces.
- We paste over the whole craft with matches. The pattern can be completely different, both in one layer of slivers, and in several.
DIY handmade match is ready!
to contents ↑Stock footage
Creating pictures from matches is a rather complicated and painstaking work for people with good endurance and a large supply of free time. In our master class, we talked about the simplest way to make match panels. And for children, lighter versions of flat paintings were found that perfectly influence logical thinking and develop hand motor skills. Creating crafts from such simple materials is a very profitable activity. Try, we are sure, after the first successful result you are unlikely to be able to stop!
- How to choose a vacuum cleaner taking into account the characteristics of the house and coatings?
- What to look for when choosing a water delivery
- How to quickly create comfort at home - tips for housewives
- How to choose the perfect TV - useful tips
- What to look for when choosing blinds
- What should be running shoes?
- What useful things can you buy in a hardware store
- Iphone 11 pro max review
- Than iPhone is better than Android smartphones
 (No ratings yet)