

DIY fabric scraps
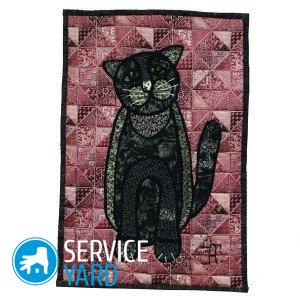
Every housewife would like her house to always look stylish, cozy and unlike others. If you want to make your home truly original, decorate it with products using the patchwork or quilt technique. A very interesting option made in this technique are paintings of scraps of fabric with your own hands. You can hang such an article on the wall, or just put it on the chest of drawers - the choice is yours. Let's find out what a patchwork and quilt are, what and how can be done in this technique.
to contents ↑What are patchwork and quilt?
Patchwork (translated from English as “patch” and “work”) is a patchwork applique technique, or sewing, where small fabric patches and details are superimposed on larger ones. This is a very time-consuming, but incredibly interesting technique.
Important! This technique has long been very popular both with us and in Europe. In Japan, there is even a whole trend of fashion - the Japanese patchwork, where various bags made in this style are especially popular.
Quilting (translated as “fastening”, “stitching”) is a broader concept in comparison with the patchwork. This technique includes several types of needlework at the same time - this is embroidery, and patchwork, and applique, and stitches.
to contents ↑Important! Initially, patchwork was used only to lengthen and renew old clothes and things. However, today it is a very fashionable decorative technique in which many interior decorations are made.
Patchwork
In order to make a patchwork picture with your own hands, you will need the following:
- Sheet polystyrene (density 25, thickness 2-2.5 cm).
Important! Pieces used to pack household appliances can be used.
- All kinds of multi-colored fabric patches.
Important! It is desirable that the fabric is not too dense, since coarse, thick matter is not very suitable for small parts.
- PVA glue.
- Stationery knife or scalpel.
- Nail scissors.
- Seam straightener or nail file.
- Carbon paper or felt-tip pen.
- Printed circuit diagram.
Important! When cutting foam, and in the process, small white balls will certainly crumble, creating debris around. Therefore, it is better to work in a room where there are no carpets with a high pile, so that later you can easily restore order.

Sequencing:
- Transfer the pattern onto the foam with a carbon paper or simply draw it with a marker.
- Prepare a picture frame. On each edge of the foam fragment, draw a margin of 2-4 cm - the frame will be of such width.
- Take a clerical knife or a scalpel, cut grooves with a depth of 0.5-1 cm along the lines you have outlined.
Important! Deeper cuts can lead to a break in the base, which should not be allowed.
- Take fabric shreds and try to distribute which one goes where.
- Apply glue to the selected fragment of the picture with a brush.
- Using a nail file or a spreader, begin to insert the edges of the fabric into the slots.
- Scissor the peeling leftovers.
- Fill the edges remaining after trimming into the foam so that they are not visible.
Important! First, a frame is made in this technique. The free edges are wrapped on the back side and fixed to the foam with a stapler or buttons. Next, the rest of the drawing is performed.
- After the whole picture is done, attach a hook to the back of its wall or sew a loop with which your masterpiece will be hung on the wall.
to contents ↑Important! In this technique, both individual paintings from scraps of fabric with their own hands can be made, as well as modular compositions.
Christmas picture from shreds for beginners
New Year's preparations are very pleasant, however, there is not always a financial opportunity to give gifts to everyone who wants to. But there is a way out - to make a New Year’s picture with your own hands from pieces of fabric. Since the New Year, the theme will be New Year's.
To work, you will need the following:
- Cardboard base covered with chintz fabric.
- Cardboard.
- Glue.
- Scissors.
- The fabric is white, red, blue, green, gold, and for the face of Santa Claus - pink shreds.
Sequencing:
- From the same cardboard as the base, cut out all the figures. It can be Santa Claus, Snow Maiden, Christmas tree - everything will depend on the plot you have chosen.
- To make Santa Claus's beard look natural, cut the fabric for it with a fringe.
- A fabric with a silver tint is best for sledges, and for a Christmas tree, several types of material in green shades.
- Glue all cardboard blanks with a cloth and fix them in places in your picture.
to contents ↑Important! A fringe for a beard, as well as fragments of a Christmas tree, can be held a little above a burning candle. Thanks to this trick, the rags will gain volume.
Stock footage
The technique of making patchwork patterns with your own hands is not complicated. Materials do not have to buy, because they can be found in any home. Despite the cheapness of such a product, it will please you no less than a still life or landscape, which costs a lot of money.
- How to choose a vacuum cleaner taking into account the characteristics of the house and coatings?
- What to look for when choosing a water delivery
- How to quickly create comfort at home - tips for housewives
- How to choose the perfect TV - useful tips
- What to look for when choosing blinds
- What should be running shoes?
- What useful things can you buy in a hardware store
- Iphone 11 pro max review
- Than iPhone is better than Android smartphones
 (No ratings yet)