

DIY backlit painting
DIY backlit painting is a real work of art. It is a reflection of the inspiration of the master who created it. Previously, such paintings could only be found in shops and museums, today many owners, wanting to decorate the interior of their home in an original way, make such decorative elements to order or create them with their own hands, because very little is needed for production. Let's understand in more detail.
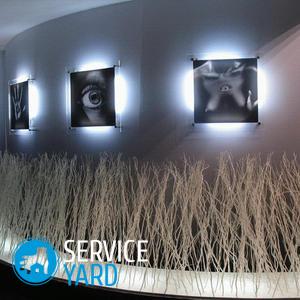
to contents ↑DIY light painting
The black and white picture will become a real decoration of any room. The original craft is also interesting, in addition to the aesthetic function, you can also use it as a cute night lamp.
To create you will need the following:
- The sketch on the basis of which the picture will be created. When creating it, it is necessary to take into account all the “highlights and gaps”, so that as a result the picture looks whole and complete.
Important! You can draw a sketch both independently and spy on the option on the Internet.
- Cardboard or paper of good quality. In our case, the format is 210 by 297 mm.
- Knife for prototyping.
- Frame for fixing sheets.
Important! Technically, it can be anything, the main thing here is that you can create space between the sheets.
- Frame box. You can choose any deep frame that fits the size of your base.
- LED strip.
Sequencing:
- To get started, prepare a space for creativity. To make a neat do-it-yourself luminous pictureCut the work on a hard and clean surface.
Important! As a substrate, you can use glass, a cutting board or a special self-healing cutting mat.
- Transfer the selected sketch to paper sheets for cutting in any way convenient for you.
Important! To make the picture look neat, make a drawing on the back of the paper.
- Start cutting parts with a clerical knife. Cut should start with the smallest details of the elements closer to the center of the sheet.
Important! To feel what pressure is more convenient for you to work with, try cutting out several test pieces of various shapes on a separate sheet. Remember that if you were not able to cut through the paper the first time, then it is better to draw a knife along the same line a couple more times.
- After all the necessary elements are cut out, fix the frame of each layer.
- Set the selected backlight inside the frame and lay each layer together with the frame.
Done! You can enjoy a picture made by yourself or give it to friends.
A few tips:
- Take your time - try to get the most out of the curly cutting process.
- In the process of cutting long straight lines, it is desirable to use a ruler.
- Try to cut curves and circles with a slight indent from the stencil - so you can subsequently adjust the line.
- The most curved sections DIY backlit paintings it is more convenient to cut with the help of nail scissors.
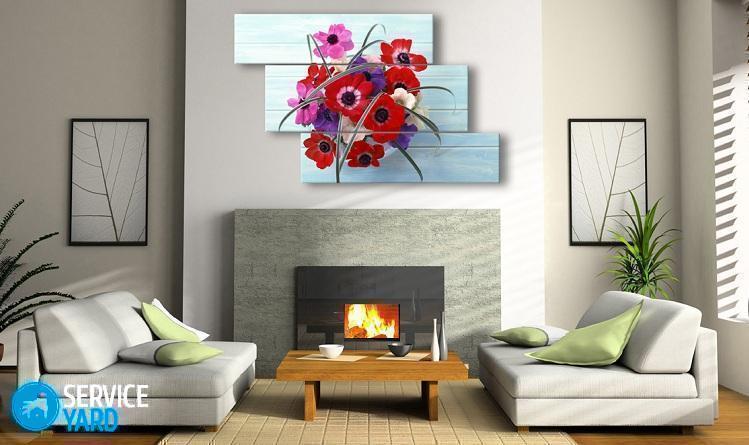
Backlit modular painting
A luminous picture of three panels will decorate the walls of the room and make your guests think that you are a professional artist.
Tools and materials
To create an original picture you need the following:
- Three finished canvas.
Important! The size of the paintings will depend on what size picture you want. Canvases should be the same size.
- Acrylic colors - black, white and blue.
- Brushes of different sizes - thick is suitable for applying to the background canvas, thin and medium - for drawing.
- LED strip - 100 lights will be enough.
- Screwdriver.
- Scissors.
- Scotch.
Sequencing:
- Paint the canvases with blue paint with a thick brush. To make the color brighter, you can apply two coats of paint.
- After the paint has completely dried, draw one small dandelion on the first canvas - here you can either use your imagination or find a ready-made version on the Internet and draw it.
- Draw the center of the dandelion with white paint. Then add the stem and fluffs of color.
Important! To give a vibrant picture, draw soaring seeds.
- After the paint has dried, you can begin to create a backlight. Make small holes in the canvas in the middle of the flowers and fluffs, where you insert the LED lights.
Important! If threads remain when piercing the canvas, remove them with scissors.
- Insert the lights into the prepared holes, and secure the garland on the wrong side of the picture with adhesive tape.
- Cover the canvases with varnish - it will give the picture an extra shine.
- Since the paintings are the same size, use a ruler and level to place them on the wall as evenly as possible.
Stock footage
As you can see, create do-it-yourself glowing paintings quite easy. To do this, you need fairly simple tools and materials, a little patience and your own imagination. As a result, you will receive a very beautiful and original interior decoration that will delight you and amaze your friends.
- How to choose a vacuum cleaner taking into account the characteristics of the house and coatings?
- What to look for when choosing a water delivery
- How to quickly create comfort at home - tips for housewives
- How to choose the perfect TV - useful tips
- What to look for when choosing blinds
- What should be running shoes?
- What useful things can you buy in a hardware store
- Iphone 11 pro max review
- Than iPhone is better than Android smartphones
 (No ratings yet)