

How to install a toilet on a tile with your own hands?
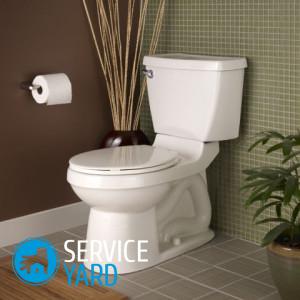
During repairs, plumbing fixtures, as a rule, are mounted already on the finished floor covering, since laying tiles is much easier if nothing interferes. And cutting tiles for finished plumbing is much more difficult. Installing a toilet on a tile is a snap. However, it is necessary to take into account certain nuances in order to avoid problems in the future. We will deal with them in this article.
to contents ↑What tools will be needed?
To install plumbing on a tile, you need the following set of tools:
- Hammer or drill.
- Screwdriver.
- Pencil.
- Wrench.
- Silicone sealant.
- Rubber spatula.
- Ball valve.
- Hammer.
- Hose for water supply, pipe for draining water from corrugated material.
- Set of drills.
- Material for wrapping.
Methods for fixing the toilet
There are 2 ways to fix the toilet:
- Open.
- Closed.
Important! In the first case, the bolts are fixed at the foot of the device. Closed mount provides for the placement of bolts inside the structure.
Installing a toilet on a tiled floor: an open way
This installation method is simple and reliable. The downside of it is that the mounts are in sight.
The order here is quite understandable even for a novice plumber:
- Before starting the installation, select the place where the toilet will stand.
- Install the plumbing as it should stand.
- Mark with a marker the places where the holes for the fasteners will be located.
Important! When marking, hold a pencil or marker vertically. Otherwise, the holes and mounting points may not coincide.
- Draw a pencil around the toilet.
- At the hole-cutting site, first scratch the tile with a core so that the drill does not slip on the surface.
- Using a drill, make holes in the tile, and then drill the required depth on concrete with a puncher.
- Strip dust openings, fill with silicone sealant and insert dowels.
Important! At the same time, the sealant serves both as a fastener and as a waterproofing.
- Before installing the toilet, apply a roller of silicone sealant along the contour. This will protect the base of the device from water ingress.
- The last stage of installation is the installation of mounting sleeves and the tightening of bolts. Care must be taken as tightening too tight can damage the toilet and cause cracking.
- Close the attachment points with special plugs (they are sold in the same kit as the attachments). This makes it possible to make the design a little more aesthetic.
- At the end of the work, remove the remaining silicone with a spatula.
How to install a toilet on a tile in a closed way?
If you want to mount the plumbing in a closed way so that the fasteners are not noticeable, you need to clarify when buying whether your model is suitable for this. The principle of installation is similar to open:
- Before fixing the toilet on the tiled floor, choose the place of installation, install the device, draw a contour with a pencil and carefully transfer marks from the holes.
- At first, similarly to the open method, holes are drilled in the tile and filled with silicone.
- The connecting structure is mounted on dowels.
- The final stage is the direct installation of the toilet, with bolting through the holes located on the side.
to contents ↑Important! Sometimes you can’t drill holes for plumbing in a tile. In this case, the device is planted on a special glue. The adhesive can be replaced with epoxy or liquid nails. To improve adhesion, the surfaces are pre-treated with sandpaper. The curing time of the adhesive is from 12 to 15 hours.
Accession to the sewerage
How to install the toilet on the tile with your own hands - figured out. Now let's talk about connecting plumbing to the sewer system.
There are 3 types of drainage pipes:
- Vertical release. Such devices are common in Western Europe, quite popular in post-Soviet countries. Before installing the toilet, it is necessary to connect the flange to the latch, in which the sewer pipe is installed. The toilet is mounted on the flange.
Important! The advantage of this plumbing is that it can be mounted at any angle with respect to the wall.
- Horizontal release. The toilet is located at a certain angle to the wall. When supplying sewage, it is enough to attach special sealing cuffs or eccentrics.
- Oblique release. They are connected to the sewer in the same way as horizontal ones. In this case, it is necessary that the hole in the sewer pipe is located at the desired angle.
Important! Most often, a corrugated pipe is used to drain into the sewer, which helps to adjust the gap between the sewer drain and the toilet. Corrugation is fastened without adhesive, using a special membrane. Corrugation also allows you to adjust the angle.
A properly fixed pipe prevents moisture and unpleasant odors from entering the room.
to contents ↑Water supply
You can bring water to the toilet either externally or internally, depending on which model was purchased. But in any case, it is necessary to treat all joints with sealant so that there are no leaks.
Internal water supply involves the use of a flexible hose or copper tube, which are usually sold complete with a toilet. If necessary - the details will need to be purchased. In addition, if the thread on the tube and valve does not match, you will need adapters and special seals. After connecting all communications, it is necessary to check the tank for operability. If there are no leaks and the system works correctly, you can tighten the bolts to the end.
to contents ↑Important! Contact between ceramic and metal parts is not permitted. Use special rubber or plastic gaskets that are sold with the mounts.
The most common mistakes
Improper installation of a plumbing fixture can lead to leaks and / or unpleasant odors. Consider the most common errors:
- Not well aligned base. According to experts, this is fraught not only with leaks, but also with equipment breakdowns. For this reason, control the correct installation of the toilet by level.
- Poor tightness. Smudges under plumbing or a drain pipe indicate that insufficient silicone was used in the process.
- Blockages. During installation, pipes or hoses may become clogged with construction waste. To avoid this, check all hoses and pipes before connecting. This will protect the plumbing from premature damage.
- The cause of leakage in the tank is the failure of the valve seals.
Stock footage
Correctly installing the toilet on the tiled floor is a simple science and does not require any special knowledge. If desired, this can be done independently. You just have to correctly assess your strengths and capabilities and make a competent decision - take up this work or still entrust it to specialized specialists.
- How to choose a vacuum cleaner taking into account the characteristics of the house and coatings?
- What to look for when choosing a water delivery
- How to quickly create comfort at home - tips for housewives
- How to choose the perfect TV - useful tips
- What to look for when choosing blinds
- What should be running shoes?
- What useful things can you buy in a hardware store
- Iphone 11 pro max review
- Than iPhone is better than Android smartphones
 (No ratings yet)