

How to sew a rose pillow?

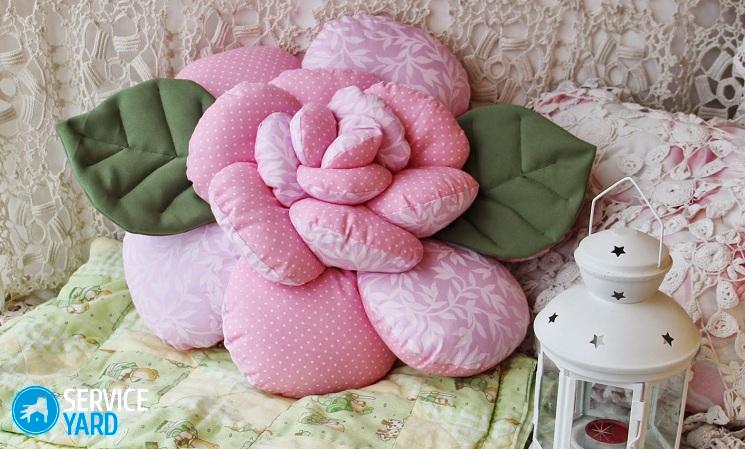
Pillows in the form of flowers give the room a special charm. They look spectacular on the couch and armchair. It’s not very convenient to sleep on such people, but such products for sleeping are not intended, they have an exclusively decorative function. About how to sew a pillow-rose, you will learn from our article.
to contents ↑What can be done from old things?
So, do-it-yourself pillow-flower - the master class begins. If you first took up needlework, it’s better not to rush to the store for expensive spectacular fabric, but to see what you have in your closet. For many women who are not inclined to limit themselves in clothes, the closet sometimes bursts with things that you do not want to wear, but it is a pity to throw it away. It is possible that there are:
- old but strong silk or chiffon dress;
- disused faux velvet skirt;
- beautiful, but uncomfortable synthetic blouse.
It's time to give them a second life, turning it into something spectacular for the home.
Cooking fabric
In order for a thing to be used in a new quality, it must be processed:
- Carefully cut off all buttons, buttons and hooks.
- Remove the threads.
- Spread the product at the seams, not forgetting the tucks, cuffs, collar and other small details.
- What you never need with a guarantee is better to throw it away right away.
- Wash pieces of fabric thoroughly, iron if necessary.
- If there are damaged areas, remove them.
Important! Regardless of whether you buy a new fabric or decide to use old clothes, the material must meet certain requirements:
- it should be thin, but dense and not very crumbling;
- it is better to take a plain fabric or with a small pattern, otherwise - the form will be poorly visible.
At the same time, the ability to change dimensions after washing does not play a big role, although it is useful to wash or iron through new cotton or linen before work through a damp cloth.
to contents ↑What else you need?
To make a flower pillow with your own hands turned out spectacular and high-quality, you will need a few more things:
- sewing machine;
- needles suitable for the fabric;
- sewing threads of appropriate quality;
- contrasting threads for basting;
- needle for hand sewing;
- synthetic winterizer or thin foam rubber;
- braid - in tone or contrast;
- cardboard for the template;
- ruler;
- compass;
- ball pen.
Braid
The braid can be of two types - thin for processing the edges of the petals and wide to sheathe the middle. With petals, you can do otherwise - for example, sheathe them with narrow lace. As for the quantity, it will need about 15 m.
Synthetic winterizer and threads
Sintepon needs about 3 m. You can, of course, fill the petals with thin sheet foam, but this option is worse - over time, this material begins to secrete substances that are not very healthy. The synthetic winterizer is absolutely neutral, so a rose pillow with your own hands will serve you until the fabric disintegrates.
Important! Parts stuffed with this material can be stacked in assemblies, and this is very important for this product.
Threads are best selected for a specific fabric. Cotton or linen is more convenient to sew with cotton, everything else is synthetic.
to contents ↑Important! If you have to connect several parts from different materials - synthetic threads (not nylon) are preferable.
Pillow Options
Do-it-yourself rose pillow is made of several petals. Their number depends on the size of the product:
- A small pillow (for example, for a puppet corner or a crib) consists of 5-6 petals, laid out in one layer.
- The product for the sofa consists of 8 or even 12 identical elements.
to contents ↑Important! And in that, and in another case, they are attached to the middle - a two-layer circle.
DIY pillow pattern rose
Any sewing begins with cutting. A throw pillow in this sense is no exception. There are only two cutting options:
- all petals are the same in shape and size;
- The pillow consists of two layers, and the upper petals are smaller than the lower.
In the first case, you will need one template, in the second - two, but they differ only in size. By the way, according to the same principle, a chamomile pillow is sewn with your own hands, and a poppy, and any other flower - they will differ only in the shape of the petals.
Important! You can make the petals of different shapes, but it is important that one side, which is sewn to the middle, be straight.
Making a template
You can, of course, find a rose petal pattern on the Internet or a book on needlework, enlarge it to the desired size and cut it out. But there is nothing difficult in drawing it with your own hands:
- Lay a sheet of cardboard of approximately A4 size on the table with the short side facing you.
- Set aside 3 cm from the upper right corner.
- Find the middle of the upper short side, mark it with a dot.
- Set aside 8 cm from the upper left corner and make another mark.
- Connect these three points in an arc.
- Set aside 1 cm from the lower right corner.
- Connect this point to the bottom left corner with a smooth line.
- Connect the same point with the beginning of the upper arc, that is, with a point that is 8 cm from the corner on the left long side.
- Cut the pattern along the contour.
Important! For a smaller petal, first cut out the rectangle, for example, reducing the standard sheet by ⅓ vertically and horizontally. It’s okay if the petals are slightly different in shape.
Center Pattern
This is even easier than a petal pattern. You need to cut out just a circle:
- If you made petals from a sheet of A4 format, a circle with a diameter of 10-15 cm is suitable for the middle if you sew a rose.
- Chamomile will have a middle center.
There are no strict ratios, the main thing is to observe approximate sizes.
to contents ↑Cut
DIY decorative pillow-rose - the workshop continues. And it's time to cut the petals. For a small pillow, all parts of which will be sewn from the same fabric, the procedure will be as follows:
- If the cut is large, fold it in half with the wrong side facing out.
- Fold the two pieces facing each other.
- Circle the pattern strictly along the contour.
- Cut parts by making allowances of 1-1.5 cm across all sections.
- Cut out the gaskets from the synthetic winterizer - from 2 to 6 for each petal, no allowances are needed.
Important! Cut the middle from the same fabric in a round pattern, not forgetting the allowances. There can be more layers of syntepon to make this part look more voluminous.
Pillow with two layers of petals
In this case, you need to carve 4 large petals and 4 smaller ones — a total of 8 parts. In all other respects, the cutting order is exactly the same as for the first option. The smaller the pillow, the thinner the petals will be. The lower ones can be made more voluminous, for the upper ones, 2-4 layers of packing are enough.
to contents ↑Important! If you use foam rubber, only one layer is laid in all the petals and in the middle.
How to make a rose pillow if all the details are already there?
So the time has come to arrange each element, then to bring them all together.
The middle
Let's start with the middle:
- Cut a piece of wide braid about 3 times the circumference.
- Sew along the long edge with a basting seam and make the assembly so that it matches the length of the workpiece in length.
- Iron the allowances of both parts on the wrong side, if necessary, make cuts so that the fabric does not puff.
- To the part that will be on top, on the seamy side, notice the braid.
- Fold the parts with the wrong sides to each other, laying a synthetic winterizer between them so that it is under the allowances.
- Sweep the structure 1.5 cm from the edge so that you can put the petals between the layers.
Petals
Each petal is processed in the same way as the middle, but there are also differences:
- Fold the petal parts with their faces facing each other, aligning all the slices.
- Sweep them around a rounded edge and stitch them.
- In several places, cut the allowances close to the seam.
- Turn the workpiece out.
- Open edge allowances inward.
- Insert the padding pad.
- Align the basting seam along the open edge.
Important! If you decide to sew the edges with braid or lace, you need to put the trim between the layers so that it protrudes from the front side in a straight line.
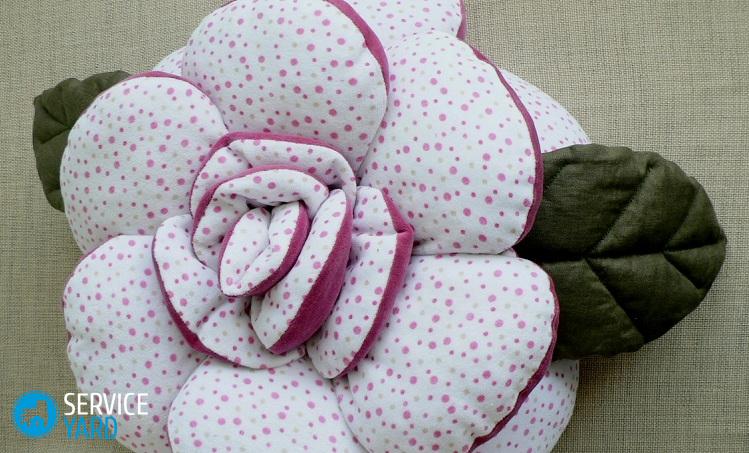
Assembly
Before stitching a flower pillow into a single product, gently pull off the basting. Then proceed as follows:
- Sweep the open edge of the petal between the layers of the middle.
- Insert the rest of the petals in the same way, if necessary, pulling up the basting and laying beautiful assemblies.
- Sew the entire structure along the edge of the middle with a zigzag or decorative stitch.
Two-layer pillow
The manufacturing procedure is not much different from that described in the previous case, but there are some features. With the middle one should do exactly the same, that is:
- cut 2 parts;
- to the top to notice the braid, previously laying it with folds;
- put in a synthetic winterizer;
- sweep away the details and set it aside for a while.
The manufacturing order of the petals is also no different. It is important to do them all before proceeding to the final assembly, which will be slightly different:
- Insert all the large petals between the layers of the center, that is, those that are from the bottom - the length of the open edge is adjusted by the assemblies.
- Bring them to the bottom layer of the middle.
- Arrange the upper petals so that they are in between the lower ones.
- Bring them to the top layer of the middle.
- Sew the blanks along the edge of the center.
to contents ↑Important! Since you are not going to sleep on such a pillow, you can decorate the middle. Suitable embroidery, applique, sewing with beads, large beads and much more.
Stock footage
As you can see, it’s quite possible to make an interesting decor with your own hands for decorating a sofa in a living room or a bed in a bedroom or a nursery. The main thing is to show your imagination, to choose the right fabric and not to spare time, carefully doing the cutting of materials and stitching the details together.
- How to choose a vacuum cleaner taking into account the characteristics of the house and coatings?
- What to look for when choosing a water delivery
- How to quickly create comfort at home - tips for housewives
- How to choose the perfect TV - useful tips
- What to look for when choosing blinds
- What should be running shoes?
- What useful things can you buy in a hardware store
- Iphone 11 pro max review
- Than iPhone is better than Android smartphones
 (No ratings yet)