

How to make a partition in the room?

Each inhabitant of the apartment needs a personal space where he could do something interesting, arrange his things in the way he likes. But at the same time, a favorite corner of one of the households should not annoy the rest and destroy the general style of the interior. Partitions can help to organize the space correctly. How to make a partition in the room? Read about it in our article.
to contents ↑Do you always need a partition?
There are several ways to divide an apartment into zones. Sometimes just laying a rug of a different color is enough to designate, say, a children's corner or a mini-workshop.
Important! This option is good when the apartment is small and you think more about how to expand it than about the possibility of privacy.
Partitions can be installed if at least some of the following conditions are met.
The family has more than two people
If a couple lives in the apartment or, say, a mother with a child, there is no need to install additional walls. You can restrict yourself to portable screens, if you really need to highlight some zone. But there are three of you, in addition, the child has reached adolescence - it is very desirable to fence off his personal space with something more or less impenetrable.
The purpose of the zone is fundamentally different from the general purpose of the room
To hide from prying eyes and even not very prying eyes the part of the room where the dressing room, study or carpentry workshop is located is also a worthy task. Let there be a small room, but one in which nothing will distract.
The room is very large and multifunctional.
Quite often, the need to allocate some parts arises in large studio apartments. If there is a lot of space, it is not necessary to be limited to screens and draperies, you can completely make two out of one room.
to contents ↑What are the partitions?
Before you make a partition in the room with your own hands, it is useful to understand how you can fence off part of the room. Maybe no construction work is needed.
Partitions differ:
- by design;
- according to the material.
The design can be one of three types:
- mobile;
- transformer;
- stationary.
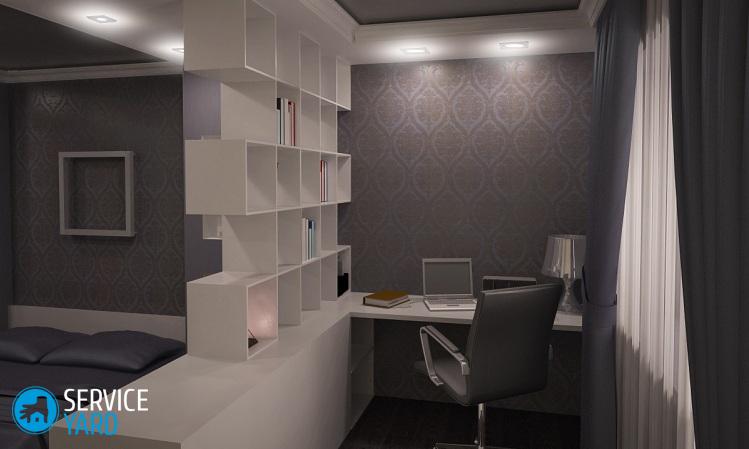
Screen, curtain and shelving
A mobile partition is screens, draperies, small racks. Advantages of this type:
- no approvals required;
- no construction work needed:
- low cost;
- the ability to effortlessly move the structure around the room.
Important! You can make such a design, say, from a large flower stand. The most popular option is sliding screens. They are inexpensive, if necessary, you can change the decor. The main disadvantage of such partitions is that the room is still not isolated.
Transformers
In this case, construction work and approval are also not required. The functions of the partition are performed by either a cabinet or a compartment wall with a door. The advantages are approximately the same as those of mobile partitions - you can rearrange it at one’s discretion, either in one corner or in another, only a little more effort is required for this.
Important! Such walls provide more reliable insulation of the corner. At the same time, the transformer has other functions - it can be a wardrobe, a table with a shelf or bookshelves.

Stationary partition
This is actually an additional wall. Its advantages are obvious:
- clearly and definitely shares the space - it turns out actually an extra room;
- can serve for a very long time;
- any materials are suitable for decoration.
Important! The disadvantages include the fact that some financial investments will be required. In addition, you won’t move such a wall, so you need to think carefully before making a similar partition in the room. In some cases, coordination is required - it is better to find out in advance at the local administration. To mount such a partition, you need special tools and materials, as well as some work skills.
Office and apartment
Stationary additional walls differ in appearance. They may be:
- Open. An open partition is part of the wall. It may not be up to the ceiling, but, say, to the middle of the height of the bearing wall. Sometimes it is made high, but narrow - not a part of the room is separated, but a corner. There are combined options when a narrow partition is supplemented with a cabinet or a screen.
- Closed. The closed version is an ordinary wall, in which a door or a window is often made (in other cases, holes are cut in an adjacent wall - and here quite often there is a need for coordination).
What to make a partition in the apartment?
There are a lot of materials from which you can make an additional wall in your home:
- brick;
- concrete;
- foam concrete;
- aerated concrete;
- drywall;
- wood;
- plywood;
- Chipboard;
- Fiberboard;
- glass blocks;
- GWP.
to contents ↑Important! Brick, foam concrete or concrete walls are the most reliable, but this is also the most time-consuming option. True, in this case, the frame is not needed. The frame will require an aluminum profile. For plywood partitions, the profile is replaced by slats.
Drywall partition
If you are still deciding what to make a wall of the apartment from, pay attention to drywall.
The advantages of this material are obvious:
- strength;
- durability;
- comparative simplicity of work;
- more or less acceptable cost.
The main disadvantage is that this material, if not specially treated, is poorly related to moisture. Both gypsum and cardboard are deformed under the influence of water. Therefore, special moisture-proofing impregnations are used.
Important! Drywall does not provide reliable sound insulation, so only “quiet” rooms can be separated with such panels.
What materials and tools are needed?
To make a plasterboard wall, you need the most ordinary tools that are in every house where repairs are underway. In extreme cases, some of them can be rented or borrowed:
- building level;
- construction plummet;
- hacksaw for metal;
- construction gun;
- dowels.
Important! As for materials, in addition to drywall and profile, you need a door (if it is supposed to be in this wall), as well as materials for surface treatment - soil, putty and what you will finish.
Building a wall
First you need to outline and, if necessary, agree on a plan.
Important! It is necessary to coordinate it if it is supposed to somehow change the strength of the bearing wall in the process - for example, make an arch in it or cut through the door. If this is not the case, there will be no need to contact the local administration.
The sequence of work will be extremely simple:
- Mark the place where the wall will be, make markings for the profile - for this you need a plumb line and level, because the lines must be strictly vertical and horizontal.
- Prepare an aluminum profile - you can buy it at a hardware store, and you just have to cut it according to size.
- Install the profile by temporarily securing it with sealing tape.
- Mark the points under the dowels.
- Put dowels - the fastest and most reliable way to do this is with a construction gun.
- Mark the location of the doorway.
- Mount the doorway posts.
- Install the door jumper.
- Mount the remaining racks.
- Mark and cut drywall sheets.
- Attach them to the racks.
- Next, a layer of soil is applied to the drywall panels on one side and the other, and only then - the finish.
Foam concrete
You can make a partition in the room with your own hands from foam concrete or aerated concrete.
Important! These lightweight modern materials provide very good sound insulation, so if you have a fan of hard rock without headphones in your home, think about this material. In addition, gas and foam concrete have excellent heat-shielding properties.
Training
Before you put such a wall, you need to prepare a place.
- Where there is a partition, remove the laminate or linoleum.
- Remove glue residue.
- Degrease the base with solvent, white spirit, etc.
Foam wall
Blocks are placed on the concrete mixture, which must be prepared immediately before work - however, like the panels themselves:
- Mark the wall under the profile in the same way as for drywall.
- Mark the position of the door.
- Install 2 wall blocks.
- Pull the cord between them.
- Strictly lay the first row on the cord, firmly attaching it to the concrete base.
- Having laid the wall before the doorway starts, stop the work and go to another wall block.
- Lay the first row to the door - to put a jumper, there are special grooves in the blocks.
- The doorway can be filled with bricks so that the wall does not deform.
- Wait until it dries completely - the wall will be ready in about a day.
- Put the door frame and fasten the door.
Wooden partition
Wood is a traditional material for interior partitions. It holds heat well, it can have a beautiful texture, so it is quite possible that additional decoration is not needed. However, protection from noise is not very reliable, and even with strong humidity the untreated tree behaves badly - mold appears on it. But for a decorative partition, this is perhaps the best material.
Materials for work
First, as always, you need to prepare materials and tools. You need:
- boards;
- beam for the frame;
- beam of triangular section;
- carpentry tools;
- wood glue;
- nails.
Training
As always, first you need to determine the place and take measurements, as well as mark the walls, floor and ceiling.
How to make a wall of a house of wood?
The sequence will be as follows:
- Pick up the boards according to the size (the frame should be 1 cm smaller).
- In two bars, make grooves along the thickness of the rails of the frame.
- Mark the floor under the bars of the base - this should be a straight line.
- Nail the bars according to the marking.
- Fix the beam of triangular section to the ceiling.
- Insert and lock the frame in the lower bars.
- Attach the frame to the ceiling beam.
- Board the entire structure with planks.
- Fill the gaps with foam.
- Put the door frame.
- Install the door.
to contents ↑Important! Partitions from plywood, chipboard or fiberboard are made in exactly the same way.
Brick wall
The most durable and reliable material. It gives excellent sound insulation, holds heat well, is not afraid of water and temperature extremes. True, there will be more fuss with him than with plates and boards, but the result is worth it.
Important! Brick, however, is not suitable for wooden houses - such a partition can only be placed on a concrete base. For internal walls, it is better to use lightweight or hollow bricks.
Another significant drawback - the wall may not be very beautiful, so it will have to be plastered. But if you perform all the work efficiently and accurately, you can well do without finishing. Now designers offer a lot of interesting solutions on how to use a brick wall in the interior.
Materials
To lay the brick you need:
- sand, cement or mortar for mortar;
- brick itself - the amount is best calculated in advance based on the area of the future surface;
- reinforcing wire;
- partitions;
- building level;
- plumb line;
- Master OK.
The sequence of work will be exactly the same as on any construction site:
- The flooring is best removed, especially if it is a laminate or linoleum.
- Designate a place for the partition - in this case it will be enough to draw a straight line on the floor between two points on opposite walls.
- Make a solution: if you have a ready-made mixture, dilute it with water according to the instructions, if sand and cement are separate, mix them in a 5: 1 ratio.
- Apply a solution of 1 cm thick on the wide side of the brick, press it to the floor and to the wall.
Important! In general, it is usually not the brick that is smeared with the mortar, but the base, but it is very difficult for a novice mason to make a neat layer of such a width that it fits completely on the brick and the mixture does not crawl over the edges.
- Next put the next brick on the mortar - and so on until the end of the row.
- Remove excess solution with a trowel.
- Start the next row with half a brick, and then proceed in exactly the same way as when forming the first layer.
- Make a few more rows - for the first case ten will be enough.
- The next day, also do 10-12 rows.
to contents ↑Important! Brick - the material is quite heavy, so it is better to build intermittently, allowing the mortar to solidify.
GWP
There are other materials for partitions - they are less popular, but no less interesting. For example, GWP - tongue-and-groove plates. Such panels have much in common with gypsum plasterboards, since the main material for their manufacture is gypsum. But they are put much more easily than others.
Important! If you are thinking about what to make a partition in a room from, and chose such panels, you need special glue for GWP boards - it is quite easy to find it in construction stores. There you will also find the rubber hammer necessary for work.
Start the installation with the preparation of the base, that is, with removal of the coating and degreasing, and then:
- Mark the base.
- Apply glue.
- Wait half an hour.
- For slabs designed for the first row, cut the comb.
- Lower the side where the comb was down.
- Spread the remaining sides with glue.
- Press the plates with a rubber mallet.
- Use a spatula to remove excess glue.
The first row is ready for you! Now you need to apply glue into the grooves of the installed tiles and put the next row of ridges in the grooves.
to contents ↑Important! It is better to make the wall gradually, allowing the glue to dry.
Glass block wall
The technology for installing such partitions is similar to that used for bricks.
Important! The sand concrete mixture should not have large grains of sand, it is best to use a ready-made dry mixture.
You need plastic crosses - they are also called painting crosses, and reinforcing rods. All work must be done very carefully - no plaster will hide your sins:
- Clean and level the base.
- Put the first row on the concrete mixture, remove excess mortar.
- Insert crosses between cells.
- Lay the reinforcing rod.
- Lay out the next row and the rest in the same sequence.
to contents ↑Important! It is better to put the wall gradually, laying no more than three rows a day.
Stock footage
As you can see, there are many variations on the topic of what to make a partition in the room. As we found out, the choice of technology and material depends on your original goals, financial capabilities, design features of the house or apartment itself, as well as experience in the repair work. Make a smart choice, and then you will not have to regret the effort, time and money spent!
- How to choose a vacuum cleaner taking into account the characteristics of the house and coatings?
- What to look for when choosing a water delivery
- How to quickly create comfort at home - tips for housewives
- How to choose the perfect TV - useful tips
- What to look for when choosing blinds
- What should be running shoes?
- What useful things can you buy in a hardware store
- Iphone 11 pro max review
- Than iPhone is better than Android smartphones
 (No ratings yet)