

How to make a basket of paper?

There are a lot of all kinds of paper crafts. It is not surprising, because this material is very convenient - you can make anything from it: from applications to things you need in everyday life. In this article, you will learn how to make a paper basket in several ways. Such a thing is useful in that it can store some useful items, plus such baskets perfectly complement any interior.
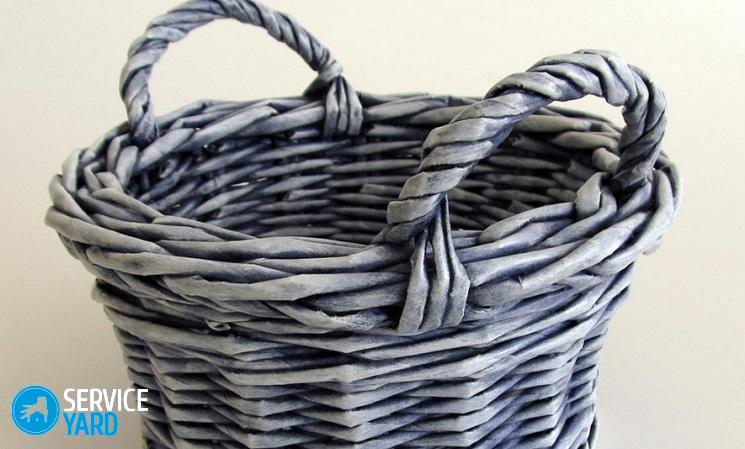
to contents ↑Basket of newspaper tubes
The product that will turn out in the end will have unusual beauty, and even a beginner needlewoman can cope with its weaving.
Materials for work
In order to make such an unusual element of decor, you need to stock up on the following materials:
- Old newspapers (you can use magazines).
- A long knitting needle.
- Glue - it is better to take PVA.
- Gum.
- Sharp scissors.
- Clips for drying clothes.
- Brushes to glue and paint the basket.
- Stationery knife.
- The base to be used for weaving.
- Thick cardboard.
- A small load - it is needed in order to give the product a shape.
- Acrylic or gouache.
- Varnish for decoration.
- Decorative items, such as artificial flowers, beads, beads, decoupage napkins and more.
Algorithm for manufacturing tubes
In order to make a basket of paper with your own hands, you need to make as many paper tubes as possible - this is necessary so as not to come off on this matter during the entire work procedure.
In order to make paper tubes, you need to adhere to this algorithm:
- Dismantle the paper into double sheets, lane them into strips, the width of which will be 10 cm.
Important! It is desirable that the length of the strips be the same, so it is better to use newspapers or magazines of the same sample.
- Cut the paper along the drawn lines.
- Take the prepared knitting needle, attach it to the corner of the strip at an angle of 10 degrees.
- Start wrapping a strip on a knitting needle until all of it is twisted into a tube.
Important! Keep in mind that one end of the paper tube should be smaller in diameter than the other end - this will help to build up the tubes later.
- Lubricate one end of the paper with PVA glue and glue it so that the tube does not unwind.
So, the tubes are made.
Important! If you have a desire, you can immediately paint them in the desired color with gouache or acrylic paint, if not, you can do this when the basket is completely ready, or not paint it at all.
There are two ways by which you can achieve the desired result.
Method 1 for the manufacture of baskets
This method is the easiest. To make a basket of paper, you must perform the following procedure:
- Cut two cardboard bottoms that will be in the shape of a circle or oval.
- Flatten a 20 mm paper tube from the edge, grease this section with adhesive, stick it to the bottom.
- Carry out the same procedure with other newspaper tubes, evenly spacing them along the perimeter of the bottom. The approximate distance between them is 2 cm.
- Lubricate the second bottom with glue, glue it with the first so that the glued sections of the tubes are between these two parts.
- Put the load on and let the base dry completely.
- Bend all paper rays so that they look up.
- On the inside, glue the working tube at the moment to the bottom, and then start weaving the walls.In this case, it is necessary to place it in front of the base tube, then behind it.
- Weave the basket this way until you reach the desired length.
- When the product is ready, it can be decorated with decorative elements as you wish.
Method 2 for making baskets
This method will be distinguished by its complexity. If you want to follow it, then it is better not to paint the paper tubes in advance.
In order to make a basket of paper with your own hands, you must follow the proposed algorithm:
- Armed with a bottle or can, circle it at the base on a piece of thick cardboard.
- Cut two circled circles.
- Now you need to make the frame. For this, it is necessary to flatten one edge of a newspaper tube by 2-3 centimeters.
- Apply glue to one base circle.
- Glue paper tubes to this base with tapered ends - they need to be placed at an equal distance, which will be approximately 2 cm.
Important! In order for the parts to stick better, it is recommended to use a press or an adhesive gun.
- Lubricate the second circle with glue and stick it on the second, thereby hiding the attachment points of the vertical tubes.
- Allow the workpiece to dry - it will take several hours.
- Take a tube with a flattened edge, stick it to the base. To get her for the right vertical vine, which is closer so that she wraps around the frame from the outside. After that, it must be planted in the other direction so that the tube wraps around the vertical vine from the inside.
- Continue to follow the algorithm until the first row is gossiped. When the paper tube finishes, insert a second one into it.
- Further, to make the basket of paper with your own hands look neater, you need to insert a jar, a vase or a bottle into the resulting blank.
Important! It is necessary that the bottom of the tank coincides with the cardboard bottom of the future product.
- Weave as high as you want.
- Now the tip of the last tube must be cut off and fixed with good glue in the middle of the craft.
- Trim the first vine, which plays the role of the frame, and stick the remainder to the inside of the product.
- Do the same with the rest of the vines. The basket is woven.
- At the request of the basket, you can weave and glue the decorative handle.
- Apply the desired paint to the product. It is better to do this in two layers. The base of the basket is best covered with three layers of paint.
The basket is ready! Subsequently, it can be used as a vase for dried flowers or as a box for the right little things.
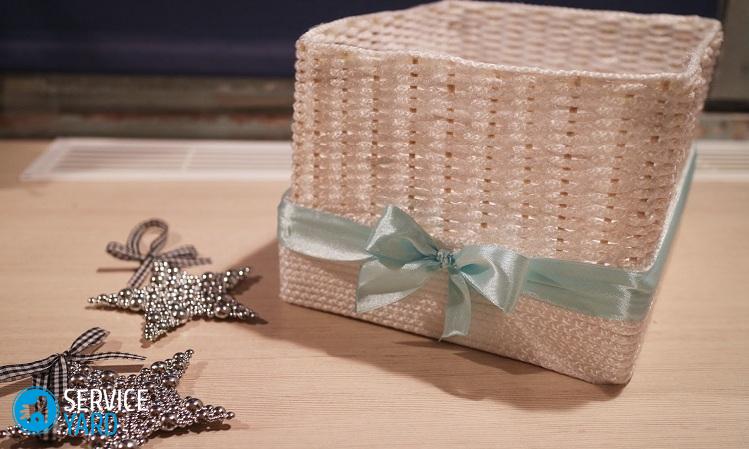
to contents ↑Master class for children
In order to weave a basket of paper or cardboard, you will need the following materials:
- Colored paper in two colors or cardboard.
- Scissors.
To make such an interesting basket, you need to follow this instruction:
- Harvest strips. To do this, cut the paper into strips 1-2 cm thick.
Important! If the paper is ordinary, thin, it is better to fold the strips in half, if it is cardboard, then it is better not to fold. For this reason, strips of plain paper are better to cut twice as long as necessary for work.
- Take 8 sliced strips, whose length is 32 cm.
- Stripes of one color put on the table, and on them stripes of a different color. Lay the stripes so that they are woven into each other in a checkerboard pattern.
Important! Try to make this colorful square dense enough, because this is the basis of the future basket.
- Bend the strips up, braid them with other strips.
- Excess should be bent into the product and glued.
- We make the handle of the basket from one strip and glue it.
The basket is ready!
to contents ↑Stock footage
Paper products can be completely different, it is interesting to make them for both kids and adult needlewomen. From this article, you learned some interesting ways to make a small paper basket for children and adults. Choose more intuitive and simple, and do it!
- How to choose a vacuum cleaner taking into account the characteristics of the house and coatings?
- What to look for when choosing a water delivery
- How to quickly create comfort at home - tips for housewives
- How to choose the perfect TV - useful tips
- What to look for when choosing blinds
- What should be running shoes?
- What useful things can you buy in a hardware store
- Iphone 11 pro max review
- Than iPhone is better than Android smartphones
 (No ratings yet)