

How to make a box of paper with your own hands with a lid in stages?
Probably, many will agree that not only children, but also adults love to receive gifts, and if it is hidden in an original box, it will leave an unforgettable impression of a surprise. And we are sure that the time spent on its creation will pass quickly and imperceptibly, because the result will definitely please you. Here you can find the most original and interesting ideas on how to make a box of paper with your own hands with a lid. The step-by-step instructions will help to issue it without any difficulties in a matter of minutes.
to contents ↑Important! Before you start creating a gift box, we advise you to practice on simpler paper, because then you can take into account all the errors and inaccuracies that may arise.
Choose material
So, how to make a beautiful DIY gift box? To do this, you need the following materials:
- Corrugated cardboard;
- Laces, ribbons, ribbons;
- Buttons, beads;
- Ready-made shortcuts;
- Scissors, clerical knife;
- Double-sided tape, glue stick;
- Super glue or “Moment” glue universal (transparent gel) for fixing beads and other things;
- Pencil, ruler;
- Hole puncher;
- Compass.
Now there are many ideas for creating original gift boxes, for you we have selected the most interesting and affordable options.
to contents ↑Box with a round base:
- It is necessary to cut 4 circles: with the help of a compass we draw circles (the diameter you choose yourself) from dense packing cardboard, or also from porous. Two large mugs and two small ones.
- From tinted cardboard or any other that you have, we cut out two strips so that they match the size of the circles, with a margin for overlapping, one of them is wide, the second is narrow.
- We glue together with the help of glue “Moment” or double-sided tape two large circles. After - separately glue the remaining two circles.
- We need small circles for the base of the box. We apply the “Moment” transparent glue on the sides of the circle by gluing a strip of cardboard; for reliability, another strip can also be glued on top of this.
- We do the same with the lid for the box: we stick a narrow cardboard strip along the edges of a large circle.
to contents ↑Important! To make your box look more festive, you can create a beautiful bow from a color or with a print of a ribbon. To do this, cut the ribbon in half, stick its ends to the inside of the lid, and tie the remaining long ends to a bow on top.
Classic gift box
And for lovers of the classics there is such an option: a small box for a small gift. We will need the following materials:
- Ruler;
- Scissors;
- Thick colored paper or paperboard (soft).
Step by step, we will consider the whole process of how to make such a box of paper with your own hands. For blanks, you need two squares - large and small. The difference in size is 1 cm, for example 15:15 and 14:14. Let's issue them:
- We select the lines of squares diagonally, after - we bend the corners to the center.
- Further, the angles bent to the center must be bent to the opposite bend line, and then to the near bend line.A square should form in the center, which will subsequently become our future bottom.
- After that, on both sides of the diagonals formed, we cut along the first deflections to the designated square in the center.
- The edges that we cut, we fold along the bends, so we get the walls of the box.
- The sharp tips of the walls are bent inward, to the center of the square.
- With the remaining unbent paper tongues, we grab the curved ends, thereby wrapping them inward.
We got a box-lid.
We do the same manipulations with the second square, and due to the fact that this square was one centimeter different in size, the box comes out smaller and fits freely into the previously made lid.
Important! We recommend using thick paper to create this option. It will fit a small gift, approximately 5-6 cm and a height of 2-3 cm. One that fits in your palm.
To fix the gift inside, put a crumpled napkin or light paper on the bottom. As you may have noticed, making a gift box with your own hands is quite simple. To add originality and an interesting accent, a colored braid will help, with which we will tie our box.
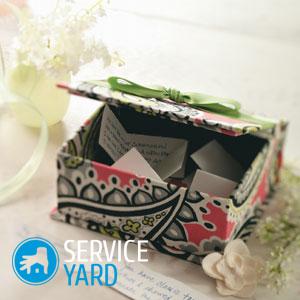
to contents ↑Box with a secret
And now for your attention we offer to make small gift boxes with a surprise. The so-called snag box: when the lid is removed, it opens up. How to make a cover - you can look in the second option described above.
So, let's proceed to the implementation of the gift boxes with a secret.
Materials for work
For her we need:
- Scissors, glue, thick paper;
- Old postcards, beads, ribbon;
- Decorations, decorative ribbons.
Important! If you decide to make the bottom 18x18 cm, then for the lid you need 1 cm more, that is 19x19 cm.
Stage master class:
- The box itself is made in this way: we divide the sheet into nine equal squares, we do not need the corner ones, we need to cut them out. We bend the remaining squares inward, forming a box.
- We decorate the interior as your imagination wishes (with pleasant wishes or verses), glue beads, rhinestones, buttons, drawings from postcards, a small bouquet.
Important! Do not overdo it with the decor so that the gift nevertheless remains the main accent in your surprise.
- Now you can put the gift in the middle, put the walls of the box together and cover it with a lid, you can also bandage the ribbon.
Felt box
Felt is a miracle material from which you can create not only handbags, jewelry, toys, but also beautiful gift wraps.
Materials
To create it, we need:
- Colored felt - its density can be different, depending on the thickness of the sheet, choose the most convenient and flexible so that it is convenient to stitch;
- Threads with a needle;
- Ruler;
- Glue (super or hot glue),
- Scissors;
The master class in stages:
- Draw a canvas with a pencil to leave less traces and not stain the fabric, 9 squares. You can and rectangles, cut corners.
- Decorate with colored appliques from the outside, if desired, you can embroider unpretentious patterns, decorate with beads or beads.
- Gently bend the walls and sew them together. Seams with contrasting threads will give a more interesting and unusual look. In general, there are no restrictions, so you can freely experiment.
to contents ↑Important! Felt boxes can subsequently also serve as a casket for various trifles or jewelry. It is also possible to use them during competitions for children and all kinds of holidays.
Beautiful flower box
If you need a minimum of costs and time spent, then for you there is the option of a simple box without glue:
- We print or you can redraw the template on colored paper.
- We cut the workpiece, create bends along the lines, and use a ruler.
- If you have white paper, turn the blank over with the front side, while tinting it over the entire surface or only the edges using a sponge and a stamping pad (you can also use pastel or watercolor paints).
- We hide our present in the middle, and we can collect the “petals” from above.
Heart box
For festive events, we can make such a tender and romantic box of paper with our own hands.
Materials
For her you need to take:
- double-sided cardboard 25 * 25 cm;
- glue;
- scissors;
- plastic for lamination 12 * 12 cm;
- stationery knife;
- beads, beads or rhinestones;
- artificial flowers;
- scheme;
- leaflets - you can cut from lace and stick on non-woven for density.
We make a box of paper - a master class in stages:
- Print and cut out the template, go along the indicated lines with a blunt knife or scissors to make neat grooves in the right places.
- Transfer the heart template to the cover detail and cut it out with an office knife.
- We make folds along the lines and fold the box, after that we fix it with glue.
- From the wrong side, gently close the window with a film.
- We decorate the cover with flowers made of paper or fabric, stripes with beads.
- Make the bottom the same.
- At the end of the work, we supplement the composition with tape.
Cardboard Gift Packaging
To make packaging for a presentation from cardboard, we need:
- A sheet of cardboard;
- Scissors or compasses;
- Circuit;
- Double-sided tape or glue.
Getting started:
- Cut out a rectangular box template from a solid sheet, as shown in the diagram.
- We draw along the bend lines with scissors or the point of a compass to evenly fold the sides of the box.
- After - glue with pieces of double-sided tape as shown in the picture.
- We decorate with color pictures or inscriptions - it depends on the event for which you are preparing.
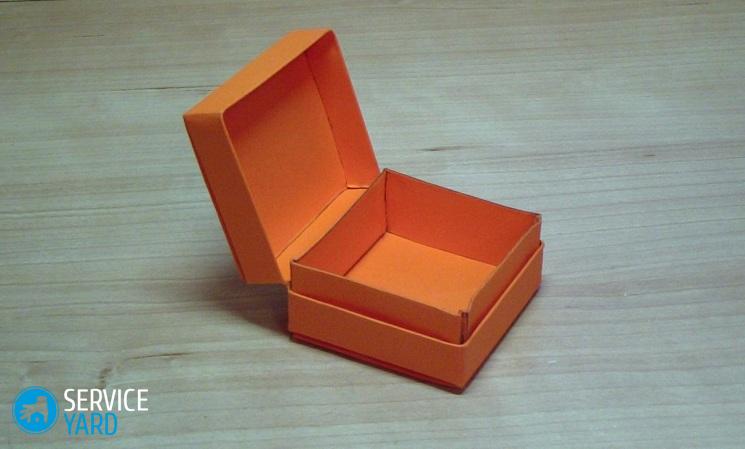
Cardboard Carrots
It sounds intriguing - it will be a wonderful and unexpected surprise where you can hide a small gift, for example, jewelry, sweets, small toys.
Important! If you are thinking about what to put in such a package, here are a few ideas:
- A friend or sister can pack in this way nail polish, lipstick.
- You can put a bracelet, earrings or a chain in a “carrot” for your wife or beloved girl.
- For a father or brother, such presentations as cufflinks, tie clips or money are suitable.
Materials for work:
- Orange thick paper;
- Dense green threads;
- Scissors;
- Transparent moment;
- Green fabric (felt is suitable);
- Box template;
- Hole puncher.
Working process
So, the steps for creating a carrot box are:
- We print a template on orange thick paper.
- Cut the blank. Fold our product along the dashed lines.
- We assemble and glue the workpiece. In the upper parts of the workpiece, we create a hole with a hole punch.
- From green fabric we cut out leaflets, tying green ropes to them. Pieces of five such leaves will be enough.
- We tie the leaves to the holes that we previously cut out with a hole punch.
to contents ↑Important! On green paper or a finished cardboard tag, you can create an additional leaflet on which you can leave a congratulatory inscription.
Stock footage
We hope that our small selection of ideas will come in handy and you will be able to surprise your family and friends with an unusual surprise. Good luck and new creative experiments!
- How to choose a vacuum cleaner taking into account the characteristics of the house and coatings?
- What to look for when choosing a water delivery
- How to quickly create comfort at home - tips for housewives
- How to choose the perfect TV - useful tips
- What to look for when choosing blinds
- What should be running shoes?
- What useful things can you buy in a hardware store
- Iphone 11 pro max review
- Than iPhone is better than Android smartphones
 (No ratings yet)