

How to make a guitar with your own hands?

The idea of making musical instruments is visited by many musicians, including guitarists. Of course, it’s hard to expect that the first time you get a masterpiece that will sound great after two or three hundred years. But all the great masters began with something, so why not try it? How to make a guitar with your own hands will be discussed in our article.
to contents ↑What does a guitar consist of?
Before you make a guitar with your own hands at home, you need to understand what exactly you have to do, that is, figure out what this instrument consists of. At first glance, two parts are visible:
- housing;
- vulture.
Body
If you look at the case more closely, it becomes clear that it is not hollowed out from a solid piece of wood, like some other tools. From the outside you can see:
- lower deck - solid or in two parts;
- upper deck - a plate with a round resonator hole, decorated with a socket, that is, an ornament;
- a shell that connects both decks;
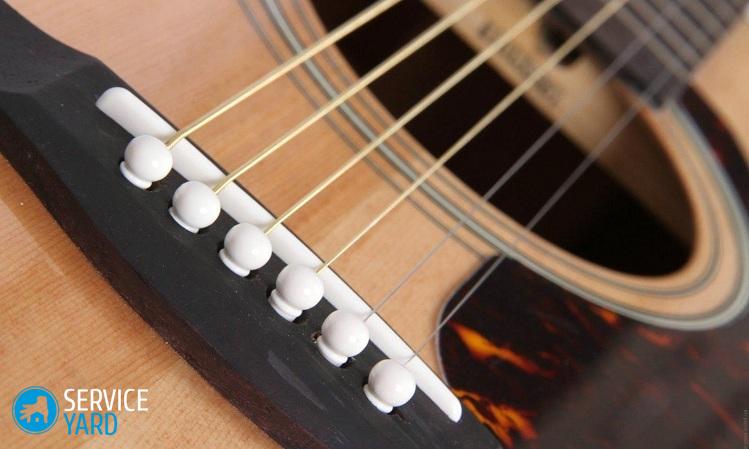
- stand - a small record on the upper deck;
- lower threshold - elevation on a stand.
The stand serves for fastening the strings, and their height above the upper deck depends on the lower nut. Inside the body are springs. These are wooden strips that provide strength to the case and the right vibration. They are:
- transverse;
- fan-shaped.
If you look inside the guitar, you will also see the footer - narrow plates that are glued along the center line of the lower or upper deck. However, not all models have these details. There is a button on the shell - it serves to ensure that you can attach the belt and play while standing.
Important! The resonant hole also has another name - the voice-over.

Vulture
Upon closer examination, it turns out that the bar also consists of several parts:
- heads;
- pens;
- overlays;
- heels;
- nut and frets.
In the upper part there is a head on which the ring mechanism is placed. To him, in turn, are attached strings. The overlay is divided by metal strips into unequal segments - at the head they are wide, and the closer to the outlet, the less distance.
Important! The metal strips are called sills, the gaps between them are called frets. Some frets have dots or asterisks. Most acoustic guitars mark the fifth, seventh, tenth and twelfth frets in this way. Sometimes marks are not placed in the central part of the neck, but on top.
The neck has another heel, with which it is attached to the body. For expensive instruments, the bar is glued. For cheap mass production tools, it is fixed with a screw. This screw adjusts the distance between the fretboard and the strings.
to contents ↑What to make a guitar from?
Different materials are used for the body and neck. The body can be made:
- from wood;
- from plywood;
- from plastic;
- from metal.
Wood
Expensive models are made of high-quality wood, while different species are used for different parts.
Important! If you choose a good material and store the instrument correctly, the guitar will last a very long time, and the more time passes, the better it will sound.
Plywood
In stores you can see cheap tools made of plywood. To get a good sound from such an instrument, you need not only skill, but also great luck.As an option for beginners, you can try to make a guitar out of plywood with your own hands. But we must consider this approach solely as a training phase of assembly for the subsequent manufacture of expensive wood tools.
Important! Plywood decks quickly crack, springs fly off, and the tool deforms.
Plastic
In Soviet times, the Leningrad factory produced plastic guitars, popularly known as the “trough”. Some models were made entirely of plastic, while others - the upper deck was wooden.
Important! It was believed that plastic is more durable than wood, but this turned out to be wrong.
Metal
Finally, metal guitars can be classified as exotic. They gave a strange sound, vaguely reminiscent of a banjo. They were made especially for tourists, because in a water trip it was a universal household item, which, if necessary, could even be rowed. Musicians, however, loved such artifacts much less than watermen.
to contents ↑Important! For those who are going to make a guitar with their own hands, on which they can play, it is better to abandon the exotic and choose something more traditional for their product.
Which breeds are suitable?
To make a guitar with your own hands, not all wood is suitable. At the same time, different parts of the body are made from different breeds.
Upper body
Conifers are suitable for the upper deck:
- resonant spruce;
- cedar;
- Pine.
In expensive models, resonant spruce and cedar are used - classical guitar materials. It will cost a lot to procure, it is not possible to get it everywhere - boards of the required size are not found in every carpentry workshop. However, in online stores you can find the right material, and even already in the form of almost ready-made fragments that can only be completely processed and assembled together.
There are several varieties of spruce:
- German
- Sith;
- ordinary.
Important! A combination of spruce with cedar gives an interesting effect. For cheap models, pine is also used, but such an instrument sounds worse.
Lower deck and shells
These parts of the guitar are usually made from the same kind of wood. It must be solid, so most often use:
- rosewood;
- maple;
- Red tree.
An instrument with a maple lower deck has a sharper and louder sound than the other two. But if the material is well dried and processed, only high-class professionals will notice the difference.
Important! Boards can be found not only in the workshop. If, for example, the neighbors threw away the old piano (and this often happens now), do not pass by, but remove from it all the wooden parts that are suitable for the manufacture of many musical instruments.

Vulture
It affects the sound quality not as much as the body, although musicians believe that the instrument has no trifles. But the acoustic properties in this case recede into the background, the main thing is the ability to hold the shape.
Therefore, to make a guitar with your own hands, or rather precisely its signature stamp, use solid rocks:
- beech;
- maple.
The overlay, among other things, should be beautiful. Therefore, the most popular materials for its manufacture:
- ebony;
- rosewood.
To decorate
Nice tool to pick up. Therefore, professional masters in every possible way are refined, trying to give their products a unique look and grace.
Most often, in the course of work on the manufacture of guitars with their own hands are used:
- thread;
- inlay.
Carving on the case, of course, is more than dubious. It reduces durability and greatly affects sound quality. Therefore, carved ornaments adorn only the head of the neck.
As for the inlay, it can be on the neck, and on the body - for example, around the outlet. To do this, you can use pieces of wood of different species. Stitches are used to mask the seams.
to contents ↑Start making your own guitar
So, you still decided, despite the fact that not all materials are suitable? Well then, you have to try.But it is advisable to draw up a work plan in advance. To make a quality guitar with your own hands at home, it will be something like this:
- Choose your guitar type.
- Find a suitable drawing.
- Transfer it to the tree of the selected species.
- Learn the process.
- Find and prepare the room.
- Prepare the tools.
Drawing
It makes no sense to independently develop a drawing - a person who has taken up business for the first time is unlikely to cope with this task. But there are many books on the manufacture of musical instruments - there you will find the necessary drawings. Now this stage has been greatly simplified, because you need only two things to search - a computer with Internet access and a printer on which you can print patterns. In extreme cases, you can take a finished guitar and just circle it.
Technology
As for technology, you immediately need to think about how you will bend some wooden parts. This is the most crucial moment. The electric heater will really help you out.
Room
This is a very important point! And it's not just about comfort. Materials require special conditions. The room should be:
- warm but not hot;
- with good lighting;
- with good ventilation;
- necessarily dry.
Important! Humidity in the workshop should not exceed 50%.
Choose a board
If you decide to make blanks yourself, rather than buying in a workshop, you must first select a board. Regardless of which species of tree you prefer:
- the future deck should be without knots;
- the fibers should run parallel and not make sharp bends.
It is very good when there is an opportunity to see a lot of boards. If you like a few, tap them and listen. You should choose the one from which you liked the sound better.
Important! Along with the blanks, in order to make a guitar with your own hands, you need to buy strings and a ring mechanism.

Cooking Tools
A set of electric and hand tools is best prepared immediately. You need:
- jigsaw;
- manual jigsaw;
- electric drill;
- Sander;
- milling machine;
- compressor installation;
- spray gun;
- cans of varnish;
- plane;
- sherhebel;
- brace;
- large clamps;
- pliers;
- nippers;
- hammer;
- crosshead screwdriver;
- sharp knife;
- files.
Important! Why do we need two jigsaws at once - manual and electric? For different types of work. With an electric jigsaw you will be cutting parts, but for cuts on the fingerboard, as well as for other delicate work, manual is more suitable.
A beginner guitar master may not know the names of various carpentry tools, but he will need several planers - for rough and fine processing.
We complete the tool
An electric jigsaw will not work without a file, as well as a grinding machine without belts. Therefore, immediately take care of the components. You need:
- wide and narrow files for jigsaws: the first for straight cuts, the second for contours;
- belts with different grains for a grinding machine - for rough grinding, to eliminate scratches, for fine processing;
- straight and edging milling cutters for a milling machine;
- metal drills 3, 6 and 9 mm;
- wood drills 12, 19, 22, 26 mm;
- concrete drill 8 mm.
First step
So, you have boards, the type of guitar you have chosen and even printed a drawing. It's time to start cutting. You need to start by gluing the case, and the first thing is to fit the two boards for the lower deck so that they turn into one. There are several ways to do this.
Option 1:
- Connect the pieces by clamping them into a “sandwich” clamp.
- Treat surfaces with a planer as if you had one plane, not two.
- Glue it together.
Option 2:
- Clamp the pieces with clamps in the form of a shield.
- Walk along the joint with a milling machine.
- Glue it together.
Option 3:
- Treat each piece separately.
- Glue them together.
Important! The next step is to cut the workpiece along the contour with a jigsaw. And here it is very important to watch so that there are no knots.
Second phase
Glue the footer and springs onto the lower deck.The footer goes strictly along the axial, three springs - strictly at right angles to it. It turns out something like a “chest” with a spine and three ribs.
Upper deck
It is better if it is from a solid board, and not from a composite. Although some masters prefer a different option and make the upper deck the same as the lower deck. But when the strings are already stretched, tension arises in the upper part, and the seam can quickly burst.
You need to outline a power outlet. Its center is in the narrowest place of the guitar. A resonant hole is cut out in the middle of the outlet. There are also springs on the inside of the top deck. It's time to stick them.

Shell
Perhaps the most difficult details are the shells. They need:
- carve out;
- to cut;
- to bend;
- stick on.
And if there are usually no problems with cutting and primary processing - they are exactly the same as all other details, they are sheared with several planes and sanded with sand, then there may be some difficulties in giving the tree the desired shape. Therefore:
- Moisten the workpiece well with warm water.
- Put it in a warm place for 10-15 minutes.
- Warm the part to a temperature slightly above 100ºС.
- Bend it in shape.
- Allow to cool - the workpiece will retain the bend.
Vulture
Glue the heel and the bar handle. This will not be a problem, the main thing is that the connection is strong.
Important! You do not need to cut a groove on the case in advance, this can be done later, when it is time to assemble all the parts together.
But with the head you need to decide immediately. She may be:
- straight;
- inclined.
Oddly enough, the second option is simpler:
- If you make a straight head, retainers will be required, otherwise - the strings simply will not be pressed against the upper nut.
Important! A direct option is made with the handle, from the same piece of wood.
- With an inclined position, you can do two things. If you do not need to save a tree, cut the bar with one piece from a whole piece. But you can glue it in two or even three parts. There are companies that make composite vultures - from two to three longitudinal layers.
Important! The slope should not exceed 17º.
Kernel
An anchor rod is glued into the bar. It gives the parts the necessary bend and increases strength. To make a guitar with your own hands at home, the rod can be glued in two ways:
- under the pad, that is, in the upper part;
- from the back, covering with a decorative plate.
Important! For the rod, a channel is made along the entire length of the neck.
Assembly
When all the parts are prepared, that is, cut, polished and equipped with all the necessary trifles, you can proceed to assembly.
Important! It is best to glue with casein glue, sometimes fish glue.
Operating procedure:
- Glue the shells into one piece.
- Put them on the lower deck.
- Glue the top deck on top.
- Dry the entire structure thoroughly - it is necessary to clamp it properly.
- Mark and cut a notch under the bar.
- Glue the bar.
to contents ↑Important! After that, it remains only to coat the guitar with varnish, make inlay and pull the strings. As for the stand, it can be glued both before assembly and after.
Stock footage
Now you have a complete understanding of how to make a guitar with your own hands at home. We hope that this technology did not seem too complicated for you, or, even if so, your desire was stronger than the fear of doing something wrong, and you did an excellent job!
- How to choose a vacuum cleaner taking into account the characteristics of the house and coatings?
- What to look for when choosing a water delivery
- How to quickly create comfort at home - tips for housewives
- How to choose the perfect TV - useful tips
- What to look for when choosing blinds
- What should be running shoes?
- What useful things can you buy in a hardware store
- Iphone 11 pro max review
- Than iPhone is better than Android smartphones
 (No ratings yet)