

How to make a screen for a bathtub from a tile?

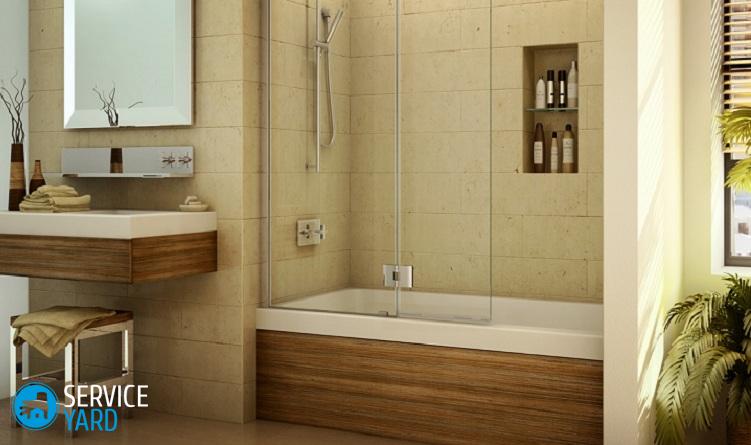
The external panel, which is installed on the bathtub from the outside, decorates the room and gives it a certain completeness. Such a screen can be bought at a plumbing store - their choice is quite large. There is only one drawback of such products - they sometimes cost almost more than the bath itself. But nothing prevents you from creating a fashionable part yourself. How to make a screen for a bathtub from tiles or other materials? This will be discussed in our article.
to contents ↑What is the screen for?
Before you start doing anything, it’s always helpful to understand the goal. For many decades, bathtubs were without any additional panels - and nothing. Even now, many owners neglect such "excesses." This is really superfluous if you have a beautiful bathtub with graceful legs and decorative enamel on the outside. And if there is the most ordinary font - cheap, but rude. It is better to close the ugly lower part, and at the same time hide the water pipes.
Other functions
In addition to a purely decorative function, such a screen will make it possible to arrange under the bathroom something like an additional cabinet where you can store:
- detergents;
- various chemicals;
- some tools.
to contents ↑Important! A do-it-yourself screen for a plasterboard bathtub or a brick partition, plywood is especially important if there are small animals in the house. You definitely do not have to pull out from under the bathroom a lost turtle or a hamster that has lost its orientation.
What are screens made of?
The panels that allow you to close the space under the font are different from each other:
- material;
- installation method;
- type of construction.
As for the material, in apartments you can find panels:
- from acrylic;
- from plastic;
- from drywall;
- from plywood;
- from metal.

Ready models:
- You can buy a ceramic screen, which will be presented to you as finished. But this is not entirely true. The kit includes a frame and a set of tiles, everything else will have to be mounted by ourselves, and this is not much different from making the screen completely.
- Acrylic panels are easy to attach, they are relatively durable, but they do not look very impressive.
- As for plastic, manufacturers offer quite a few options, but they all have one very significant drawback - plastic is very fragile. In addition, low-quality plastic collapses quite quickly, while releasing substances that are harmful to health.
Homemade screens
Ready-made screens are easy to install, but the costs may be too high. But you can always do something interesting with much less cost. A homemade screen can be:
- painted:
- lined with ceramic tiles;
- with mosaic.
The form
The use of a particular technology depends on the shape of the screen itself. She may be:
- simple rectangular;
- difficult - with all kinds of bends.
In the first case, tile is suitable, in the second - small fragments from which you can make a mosaic panel.
Complex form
Suitable for mosaics:
- colored glass (for example, broken bottles);
- broken multi-colored porcelain dishes;
- special mosaic modules.
Important! As a basis for the mosaic, a special flexible grid is used, which can take any shape and onto which the modules are perfectly attached.
Rectangular screen
For a simple rectangular screen you need:
- tile:
- frame.
- drywall.
Tile
Before making a bath screen from a tile, let's discuss the performance of this material. There are a lot of them:
- strength;
- durability;
- hygiene;
- moisture resistance;
- resistance to mechanical damage;
- spectacular appearance;
Tile is widely used for decoration of rooms with high humidity. The abundance of water vapor in the air does not affect it and does not in any way reduce its performance. This material is also not sensitive to temperature extremes. In addition, it is easy to keep in order, not only dirt, but also mold is removed from it with an ordinary sponge, if it suddenly appears.
Such a screen will serve for a remarkably long time, and during the next repair it will be enough to replace several tiles, if they suddenly break, or change the frame and put the same tile again. Pottery cannot be scratched, and such a screen can fail only in one case - if you hammer on it every day.
Choose the type of tile
The do-it-yourself tile screen under the bath will delight you for a long time with its magnificent qualities and spectacular appearance, if you choose the right material. You need to pay attention to several parameters:
- specifications;
- tile shape;
- color.
First, decide on the color - this will significantly narrow your search, and accordingly - save time. There are many options:
- a screen in the color of the walls already finished with tiles;
- screen for the color of plumbing;
- slightly lighter or slightly darker than walls and equipment;
- contrasting color.
As for the form, then there is little choice. Tiles are most often square or rectangular. The first option is more convenient in many respects, in addition, the choice of square tiles in stores is wider.

Specifications
These characteristics include:
- area;
- thickness.
Area
A bathroom is a relatively small room (although there can be any size in a private house), therefore, from the abundance of tiles, choose:
- small size (preferred);
- medium size (if not small, suitable for other parameters).
The advantages of a small tile are obvious:
- less likely to have to be cut;
- You can make interesting patterns.
Important! The most convenient options are 10x10 or 15x15 cm squares.
Thickness
It entirely depends on the frame and base. The stronger they are, the thicker the tile can be. Standard tile, which is usually lined with walls, is also suitable for the screen.
to contents ↑Important! One possible solution is a screen made of the same material as the walls. This approach greatly facilitates the choice.
Design Features
What functions will your screen perform? The choice of its design depends on this. It happens:
- capital, or deaf;
- with the ability to arrange under the bathroom a kind of storage;
- with a niche for the legs.
The first option is easier to develop and install, however, it has a significant minus. If suddenly a pipe under the bathroom flows, you will have to disassemble the structure and do it again. But these troubles can be avoided by taking care of the inspection windows - holes through which it will be possible to penetrate under the bath.
If you need access
Access can be provided in two more ways:
- with the help of sliding walls;
- leaving a niche at the bottom.
Dull screen
The basis is most often made of two materials:
- brick;
- drywall.
Brick screen
It’s just a wall to the edges of the font, and in order to build it, you can use not only whole bricks, but also halves. Installation is not much different from construction, for example, partitions. First, the wall is laid out of brick, then plaster, and only after that they are tiled. The main difficulty is to make a strictly vertical wall.The requirements in this case are the same as for a normal wall, that is, the surface should be almost perfectly flat.
to contents ↑Important! You can skip the brick screen without tiling at all - now it is very fashionable to leave fragments of walls without decoration. But the surface must be cleaned of cement residues and varnished.
Drywall
How to make a drywall bath screen? It will even be a little easier than brick, because this material is sold in large sheets, and it is enough just to cut it correctly. Plastering it is not necessary. But when working, some subtleties must be taken into account. First, two words about the virtues, which include:
- strength;
- ease;
- flexibility;
- the ability to apply different types of finishes;
- affordable price.
Important! Drywall is not afraid of mechanical stress. It will be difficult to break the screen. It is lightweight, which is important during installation. In addition, from it you can make the screen even a rather complex shape - for example, oval.
For work you need the most ordinary tools. Drywall is cut with an ordinary sharp knife, attached to the frame with self-tapping screws. As for the variety of finishes, the plasterboard screen can:
- to paste over with a tile;
- to paint;
- wallpapering;
- to process with decorative plaster;
- make a mosaic.
The only problem
But there is a significant drawback. Gypsum cardboard does not tolerate high humidity quite well, since it consists of cardboard sheets, between which layers of gypsum are laid. Both materials are deformed under the influence of water. This, of course, can be used if you need to process a complex surface (for example, round sheets).
Therefore:
- Process the sheet with a needle roller.
- Wet.
- Give the desired shape.
Important! This does not mean that drywall can not be used in the bathroom. You just need to choose the right soil - then the material will not get wet, and the fungus will not settle on it. It will not be difficult to buy such an option - in construction stores you will be offered several formulations specially designed for processing drywall tiles. Prices are the most varied, so you can choose a soil that does not cause significant damage to your pocket.

Making a drywall screen
The work will consist of several stages, each of which must be performed as qualitatively as possible. You have to:
- markup;
- frame assembly;
- sewing;
- finish.
Markup
To properly cut the sheets, they need to be marked out. For this we need:
- building level;
- several cords with loads;
- marker.
Operating procedure:
- According to the construction level, outline several points on the side of the bath.
- Lower from these points to the vertical floor (using laces with loads - but you can also use a large metal square).
- Mark with a marker.
- Connect the dots with a straight line - the screen should not go beyond it.
Rack marking
To make the necessary marks, you need to know:
- drywall thickness;
- the thickness of the finish.
Add these two measures and back off such a distance from the already outlined line towards the bath. Decide how many racks your screen will hold, outline the places for them.
Important! If you are going to glue the tile, then the thickness of the tile with glue is 10 mm, and the thickness of the CD47 profile is 47 mm.
Assembling the frame
After everything is marked up, you can begin assembling the frame. You need some tools and materials:
- scissors for metal;
- hammer drill;
- screwdriver;
- self-tapping screws;
- dowel nails;
- priming;
- sealant.
The frame is made of two types of profiles - L and CD. It is better to stick to the following sequence:
- Draw a skeleton diagram on paper.
- Dimension.
- Cut the profile, strictly observing the dimensions.
- On the bar, which will be below, outline the places for holes every 15-20 cm.
- Lay the bar in the marked line.
- Punch holes with a puncher.
- Fix the bar with dowel nails.
- Attach end strips - they are also more convenient to fasten with dowel-nails.
- Put the remaining vertical slats, and then the upper one, they are fixed with self-tapping screws.
Sheathing and cladding
The next step is cladding. Plasterboard sheets are placed on the frame and fastened with self-tapping screws. Then it is necessary to seal all the joints with silicone sealant. You can also paint drywall with oil paint.
But to sheathe the screen is not all. It is necessary that it looks beautiful, and for this they use different options for facing.
Important! Before this, a layer of deep penetration soil must be applied to the surface and allowed to dry.
They are lined with a primed screen in the same way as any other drywall surface. The tiles are glued in rows using a notched trowel and special glue. Of course, it makes sense to make a preliminary layout in this case.
Important! If you decide to paint the screen, polyester and acrylic paints are suitable, they tolerate high humidity very well, are easy to apply and dry quickly.
Revision windows
Such windows can be bought at hardware stores. They can be mounted on the screen. Doors are already made in them. Moreover, in construction stores you can even find sheets of drywall already equipped with such windows - all that remains is to determine the place for them, correctly lay out the sheet and mount the entire system.
to contents ↑Sliding screens
Such models are practically not made of drywall. For a similar design are more suitable:
- plastic;
- plywood;
- metal sheets.
Tiling such a model is also unprofitable - the whole system turns out to be very cumbersome and inconvenient. Therefore, proceed as follows:
- Top and bottom install metal strips.
- “Rails” - strips of plastic with grooves — are glued and fixed with screws with planks (for example, fragments from an old sideboard with sliding doors).
- Between the grooves are inserted sheets of plywood or metal, which ride along such “rails”.
Niche Screen
The niche below is a very convenient thing if you often have to wash in the bath or bathe the kids. If there is a screen, you have to tilt more, which is not very convenient. To avoid unnecessary loads, a foot niche is cut out at the bottom of the screen. It can be placed both in the center (or where you most often stand), and along the entire length.
to contents ↑About other materials
Instead of a profile, you can use wooden blocks, and instead of drywall - plywood. However, it should be borne in mind that the tree is very sensitive to high humidity, so without special treatment it will get wet and then dry. In this case, you can’t do without impregnation. In all other respects, the actions will be almost the same as when working with drywall, only wooden parts can be fastened with ordinary nails.
to contents ↑Stock footage
Now you know everything you need to make a screen under the bath yourself. From the tile it will be, gypsum board, plywood or wood - now determine yourself, because only you know the planned design of the bathroom and only you know exactly how much money, time you are ready to allocate for this repair process.
- How to choose a vacuum cleaner taking into account the characteristics of the house and coatings?
- What to look for when choosing a water delivery
- How to quickly create comfort at home - tips for housewives
- How to choose the perfect TV - useful tips
- What to look for when choosing blinds
- What should be running shoes?
- What useful things can you buy in a hardware store
- Iphone 11 pro max review
- Than iPhone is better than Android smartphones
 (No ratings yet)