

How to make a clock out of cardboard?
From an early age, a child needs to be accustomed to such a concept as time. Mastering this science will help watches made from improvised materials. Such a toy will allow the child to set the arrows himself and study the numbers. It is better to make such a craft together with the child, so that during work, explain to the baby the purpose and the very structure of the dial. In addition, the manufacture of the dial will help to develop fine motor skills, accuracy when working with glue, creativity, imagination and imagination of the child. Today we will introduce you to various options for making the dial and tell you how to make a watch out of cardboard, and for older children we will help to assemble a functional model with a clockwork. It’s not difficult to make a watch out of cardboard with your own hands, and if a small child inadvertently damages the craft, you can always make a new one using available materials and our recommendations.
to contents ↑Option One: Cardboard Watch for Baby
A preschool child can make a children's watch with his own hands out of cardboard. Homemade toy watches will help the baby move the hands himself and get acquainted with their purpose.
Materials for work
To make this model you will need the following materials:
- Colored cardboard.
- Scissors.
- Colored paper.
- Pencils, felt-tip pens, marker.
- PVA glue.
- A small bolt and nut.
- Compass.
- Decor for crafts - acrylic mother-of-pearl paints, sparkles, etc.
Step-by-step instruction:
- Take one sheet of thick cardboard, which will be the basis for creating the dial.
- Cut a circle out of cardboard using a pair of compasses or a large plate.
- Do the same manipulations with a sheet of colored paper.
- Stick the colored paper dial onto the cardboard base.
- Cut a smaller circle from paper of a different color, glue it inside the future dial.
- From a thick cardboard cut two arrows: one is shorter, the other is longer.
- Stick strips of colored paper on the arrows.
- On the dial, write clearly the numbers that indicate the hours, and use the marker to put smaller numbers for the minutes.
- Make a small hole in the center of the dial and fasten the clock hands with a bolt and nut.
- Decorate your watch with decorative elements.
Advice:
- Let your child decorate his first watch himself. You can decorate the dial with thematic pictures corresponding to the time, for example, at 2 o’clock - time to eat (plate with food), and at 10 - time to sleep (bed). Such drawings will help the child remember the time faster.
- Do not tighten the nut tightly from the back of the dial; otherwise, the hands will not move.
- Do-it-yourself watches for children can be made in the form of any object, for example, in the form of a flower or a starfish. Simply stick the dial onto any suitable cardboard base.
- If you place geometric shapes on the whole dial, then home-made watches will turn into a universal teaching aid.
- You can use a disposable paper plate to base the dial. Fix the arrows made of thick cardboard with a bolt and nut, and draw large and bright numbers in a circle.
- If the numbers are made of plasticine, then they will be more convex and bright.
- On a too bright paper plate, you can stick a white circle for the dial, and replace the bolt and nut with a wire coated with plastic.
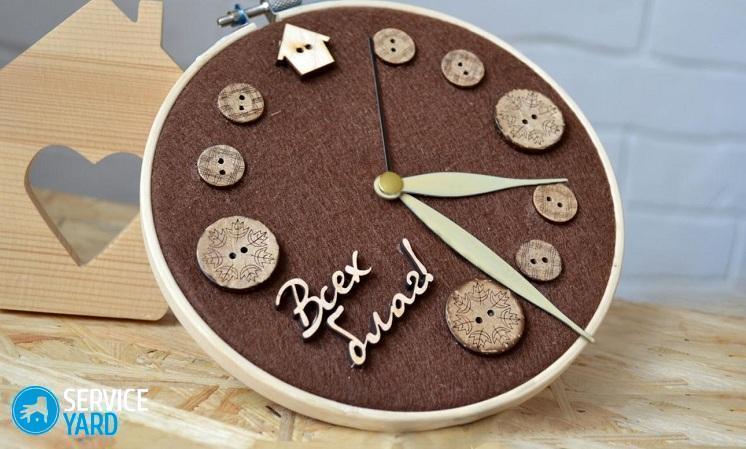
Option Two: Effective Functional Clock
For an older child, you can make a functional model with an operating clockwork. Such watches can also be used as a decor item.
Materials for work
To make a clock out of cardboard so that the arrows turn, prepare the following materials for work:
- Thick cardboard. You can use a sheet of corrugated cardboard, for example, from a box or box.
- Multi-colored caps from yoghurts (vitamins) or large buttons.
- Compass.
- PVA glue.
- Clockwork with hands from any cheap version of quartz watches.
The manufacturing process is as follows:
- Prepare a sheet of thick cardboard, lay colorful caps on it to understand what the size of the future clock should be.
- Cut the base circle out of cardboard.
- Using an angle ruler, mark based on the location of the covers.
- Glue lids (buttons) to the base at an equal distance from the center and each other.
Important! To glue plastic parts, you can use a hot glue gun or PVA glue.
- On the lids, write with a marker the numbers indicating the time. If the material of the parts allows, then you can use acrylic paint.
- Make a hole in the center of the circle.
- Install the clockwork on the back of the watch and tighten the hands.
- Insert the battery into the watch and set the time.
Important! The edges of the circle can be outlined with a color or black marker. In the center of each cap, you can paste a cardboard circle with a number, and do not put it on the part with a marker or paint.
Do-it-yourself watches can be an excellent element of the interior and decor. We suggest you familiarize yourself with the following version of the watch model, which can become an original and unique home decoration.
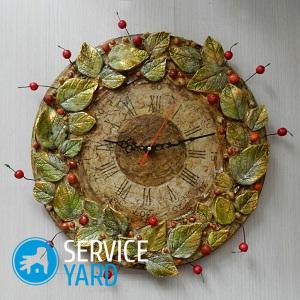
to contents ↑Option Three: Decoupage Wall Clock
Everyone can make a model of a wall clock, the main task is to establish a large working mechanism.
Important! The presence of old watches will greatly simplify the task, since you can use their mechanism, and if old models are not in the house, then buy a clockwork mechanism in a specialized store.
You can make a chronograph from any materials at hand. But, if you want to create an elegant and unique product, then the decoupage style will be the perfect solution.
For work you will need:
- Wooden base (square or round).
- Clockwork with arrows.
- Napkins for decoupage.
- Acrylic paints.
- Sponges, brushes.
- Lacquer.
- Sandpaper for processing the workpiece.
Master Class
Making watches in the style of decoupage is carried out in the following sequence:
- Grind the foundation of the future workpiece with sandpaper.
- Coat the finished workpiece three times with acrylic paint. The coating will serve as a primer.
- Give the paint time to dry.
- From the edge of the workpiece, step back a couple of centimeters and outline the future frame.
- Choose a paint color for the base, the most suitable for the interior. Dissolve the paint and apply it with a sponge in a chaotic manner to age the product.
- Highlight the future chronometer's frame with a darker color. Brown paint is ideal for this purpose.
- Cut a pattern from prepared rice paper and apply it to the workpiece. If you use special napkins for decoupage, soak them in water first and attach them to the selected place on the dial.
- Apply special glue over the image.
- Use the colors of the corresponding tones and the sponge (brush) to create a smooth transition from the pattern to the surface of the dial. Connect all your imagination and carefully make it so that the picture fits seamlessly into the surface.
Important! If desired, the product can be aged using a two-component cracking agent. Use a dry brush to apply the product on the surface (you can buy it at a needlework store). After the craquelure dries, cracks will appear on the chronometer, which will give it elegance.
- Coat the workpiece with varnish (as a protective layer).
- Install the clockwork with arrows in the workpiece and glue the numbers.
Now the watch has a finished look and you can use it in any room as a decor.
to contents ↑Interesting ideas
Ideas for creating watches are completely different, for example:
- You can create a masterpiece in the style of quilling, which uses paper strips of different lengths and widths. They are twisted into patterns and stacked into compositions. From the prepared strips of paper, you can make numbers and decorative elements. Such decorative elements are glued onto thick cardboard or plywood glued with colored paper.
- You can use other materials to create a chronometer - CDs and paper.
When choosing a manufacturing option, focus on the available materials and your taste. The main thing is that the do-it-yourself decoration element pleases the eye.
to contents ↑Stock footage
Even in ancient times, people knew how to navigate in time, using for this purpose, stars and the sun. What kind of clock was not invented: solar, lunar, water, candle, sand, oil. Over time, more convenient and modern dial models have appeared. Today you learned how to make a watch with your own hands for a child. We hope that the joint craft helped your baby learn how to navigate in time and control their actions faster. Creative success to you and your baby!
- How to choose a vacuum cleaner taking into account the characteristics of the house and coatings?
- What to look for when choosing a water delivery
- How to quickly create comfort at home - tips for housewives
- How to choose the perfect TV - useful tips
- What to look for when choosing blinds
- What should be running shoes?
- What useful things can you buy in a hardware store
- Iphone 11 pro max review
- Than iPhone is better than Android smartphones
 (No ratings yet)