

How to make butterflies of paper with your own hands on the wall?
Overhaul of an apartment or house requires considerable financial investments, and sometimes one wants to make changes to the interior of his home. You can embellish a design slightly and breathe newness into it without any special financial expenses, simply by invoking imagination and creative thinking. One of the inexpensive, but at the same time, spectacular decor methods is wall decoration. Collage, panels, paintings, fabric paintings, drawings and butterflies - this is just about the latest decor we will talk about today.
How to make butterflies of paper with your own hands on the wall? - It’s very simple, the main thing - you won’t have to spend a lot of money on it. You will only need handmade applications or ready-made stickers.
to contents ↑The role of butterflies in interior design
Today, very often these fluttering beauties are used in interior design. They decorate chandeliers, ceilings, frames of mirrors and paintings, and they also often decorate walls. And it is no coincidence that this type of decor is preferred - butterflies are able to add a special twist to the design of the room.
Important! According to the laws of Feng Shui, they are the messengers of joy and mutual love, symbols of rebirth and natural beauty.
By placing them in the bedroom, you will bring a new meaning to the relationship, awaken a long-forgotten romance, and be able to rekindle the bonfire of love. At the same time, it is undesirable to attach moths one by one - they should be arranged either in pairs or in whole compositions.
You can make butterflies on the wall with your own hands from different materials, for example:
- Colored paper.
- Vinyl film.
- Thin cardboard.
- The cloth.
- Metal.
Fluttering beauties can be of various shapes, sizes and colors. As for the type of accommodation, everything will depend solely on your imagination - a swirling whirlwind, a chaotic round dance, airy compositions, all kinds of figures from moths, lots of options, and all of them are welcome in the interiors in any interpretation.
to contents ↑Harmony in design
Butterflies will be a harmonious decoration of the interior of any style, be it the ascetic Modern, the demanding Classic or the tech Hi-tech. But they will give special charm to the rooms, which are decorated with a lovely rustic coziness in the Country style.
Important! The main thing is to maintain color balance, otherwise - the design will “crush” with its tinsel, as if hinting at a lack of taste.
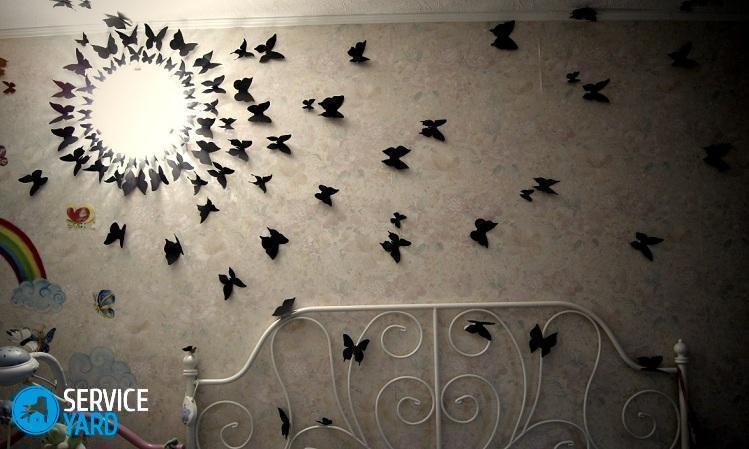
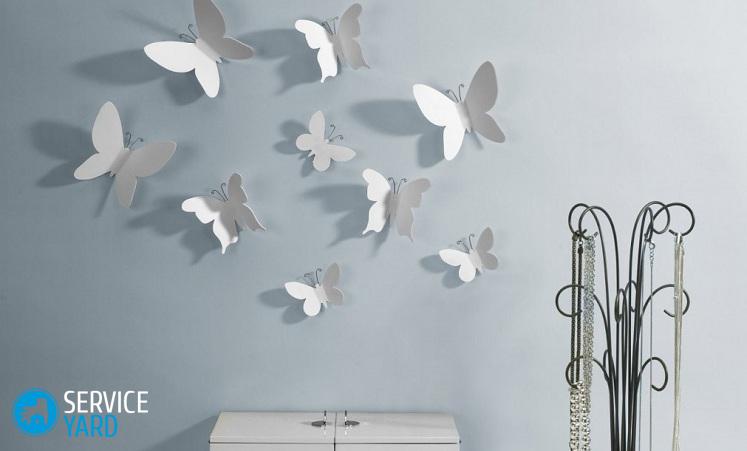
Colorful, vibrant paper butterflies on the wall with your own hands are a wonderful addition to the monochrome interior. For example, green or red moths on a beige background. The beautiful design of light walls (pastel, gray, white) will be black applications.
Compositions can be sustained in any one color or delight the eye with multicolor splendor. The beauty of the decoration can be enhanced with neon lights, which will give the decor the illusion of 3D decor.
to contents ↑Important! Specialists in the field of decor are advised to decorate a children's room or bedroom with beautiful moths. Although, if desired, they can decorate any room.
Preliminary work:
- Before decorating the wall with butterflies, you should decide on the material and appearance of the composition.Carefully consider the colors of the future jewelry, choosing it according to the style of the interior. Butterflies should stand out against the background of walls, and not get lost, merging into a single spot.
- Having prepared the material you like, draw moths of the desired size on it. At the same time, it is not necessary to get involved in art and draw ruffles and complex bends on the wings - all this can create difficulties in the process of cutting.
Important! Also take care of the way of attaching your applique to the walls - decorative pins, glue or stationery buttons.
- Having recreated in your head your clear vision of the decor, it should be noted on the walls with chalk or pencil the lines / points of the butterflies. This will help you not to deviate from the desired pattern in the process of attaching jewelry.
to contents ↑Important The arrangement of butterflies on the wall can be completely different, however, you should adhere to a combination of decoration with decorative plaster, wallpaper, and other interior elements. A scattering, a whirlwind, a flock, a cluster of moths in the form of a heart or a bouquet of flowers will fill any room with the romance and freshness of spring.
Methods for attaching decor
To fix butterflies on the wall, you can use several ways:
- The most convenient and most common tool is glue. Butterflies can be fixed partially or completely. Superglue, wallpaper or simple PVA are perfect for these purposes. The main thing is that he does not go beyond the boundaries of applications.
- Pins - it is preferable to choose decorative pins - decorated with beads, colored beads, pearls. For walls that are glued with wallpaper, the ends of the pins should be bent 90 degrees. As a result, their bent part is driven under the canvas, thus fixing the decoration.
- Threads - this option is good in the presence of origami moths, which, with the help of colorless fishing line or thin threads, are suspended from the ceiling plinth and extend along the wall, trembling and swaying.
Making paper butterflies
This is the easiest way to seat fluttering beauties on the walls. The basis for this decor can be colored or plain paper. You can either draw a drawing manually or create using graphic programs on a computer. A huge plus of this method is the low cost of the material. In addition, the paper is easily and securely attached, and the wings of butterflies acquire dynamism, beautifully fluttering from air currents.
Important! A fed-up composition can be easily removed from the wall at any time, without causing damage to the design and without regretting the money spent.
The first thing to do is prepare a stencil from cardboard. Attaching it to the paper, you will outline the contours of the moths, and then cut them out.
Important! If you prefer multi-colored, colorful butterflies, then turn to the help of old glossy magazines with bright pictures.
There is another way to decorate the wall with paper butterflies - to find ready-made pictures on the Internet, print them on a printer. To make the decoration glow in the dark, you can cover them with luminescent paint.
Finished jewelry is mounted on the wall with pins, double-sided tape or glue. It is only necessary to fix the center of the layout so that the wings remain free and can beautifully sway from the air currents.
to contents ↑From cardboard
Butterflies made of thin cardboard will be much more reliable and stronger than paper ones. Although the process of cutting them will take longer than in the first embodiment. However, cardboard moths will take and retain any shape.
Important! Wings can not only be bent up - they can also be given a rounded appearance. To realize this idea, slightly moisten the cardboard and bend it, crushing it with some heavy object. Having completely dried, it transforms into the model you want.
Cardboard butterflies can be cut from covers from notebooks, packages from nylon tights, geographical atlases.Due to the fact that this material is slightly heavier than paper, it should be mounted on the walls in reliable ways.
to contents ↑Fabric moths
Butterflies made of fabric will be an excellent wall decor with liquid monophonic wallpaper, drapery or other soft decoration. They perfectly complement the concept of “warm” design and add notes of home comfort to it. In this case, the fabric will suit both motley and plain.
to contents ↑Important! It is better to fix such jewelry with PVA glue.
From vinyl records
One of the original ways to beautifully decorate the wall with butterflies is to make moths from old vinyl records. They turn out to be more durable and voluminous, and most importantly - glossy, very beautifully sparkling and shimmering under any light source.
The manufacturing process of such butterflies takes place in several stages:
- Put a moth on the plate. After this, the disc is slightly melted in the oven or microwave, as this material is quite hard and difficult to cut.
- After placing the plate in the oven, remove it after a minute, waiting for a slight deformation (the edges will begin to bend).
- We cut the plate according to the drawings.
- Using sandpaper, we grind the edges of the model, removing sharp protrusions and small errors.
- We fix the butterflies on the walls with glue.
Painted butterflies
You can decorate the wall with butterflies by drawing them. This decor looks no less luxurious and spectacular than the above options. To create a picture, you should stock up on the following materials:
- Stationery knife.
- Plastic or cardboard for stencil.
- Brush or sponge for painting a picture.
- Paint - acrylic or water based.
Important! The contours of moths can be outlined with fluorescent paint so that they mysteriously flicker in the dark.
Having prepared all the materials and tools, you should:
- Think over the type of drawing and transfer your idea to plastic or cardboard.
- Use a stationery knife to make a stencil.
- Mark on the wall the place and direction of flight of the moths.
- Dilute the paint and build yourself a drawing tool by attaching a small sponge to the brush, cutting it out of the sponge.
- Having fixed the stencil with masking tape, transfer the drawing to the wall.
- Remove the stencil after drying.
From cans
Another very interesting option to beautifully decorate the wall with butterflies is to cut them out of a tin can and fix them on a selected site with a thin wire. True, when creating such an ornament, you will have to be careful not to cut yourself. But as a result, you get a magnificent decor - from any stream of air such butterflies will flutter and “come to life”, filling the room with a melodious ringing.
to contents ↑Picture
You can place winged beauties on the wall in the form of a colorful picture. In order to create a picture of butterflies with your own hands, you will need:
- Adhesive tape or glue.
- Scissors.
- Picture frame.
- Pages of an old glossy magazine.
- Several different sizes of stencils.
Having got everything you need, get to work:
- Cut the pages of the magazine into squares.
- Having attached the stencils to the obtained squares, cut the moths - their number should be such that they completely fill the central part of the picture and are not located on each other.
- Having prepared a paper sheet, which will serve as the basis for the photo frame, place moths on it and decide on the type of your composition.
- Glue butterflies to the sheet with glue or double-sided tape.
- Make sure that they do not adjoin the picture, but slightly rise above it.
to contents ↑Important! For a larger volume, insert a piece of foam between the tape.
Stock footage
This version of decor, like butterflies on the wall with your own hands, requires perseverance, time and a flight of creative imagination. However, if you do go through all the stages of their creation, you will end up with an original and exclusive decoration of the walls in the room.
- How to choose a vacuum cleaner taking into account the characteristics of the house and coatings?
- What to look for when choosing a water delivery
- How to quickly create comfort at home - tips for housewives
- How to choose the perfect TV - useful tips
- What to look for when choosing blinds
- What should be running shoes?
- What useful things can you buy in a hardware store
- Iphone 11 pro max review
- Than iPhone is better than Android smartphones
 (No ratings yet)