

How to lay a laminate flooring?
From the moment people learned how to build homes, flooring has changed many times. And now the inhabitants of private houses and city apartments, sometimes without even thinking about it, make floors using old technologies. However, many prefer modern materials, among which the laminate is the undisputed leader. He has many advantages, the most difficult thing is how to lay a laminate. You will receive the answer to this question in our article.
to contents ↑What is he like?
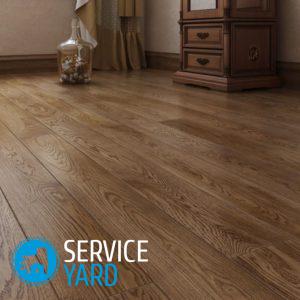
You can lay a laminate in any room. It looks great in the living room, hallway, nursery and bedroom. True, the material for the kitchen and bathroom should be chosen very carefully - in these rooms there is always high humidity, and temperature changes periodically occur.
Important! For the kitchen, it is better to choose a coating of class 33 or 34, and for the bathroom, ceramic tiles are still more suitable.
The coating consists of four layers:
- protective;
- decorative;
- main;
- lower.
Important! The protective layer is a transparent film. Decorative is made from kraft paper, and it is it that gives designers the opportunity to express their creative abilities. The core is a high density HDF or MDF plate. The bottom layer is stabilizing. It is made of plastic or paper, which is impregnated with melamine resin.
The properties
The popularity of the laminate is due to its unique properties:
- the variety of assortment allows you to create a unique interior for people with a variety of tastes and passions;
- the panels are securely fixed, in addition, no additional devices are required;
- coating care is extremely simple;
- minor scratches and stains are very quickly eliminated;
- if serious damage appears, it is often possible to rearrange plates or replace a fragment.
What to think in advance?
Before you lay the laminate with your own hands, you need to prepare carefully. In addition to the coating itself, you will need:
- laminate staples;
- priming;
- substrate;
- baseboard;
- baseboard mount;
- plastic film in a roll;
- mounting wedges.
All this can be bought in the same store where the material itself.
to contents ↑Important! Wedges can also be home-made - from wooden pegs or scraps of the laminate itself. There is another very useful thing - a device for pulling panels. The length of the tape, in order to properly lay the laminate with your own hands, should be at least 300 mm.
Instruments
Work is controversial if you perform it with a good tool, having at hand the auxiliary tools that are needed to lay the laminate. Make sure that at the right time in the right place are:
- jigsaw or hacksaw with small teeth;
- construction square;
- sharp knife;
- mallet or hammer;
- roulette;
- wooden beam;
- masking tape;
- pencil.
to contents ↑Important! In construction stores, you can purchase a tool kit for a laminate, which has everything you need.
Work stages
It is always better to act in order, and the situation when you need to lay a laminate with your own hands is no exception. This makes it possible to observe the technology to the smallest detail.The whole process can be divided into several stages:
- leveling the rough floor;
- preparation of a plan;
- mounting the substrate;
- collecting the first layer;
- docking of the second layer;
- docking with a wall;
- installation of other panels;
- laying between doorposts;
- docking of individual fragments (if any);
- gluing the baseboard.
How many panels do you need?
The solution to the question of how to lay the laminate yourself begins with determining its amount. This requires roulette. If the room is square or rectangular, the answer is simple - just measure and multiply the length and width.
It is another matter if there is a niche or ledge in the room. In this case, two options apply.
Option 1
If there is a niche in the room, first measure the area of the majority, rectangular or square, and then add the area of the niche to it.
Option 2
For a room with a protrusion, the method of action is the exact opposite:
- Measure the area of the entire room.
- Measure the protrusion.
- Subtract its area from the total.
to contents ↑Important! When buying a laminate, do not forget to see the coverage in one package. Add another 20% to the result - the “surplus” will be needed if some of your actions turn out to be erroneous, and also in order to replace the damaged area if necessary in the future.
Cooking Laminate
Before you get to your apartment, the material was stored in a warehouse or in a store, then it was taken. It may well be that the humidity in the store was not at all the same as in your home. If the coating is glued immediately after it has been delivered, it may become deformed. Therefore, before laying the laminate at home, it must be kept for a day in the room where the installation work is planned, and preferably two. Then the humidity will equalize and there will be no deformation.
to contents ↑Preparing the foundation
You can’t just take and lay the laminate on the old floor. For him, you need to prepare the basis:
- Look at the base of the subfloor - it is most likely concrete, but other options are possible in old houses.
- Check if the base is horizontal - there should not be any deviations from the norm. This is done using the usual building level, but it is better to use a modern laser. Take measurements every one and a half to two meters - deviations should not exceed 2-3 mm. If there are more deviations, level the base with a cement screed.
- After the screed hardens, take measurements again.
- Cover cavities, crevices and cracks with cement-concrete mortar.
- Particularly carefully repair defects at the joints of the floor and walls (they almost always arise due to the natural shrinkage of the house).
- With a grinder, remove the bulges.
- Take out the trash; the most important thing is to get rid of dust.
Is it mandatory to remove the old coating?
Some apartment owners are afraid to overfill the floor, because they will have to remove the old ones and arrange major repairs in the house. But it's not always the case. Sometimes you don’t have to remove anything, but use the old coating as a base to quickly lay a laminate on your own.
With a carpet, such a number will not work - it is too soft, but the rest of the species - completely, if only the base meets certain requirements:
- If the floor is wooden, it should be flat and strong, the boards should sit firmly, rot and other damage are completely unacceptable.
- The ideal base for the laminate is the old linoleum, because for its installation exactly the same conditions were required. It should lie horizontally, and there should be no fungal damage on the inside.
- The tiled floor must be completely intact, without flaws.
Substrate
To lay a laminate and it has served for a long time, it is very important to use the substrate correctly. It is needed for several purposes:
- provides isolation of the basis;
- conceals the remaining bumps;
- plays the role of a shock absorber under mechanical loads;
- It is a good heat insulator;
- absorbs moisture;
- provides protection from noise, which inevitably occurs when households begin to walk on the floor.
To properly lay a laminate with your own hands, you need a good substrate. For this purpose, use:
- extruded polystyrene foam;
- bitumen-cork composition.
Important! Expanded polystyrene will cost much cheaper, in addition, it will serve much longer. But in this case, the rough floor should be perfectly flat. Bitumen-cork mixture is more expensive, but the requirements for the base are less. In addition, it lets air through, so the floor will be “breathable”.
So, the rough floor is ready, it is time for the backing. This is where unexpected difficulties begin. It turns out that the substrate can slip. To prevent this from happening, before laying the laminate, it is fixed with masking tape.
to contents ↑Styling plan
If you still have little experience in repair work, things will go better if you make a plan. It is necessary to draw up a layout of the panels. In this case, a number of circumstances should be taken into account to make it easier to lay the laminate:
- in each next row, the panels are shifted relative to the previous row so that there are no cruciform seams;
- with transverse assembly, the panel length cannot be less than 30 cm;
- if the material has to be cut lengthwise, the strip width should not be less than 5 cm;
- on a wooden floor, plates are placed across the boards;
- it is necessary to take into account a damper indent of 1 cm along all walls.
Mounting method
Laminate is applied in two ways, which is always indicated on the package:
- lock;
- glue.
Locks
In the first case, the panels have special structural elements:
- combs;
- grooves.
The profile of the ridges can be different, which determines the type of castle:
- lock;
- click.
Important! In the first case, ridges and grooves are connected in a vertical or horizontal position. With the click method, the panels are connected to each other at a certain angle, so that the lock closes. This is a more reliable mount.
Glue method
Manufacturers now almost do not produce laminate with this method of fastening. He is too unreliable. However, on sale you can still find old material. Special glue can also be found. If you come across just such, you will have to glue the ends and long edges, lay the laminate and let it dry.
to contents ↑Important! This method has lost popularity, including due to the fact that it is not possible to quickly dismantle the floor, if such a need suddenly arises.
First row
Panels have scallops, and what to do with them when work is just beginning? How to lay a laminate flooring from the very beginning? If left, the panel will not lie close to the wall. Therefore:
- The crests of the plates of the first row must be cut off.
- The first row is laid out over the entire width of the room.
- Docking of the second row also usually does not cause difficulties.
- And then you need to connect the entire structure to the wall. Insert mounting wedges between the wall and the cover plates - the distance between them should be 25-30 cm. They will allow you to create a gap of 0.8-1 cm.
- After that, all the other layers are laid out.
- In order for the stove to enter the doorway, it is cut off, while care must be taken that it comes in tightly between the jambs.
to contents ↑Important! The clearance should be less than the bottom of the baseboard.
How to lay a laminate? Design basics
To beautifully lay a laminate with your own hands, you need to choose the right direction of its installation. And it depends on the geometry of the room and design ideas. Three options are possible:
- longitudinal;
- transverse;
- diagonal.
2 simpler ways
In the first case, it is necessary to lay the laminate along the line along which the light falls, in the second - across:
- Longitudinal laying occurs most often, its advantage is that no shading is formed at the seams, the floor looks even.
- Cross - applied if the windows are on a long wall. With this installation method, the room seems to be wider than it actually is.
Features of diagonal mounting
If you decide to put a cover in this way, consider several important nuances:
- You need a guideline - for this purpose a cord stretched between opposite corners is suitable.
- Panels are laid at an angle of 45 ° to the wall.
- Work starts from the angle closest to the window.
- The distance between the joints in adjacent rows must be observed - it must be 50 cm or more.
to contents ↑Important! The diagonal arrangement allows you to fully demonstrate your design abilities, however, this is a much more complicated process than the first two, and you need more material.
Stock footage
Design decisions can be different. The most popular way is the classic one, when homogeneous panels are stacked row by row over the entire surface. But you can lay the laminate in a checkerboard pattern - the interior will immediately become more interesting. You can lay out a pattern - however, this approach requires a large space and good work skills. What exactly to give preference to and what to decorate the floor decor in your home with the help of a laminate is up to you, because now you have all the necessary information to do everything correctly.
- How to choose a vacuum cleaner taking into account the characteristics of the house and coatings?
- What to look for when choosing a water delivery
- How to quickly create comfort at home - tips for housewives
- How to choose the perfect TV - useful tips
- What to look for when choosing blinds
- What should be running shoes?
- What useful things can you buy in a hardware store
- Iphone 11 pro max review
- Than iPhone is better than Android smartphones
 (No ratings yet)