

How to set up a manual sewing machine?

Today, manufacturers of sewing machines most often specialize in the production of models with foot drive, powered by electric energy. Such devices are very ergonomic, both hands remain free, the time to perform certain operations is significantly reduced. Unfortunately, manual mechanical machines, which were still used by our grandmothers, often gather dust without work. In vain! We will deal with the question of how to set up a manual sewing machine, and over time, you can not resort to the services of a sewing workshop, creating real sewing masterpieces.
to contents ↑A bit of history
Until 1829, all attempts at the practical creation of a sewing machine can be considered unsuccessful, although the great Leonardo created drawings that could be taken as a basis.
The first sewing device made of wood was created by the French tailor Timonier. With all the primitiveness, the performance of this mechanism was several times higher than that of a person sewing manually. The first sewing machine was greeted by workers rather aggressively, since the mass production of such mechanisms threatened with massive layoffs.
Subsequently, Timonier perfected his invention. Some of his ideas are used in today's models. Its peculiarity is that it can work even with the thinnest and most delicate fabrics, for example, with silk.
A machine with a shuttle, vaguely reminiscent of the modern, was invented by W. Hunt in 1834. This device was equipped with a mechanism for promoting tissue. The machine was equipped with a horizontal needle. For the first time, the vertical movement of the needle was put into practice in the famous Singer machines.
to contents ↑How is a manual machine arranged?
Almost all old hand-held sewing machines have the same principle of operation:
- On the right side is a wheel called a coiler. It is set in motion by hand.
- Next to the wheel is a lever through which the stitch length is adjusted.
- On the left side of the machine is a shuttle device and a needle with a presser foot. There is also a regulator for tensioning the upper thread and a lever for raising the presser foot.
- The working surface of the device is equipped with rails that advance the fabric during sewing.
How to set up an old sewing machine: general principles
The essence of tuning is to choose the right number of threads and a needle to work with a particular fabric. The quality of the stitch largely depends on how well the thread tension is adjusted. With improper tension, the seam “winds” from the bottom or top.
How to set up a manual sewing machine:
- You can adjust the bobbin thread tension with the screw located on the bobbin case. The tension of the thread is the stronger, the more the screw is tightened.
- The upper thread tension is adjusted using a special knob, which is located near the lever that lifts the presser foot.
Rules for using the machine "Seagull"
Here are some important rules for using the sewing unit of this brand:
- You cannot start sewing without first lowering the needle and foot.
- The handle should only be turned towards you.
- Only use special oil to lubricate the machine.
Important! Use the machine only on those fabrics that are suitable for all types of stitches. Otherwise, the machine may become unusable.
How to set up a sewing machine “Seagull”? The most important point when setting up the “Seagull” is the correct installation of the thread and needle:
- Turning the knob, set the mechanism to pull the thread to its highest position.
- Insert the needle into the holder as far as it will go, turning the flat side to the shaft on which the foot is located.
- Secure the needle with the screw.
- Install the spool of thread on a special pin.
- Pass the thread through the thread guide and friction washers.
- Insert the thread into the thread tensioner, and then fix it in the thread guide and needle holder.
- In conclusion, the thread must be threaded into the eye of a needle.
All this applies to the upper thread.
Let's figure out how to configure the lower thread:
- Wind the thread over the bobbin.
- Insert the bobbin into the cap, pull the thread out.
- Replace the cap until it clicks.
- Turn the knob of the machine to tension the threads.
- Thread both threads under the presser foot.
All! Now you can sew.
to contents ↑How to set up an old Podolsk sewing machine?
The peculiarity of this sewing machine is that with its help it is possible to sew dense and thick fabrics, for example, denim. The machine is quite simple to operate, but at the same time you need to follow simple rules that will extend the working life of the structure:
- In accordance with the instructions, the flywheel of the machine should only rotate in the direction “towards itself” (the direction of movement of the handle is from a working person). The rotation of the flywheel "on its own" is unacceptable, since the thread in the shuttle can get confused.
- If the machine is inoperative, the presser foot must be raised.
- Do not start the device without moving the fabric under the presser foot, as the teeth of the fabric advancing device may become dull.
- Do not stretch or push fabric during operation. The needle may break or bend. The machine itself promotes tissue.
- When working, do not forget to tightly close the front plate above the hook.
How to wind a thread on a bobbin?
The Podolsk machine is equipped with a special winder located at the back of the machine, near the flywheel.
Important! The winder is operated together with the lower thread tension device, which is located in the right corner of the platform. The sewing machine mechanism should not work while winding the thread.
 How to set up an old manual sewing machine of this model:
- The first thing to do is turn off the flywheel so that it cannot start the movement of the machine. To do this, turn the friction screw located in the central part of the flywheel in the direction “towards you”.
- Place the bobbin on the coiler.
- Put the spool of thread on the spool pin.
- Pass the thread from the spool under the washer of the tensioner, and then up to the bobbin.
- Press the winder frame down so that the pulley rim is in contact with the flywheel.
- Hold the free end of the thread until enough threads are wound so that the thread snaps into place. Then tear off the sticking end of the thread.
Important! With proper winding, the coils lie tightly and evenly.
Threading the bobbin into the cap:
- Holding the bobbin with your right hand, insert it into the cap. At the same time, the oblique slot of the cap should be on top.
- Then pull the thread through the slot to the tension spring, and then into the slot at the very end of the spring.
- Install the cap into the machine, pull out the free end of the thread and close the shuttle device.
How to install the needle?
The needle is installed when the needle bar is in its highest position.
Important! You need to install the needle correctly. Otherwise, the line will turn out with gaps. The flat part of the needle bulb is directed to the left, and the long groove on the blade is directed to the right.
Threading the upper thread:
- Turning the handwheel toward you, set the thread take-up lever with the hole to its highest position.
- Set the spool on the pin and pull the thread to the eye of the needle.
Important! Thread the thread into the eye of the needle to the outside - from right to left.
Preparing the machine for sewing
How to set up a manual sewing machine, figured out. Now let's get ready for sewing:
- First of all, pull the bobbin thread outward. To do this, turn the handwheel of the machine so that the needle first lowers, capturing the shuttle thread, and again rises to the upper position.
- After that, pull both threads back and put them under the foot.
- Lower the presser foot onto the lined fabric.
- The machine is ready to go.
Features tuning mini-cars
This is the best option for occasional use. Externally, such a machine is similar to a stapler for fastening papers.
Important! The device fits freely in a handbag. The machine takes up very little space and can be held with one hand.
The resemblance to the stapler is not accidental. The principle of use is approximately the same, only instead of staples, a spool of thread is inserted on the side. Before refueling, you need to wind the thread on a regular standard spool, which is supplied with the device.
Important! You can purchase several of these spools in the store and wrap threads of different colors on them.
The compact autonomous machine sews well both thin and heavy dense fabrics. You can use it both at home and on travel. The design is extremely simple: press the button and sew the fabric.
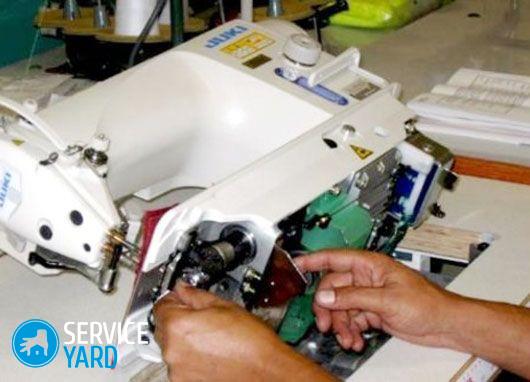
to contents ↑Service Issues
Repair of the sewing unit is best entrusted to a professional master. However, there are settings that the seamstress can quite cope on her own. Moreover, in the process you have to deal with various types of tissues. To know how to set up an old sewing machine in case of minor problems is necessary.
Presser foot strength
You can adjust it by tightening or loosening the bolt that presses the foot spring. It is located directly above the foot and is made so that it is convenient to twist it by hand.
Important! If you intend to work with a thin cloth, the presser foot must be loosened.
Tooth height for tissue advancement
In the machine "Seagull" regulation is carried out using a disk in 4 positions. The thicker the fabric, the stronger the teeth should protrude. When embroidering, the teeth hide completely.
Important! “Podolsk” has 3 positions of regulation of teeth.
Lower thread tension control
It is carried out using a special adjusting nut. Adjustment is made, for example, if loops form below.
Upper thread tension control
To do this, there is a small screw that is located on the spring of the bobbin case. Adjustment is made if loops appear on the top during sewing.
Important! Sometimes, if the bobbin is rotated too freely, the thread often breaks inside the cap.
New models of sewing machines are equipped with special spring devices that press the bobbin. In old cars, this is not. To solve the problem of how to set up an old sewing machine, you can simply:
- cut a circle with a diameter slightly less than a hairpin from fabric or thin paper;
- cut a hole for the axis in the center.
It remains to put a homemade washer in the cap of the bobbin, drip on it special oil for sewing machines, and then insert the bobbin.
to contents ↑Care Issues
- If you work on a sewing machine without lubricating it for years, it will certainly work, but over time various problems will arise and the quality of sewing will deteriorate. But, if you regularly lubricate it, it will last much longer. Lubricate the machine once every six months to a year.
Important! When lubricating, use special oil for the sewing machine. Otherwise, the appearance of the “drying oil effect” may occur, and the machine’s travel becomes more difficult.
- They clean equipment from dust much more often.It all depends on what fabrics you use when sewing. Especially a lot of dust from fur, wool and knitwear. After work, it is necessary to sweep the dust under the covers, from the surface of the machine, under the hook and the needle plate. You can use an ordinary cosmetic brush for this.
- At the end of the work, place a small piece of dense fabric (for example, denim) under the foot.
- The machine must be kept inoperative under a cover.
Stock footage
With proper care, the device will work flawlessly, and you will rarely have questions on how to set up a manual sewing machine or repair it. So - you can easily create your own original clothes and look irresistible in them.
- How to choose a vacuum cleaner taking into account the characteristics of the house and coatings?
- What to look for when choosing a water delivery
- How to quickly create comfort at home - tips for housewives
- How to choose the perfect TV - useful tips
- What to look for when choosing blinds
- What should be running shoes?
- What useful things can you buy in a hardware store
- Iphone 11 pro max review
- Than iPhone is better than Android smartphones
 (No ratings yet)