

Doors for a wardrobe do-it-yourself
Furniture in the form of a wardrobe recently appeared in the everyday life of almost every average family. In the recent past, this kind of furniture was considered a rather expensive and exclusive interior item, which appeared on the pages of glossy magazines or adorned living rooms and halls only among wealthy people. Such products combine practicality, saving usable space and spaciousness, and in addition a wardrobe fits perfectly into any interior of a room, in most cases it even becomes the main highlight of a room. If you have already encountered a miscalculation of the cabinet in firms that produce furniture, then the prospect of replacing furniture looks somewhat frightening. Based on this situation, for craftsmen who can handle carpentry and locksmith tools, the question creeps in: how to make the doors for a wardrobe with your own hands? It turns out that this is quite possible. The installation and assembly process of the cabinet is, in principle, not complicated. The main task is the installation of a sliding door system. Of course, you will get a good result in case of maximum concentration on the work process and observing a clear sequence of technological actions.
to contents ↑Preparatory work
Making doors for a wardrobe with your own hands is not the easiest task, so before you begin, you should carefully consider all the details:
- The first and most important thing to know is the exact size of the opening where the door will be installed. This is necessary in order to correctly determine the required quantity and type of materials for installation.
- Decide for yourself what to make cabinet doors. To do this, you can use glass, mirror, chipboard or chipboard and other durable sheet materials.
- Decide how the cabinet doors will work, in which direction each of the halves will move, to determine the main one.
Important! You can easily find all the necessary set of accessories in a furniture store.
- Prepare the necessary equipment for assembling the cabinet so that at the right time everything is at hand.
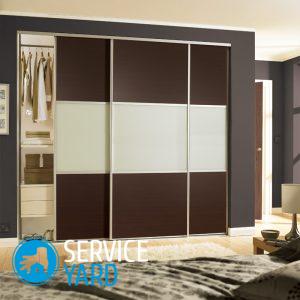
Complete set of system for a sliding wardrobe
In this article we will not consider the sequence of assembly of the cabinet, the installation of shelves, side and rear walls. The main element of such a product is sliding doors, and in some cases they can be mounted without installing a frame.
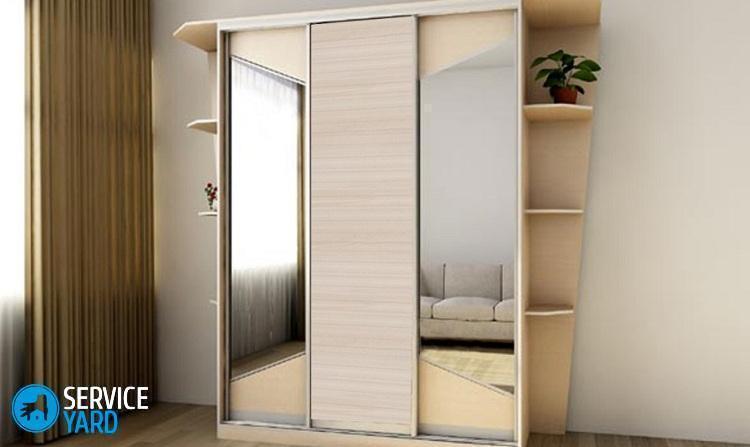
- With a sliding furniture system, you can close a niche in the corridor, in which to install shelves, drawers and additional racks inside.
- Sometimes such partitions separate the end of the room across the entire width and height.
- A small room can serve as a spacious closet, pantry or a small office.
Important! A properly assembled sliding system allows you to move the door, without much effort opening one or another part of the cabinet, and in the closed position it fits snugly to its side parts.
The kit includes the following parts:
- Side rack handle type open, profile C, or closed type N.
- Upper and lower profile guides (tracks) are two-track.
- Door frame top and bottom.
- The frame for the door is optional.
Important! The use of several filling fragments is provided by the type of model.
- Shaped emphasis is used as an additional element. Used for edging vertical openings made of chipboard.
- Direct emphasis, an additional element. Used to frame the opening, in places of contact with the walls.
- Frame for stiffening the door frame. Especially often, such a frame is used when filling with fragments of glass, a mirror, or in the case of large dimensions of the product.
- P-profile, auxiliary element. They are used for finishing the ends of the side parts of chipboard, in places of contact with the floor or ceiling.
- Symmetric top roller for system H of closed vertical profiles.
- Asymmetric roller for open vertical C profiles.
- Silicone rubber sealant.
Important! A sealant is laid around the perimeter of the door if the filler is thinner than 10 mm.
- Basic lower roller with adjusting screw.
Important! To install two sliding doors, you need a set of two rollers for each door.
- Assembly screw AB75 with self-tapping top.
- Spring stop to lock the door in the closed position.
- Schlegel - a strip of plastic and pile, softens the blow when closing the door.
to contents ↑Important! All equipment system is individual. Additionally, you can purchase magnetic stoppers, closers, plugs on the ends of the profiles.
Door dimensions and surface preparation:
- When making a door for a niche, very carefully measure the walls - they should be perfectly even vertically, because a side guide profile is attached to them.
- The top and bottom (ceiling and floor) should also be flat. They fix the lower and, accordingly, the upper guide of the sliding system.
- All angles around the perimeter must strictly be 90 degrees. Otherwise, the doors will not be fully adjacent to the side profile.
- If the opening does not meet all the requirements, and you do not want to mess with the putty, you can install a box in it. You only need to mount it before you take measurements, or mount folding doors for the cabinet with your own hands.
Important! A box installed in the opening will reduce the size of the opening, so all final measurements for the doors are done after installation.
- Do not worry if the material is purchased and the box installed after the acquisition of building materials. Profiles can be easily trimmed, just a few leftovers.
Do-it-yourself sliding doors for sliding wardrobes. Door size calculation:
- To determine the size of the doors, you need to measure the width of your cabinet, while not taking into account the width of the side walls that the doors will rest on in the future. For example, after measuring, you’ve got a width of 1500 mm. Cloths according to the rules should overlap each other, at least by the width of the handle (25 mm). For a better appearance, we recommend increasing the clearance to 50 mm.
Important! As a result, we get the sash size: (1500 + 50) / 2 = 775 mm.
- The height of the door is calculated taking into account the lining under the door and the gap itself between the guide profile and the door. As a rule, the linings are placed at the top and bottom, the thickness of one lining is 16 mm. For smooth and correct operation of the system, 15 mm is allotted to the gap. As a result, the calculation looks like this: cabinet height 2200-16-16-15-15 = 2138 mm.
Web Size:
- The width and height of the internal filling of the door is calculated based on the distance between the handles, the upper and lower frames.
- To insert the inner filling neatly without damaging it, leave a gap of 1 mm on each side.
Important! In cases where they work with glass, use a rubber band, the gap on which is also 1 mm.
- Assembly is quite simple: in the middle of an already assembled, but loosely twisted frame, insert the filling and tighten the screws tightly.
The dimensions for assembly will be ready. Next, we will tell you how to make doors for a wardrobe.
to contents ↑Sliding system assembly sequence
In the work we need the following:
- A vertical profile-handle is sold in the store with a 2.7 m long pagon. To assemble two wings, you will need 4 pieces of such a profile.
Important! Lower and upper slide rails are sold per meter.
- To assemble a sliding cabinet door, you need 2 meters of lower and 2 meters of upper profiles.
- All necessary fittings are sold as a set, it includes:
- two rollers for the lower profile;
- two bolts for mounting the rollers;
- 4 screws for assembling the frame;
- 2 supports for the upper profile.
Important! One set is designed for the assembly of one door. Accordingly - if you plan to install 2 or 3 doors, purchase the appropriate number of sets.
Operating procedure:
- First of all, we cut off the necessary length of the handle profile. They are additionally pasted with a film. In order not to damage the product during installation, it is not recommended to remove it before the end of work.
- Next, drill holes for the mounting bolts in the frame handles. To do this, measure the distance from the end of the lower horizontal profile to the middle of the groove for fastening.
- We measure the same values on vertical guides and drill holes with a diameter of 5 mm.
- Similarly, the marking of the upper profile is carried out.
Important! Holes for fasteners are drilled through 2 slats. Exterior usually do more, approximately 8 mm. At the moment of twisting the profiles, the self-tapping head will go through the hole, and fastening will occur to the inner strip.
- The holes for attaching the rollers to the bottom of the handles are made in exactly the same way.
- To assemble the frame, align all the holes and tighten them with screws. At the top of the frame, insert the support, then screw tightly tighten.
to contents ↑Important! In the case of combining the canvas with different materials, such as glass and chipboard, another profile will be located in the middle of the door.
Do-it-yourself wardrobe door assembly
Installing an already assembled door is not difficult:
- First, the upper rollers are inserted into the guide in the already prepared system, and only then they are inserted into the lower one.
- First of all, set the canvas, which is placed further.
- At the end of the installation, the valves are adjusted. To do this, screw the bolts of the lower rollers with a hex wrench or loosen the bolts.
Stock footage
Having decided on such a step as making the doors for the wardrobe with your own hands, you will not only save a decent amount of money, but also turn your design ideas into reality, making the interior of the room unique. Applying our advice and recommendations, the whole process does not take much of your time and does not require much effort.
- How to choose a vacuum cleaner taking into account the characteristics of the house and coatings?
- What to look for when choosing a water delivery
- How to quickly create comfort at home - tips for housewives
- How to choose the perfect TV - useful tips
- What to look for when choosing blinds
- What should be running shoes?
- What useful things can you buy in a hardware store
- Iphone 11 pro max review
- Than iPhone is better than Android smartphones
 (No ratings yet)