

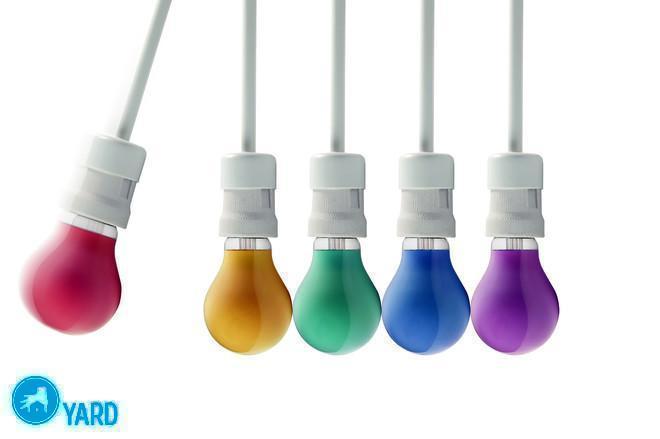
How to paint a light bulb?
Little things in the interior mean a lot and are not those little things that you should not pay attention to. Original touches of the decor, unusual solutions aimed to emphasize the comfort and warmth of the home environment, do not necessarily require large expenses and money. For example, to emphasize and bring bright colors to the atmosphere, you can simply paint the light bulbs. After reading our article, you can understand how to paint a light bulb, how to do it better. Here you will find the easiest and most affordable ways.
to contents ↑Coloring a light bulb - what you need to know about the process?
The idea of coloring can come to the mind not only of a child, but also of an adult. You ask why they are painted? You can buy multi-colored. But no, it’s very rare to find a blue or red bulb in the store, and they are not cheap.
Why you may need light bulbs in different colors:
- painted lights in the entrance will not be stolen;
- multi-colored garland, made by yourself, will delight your household;
- multi-colored backlight will look very stylish.
The main and problem that you may encounter is temperature. When the light is on, it heats up and the color can change very much at high temperatures. Incandescent lamps come in different capacities, on the basis of which incandescent lamps of no more than 25 watts are suitable, and ordinary energy saving.
Important! Halogen lamps must not be painted. Reducing the light transmission will lead to uneven heating, respectively, the lamp will fail.
We will consider in detail 7 ways of making paint at home.
to contents ↑Method 1 - Ball Paste
For this method, you need to prepare the following components:
- ball paste;
- acetone, paint thinner (can be bought at any paint and varnish store), ethyl alcohol (sold at the pharmacy);
- paint brush;
- capacity for the preparation of paint.
Cooking process:
- Remove the rod from the paste. Blow the paste into a container. We take at least 5 rods.
- Add 50 ml of acetone or some other solvent that is available.
- Stir until smooth.
- Apply paint to the light bulb with a brush.
Important! By applying several coats of paint, you get the color.
How to make the right color?
- From blue paste you can get a blue color - the number of rods will affect the color saturation.
- From red - red.
- From green to green
- Of the yellow, yellow.
You can also show imagination, and by mixing red and blue, get a purple color, add red to green and the result will be brown and so on. It all depends on your imagination.
Important! Prepare a drying stand in advance. It can be made from improvised materials:
- cardboard;
- polystyrene;
- plastic bottle.
At a certain distance, so that the bulbs do not touch each other, make holes whose diameter is equal to the diameter of the bulb base. A light bulb must be inserted into these holes for the final drying of the paint. So you can easily and accurately paint the light bulb.
to contents ↑Method 2 - Nail Polish
For this method we will use quick-drying nail polish. They can paint an incandescent light bulb of low power or energy-saving (fluorescent or LED).
Step-by-step instruction.
- We take a light bulb and use the brush that is in the varnish to apply varnish.
- We put on a stand for 10-15 minutes, with the base down.
- Reapply the varnish.
Important! For application, you can use a tampon or cotton pad. There will be no stains and the varnish lays more evenly.
If you have only colorless varnish available, do not worry - you can paint with ball paste, as described above.
to contents ↑Method 3 - PVA Glue
For cooking, you need to prepare the following items:
- PVA glue;
- ink for an inkjet printer, or other water-soluble paints;
- shallow capacity;
- a brush.
Important! It can be used only on moderately heating elements.
Cooking paint:
- Pour glue into the container.
- Add coloring pigment in a 1: 1 ratio (50 ml of glue needs 50 ml of paint).
- Stir well with a brush.
- Apply to a light bulb and dry.
to contents ↑Important! Prepare separately all the necessary shades so that you can paint the bulbs in blue, red, green or any other color.
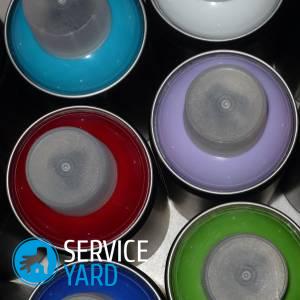
Method 4 - Auto Enamel
Car enamels are sold in aerosol cans. Everything is simple enough here, a lot of time and effort to paint a light bulb is not necessary. Need to:
- Buy balloons with the right colors.
- Spray paint on light bulbs at a distance of 30-40 cm.
- To dry.
The advantages of this method:
- suitable for bulbs with bulb temperature up to 200 ° C;
- easy to use;
- dries quickly.
to contents ↑Important! Do not apply too thick a layer of paint, it can make the flask opaque, and the bulb simply will not shine.
Method 5 - Stained Glass Paints
These are special paints for creating a picture on glass. They come in many forms. In our case, we need water-soluble firing. When heated, they do not burn, but rather become more transparent. Accordingly, a bulb painted using this method will last longer, and the tinting will be brighter.
Important! The only drawback of such a tool is the price.
The application technology is also not difficult:
- Mix paint in a bottle.
- Apply with a brush or swab from sintepon.
- To dry.
Method 6 - Organosilicon
The painted surface with silicone enamel withstands high temperatures. Light bulbs painted in this way can be used to create color music. Available at any hardware store.
Important! When buying, pay attention to the toxicity of the varnish.
Instructions for use:
- Stir the enamel with the solvent (the mark of the desired solvent is written on the packaging).
- Apply with a brush to the light bulb.
- Put on a stand for drying.
to contents ↑Important! Wear a mask and gloves during work, as the paint is toxic during drying and staining.
Method 7 - Zaponlak
Zanoplak is a varnish, which in its composition it belongs to nitro-varnishes, is a liquid mixture of nitrocellulose mixed with dyes and plasticizers.
The advantages of this dye:
- the components of varnish are not dangerous to humans;
- the coating withstands high heat;
- ease of use.
Important! The disadvantage is the small choice of color. But it is easy to fix with ball paste. For example, if you need a red color.
Cooking Technology:
- Remove the stem from the red paste.
- Blow the contents into a bottle of varnish.
- Stir well.
- Apply with a brush.
From our article, you learned how to paint light bulbs using various means.
to contents ↑Stock footage
Use any method you like, and you will please your family with an original festive garland, light music, or you can create a more calm and comfortable atmosphere in the desired room.
- How to choose a vacuum cleaner taking into account the characteristics of the house and coatings?
- What to look for when choosing a water delivery
- How to quickly create comfort at home - tips for housewives
- How to choose the perfect TV - useful tips
- What to look for when choosing blinds
- What should be running shoes?
- What useful things can you buy in a hardware store
- Iphone 11 pro max review
- Than iPhone is better than Android smartphones
 (No ratings yet)