

DIY cut dress
Even experienced seamstresses are not always able to create the right pattern for sewing clothes, because there is no guarantee that, given all the measurements taken and their clear transfer to paper, the product will fit perfectly. The main reason for this inconvenience is that not all people have ideal forms. The non-standard shape, as a rule, leads to the fact that it is not possible to create a universal pattern. That is why, if you are just starting your career, try to create a free-cut dress with your own hands. It is important that you do not have to use any complex drawings, you can use an old T-shirt or other thing. In this article, we will provide some of these simple workshops.
to contents ↑Creating a casual dress
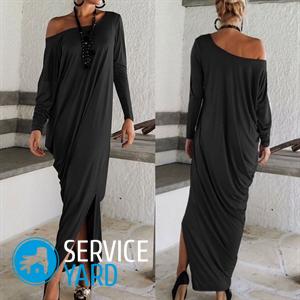
Believe me, a direct dress without tucks can be sewn with your own hands even in one evening, while you do not have to use a sewing machine. To make the product look spectacular, use bright material for the manufacture. Mint or blue fabrics just look gorgeous on a tanned body. If you plan to sew a long dress, be sure to add some material for the sleeves. If desired, you can add a collar or creases, but then the consumption of fabric will also increase.
Important! When calculating the required amount of fabric, be sure to consider the allowances for bending the lower edge of the product and all the necessary seams.
Building patterns
Before sewing a loose-fitting dress, make a pattern, of course, in this case there is no urgent need for it, because the dress will be quite simple. You can create it even using your own t-shirt as a template.
Follow these steps to get a pattern:
- Fold a strip of fabric along the length, face inward.
- Take your t-shirt that fits perfectly on you. Iron it well, then fold it along the line of symmetry. Attach the T-shirt to the fabric so that the fold line is clearly aligned with the fabric curve.
- Using pins, attach the t-shirt to the knitted base, circle it with chalk, taking into account allowances for seams of 0.5 cm.
- Now you need to make a back pattern: determine the desired length and width of the product. If your parameters are close to ideal, then it’s enough to add 50 cm in the armpits and 100 cm along the bottom line. That is, you need to add 12.5 cm and 1.5 cm to ½ of the back: as a result, we get 14 cm under armpits, 25 cm and 1.5 cm, along the bottom line - 26.5 cm.
- Draw on the paper a smooth line of the hem of the dress.
- Create a portion of the submission. Follow the same steps as in the case of the manufacture of the back part, only here you will have to make a deeper neckline.
- Use a T-shirt sleeve as a template, make a sleeve pattern on the fabric so that it is, in length.
- Build a neckline drawing following the selected view. You will need two parts for this: one for the front and one for the back.
- Cut out all the workpieces, leaving 0.5 cm of seam allowances.
Important! If you are not sure that you have enough fabric, it is better to first build a pattern on tracing paper in order to avoid miscalculations.
Sewing dresses
Now we will consider in stages how to sew a free-cut dress with your own hands.
Perform the manufacture according to the diagram below:
- Lay the front and back of the product on a flat surface inward, facing each other.Chip off the pins along the shoulder line, process them with a zigzag or knitted seam.
Important! Keep your shoulder lines aligned.
- Pins sleeves to the back and front side. Align the axis of symmetry of the sleeves with the shoulder seams. Sew them.
- Chip off the dress on the sides from the line of the sleeves to the waist line, then sew.
- Then connect the side seams from the waist line to the bottom edge, also sew them.
- Sew to the neck first and then sew the stitching. Iron it so that the seams are even.
- Pin the sleeves and bottom of the product to the desired length. Hem them with a blind stitch.
- Iron the dress and you can try on.
to contents ↑Important! You can wear such an outfit with a thin belt, emphasizing its airiness and lightness. You can complement the image with an original pendant and other accessories.
Sewing a light summer dress
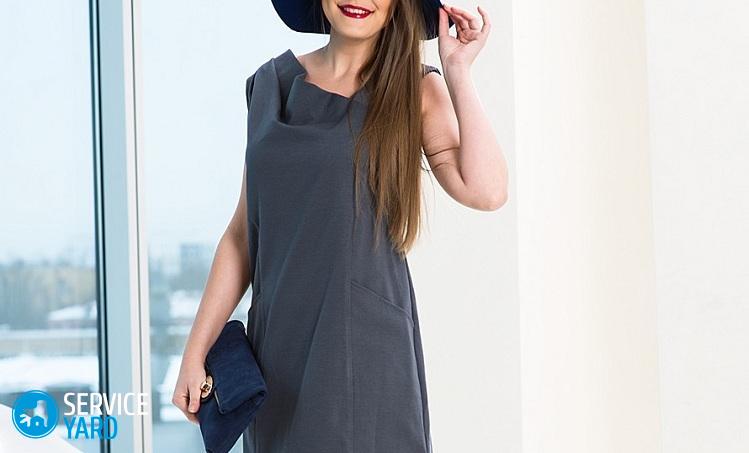
Every girl would definitely like to update her wardrobe before the start of the new summer season, and today we will tell you how to sew a straight-cut dress with your own hands that will truly decorate you. Free silhouette products are in great demand, because they are incredibly comfortable to wear and relevant today in the fashion world.
You will need:
- 1.5 m of fabric, preferably light, flowing, cool.
- Scissors.
- Threads in the color of the main material.
- Chalk.
- Needles.
- 0.6 m oblique inlay.
In this master class, maximum attention will be paid to the processing of the neck, since we will use a slanting inlay for this. It is used for fabrics of any texture and density. It can be purchased ready-made in the store or created with your own hands.
Sew the dress according to the instructions given:
- First of all, we create a tie, if you still decide to make it original or did not find a suitable option in the store. Cut the fabric at an angle to the shared thread of 45 degrees into strips 3-4 cm wide. In the middle of the strip, bend the inside out, then iron and bend each half again.
- Reveal the details. Use loose-fitting clothing as a basis to minimize adjustments to the pattern. Cut out a shelf with a fold, two parts of the back and sleeves.
Important! To better fit the dress on the figure, if possible, extend the tucks to the neck, if the original version was different.
- Process all the elements on the overlock. Sew tucks and side seams.
- Slightly roll over the sleeves and sew them.
- Process the neck. Simply attach the bias tape to the fabric face to face. Sew it, trying to get the needle clearly into the bend of the inlay.
Important! To make it sit better when sewing, stretch it a little.
- Make a stitching on the tape, stepping back from the seam a few millimeters.
- On the wrong side of the dress, unscrew the ribbon, hide the neckline inside, fold the ribbon under the claw of the machine, lay a stitch parallel to the stitching. As a result, the inlay will remain on the inside, and on the front side one shovchik.
- Work on the sleeves and the bottom of the product.
- Perform final ironing.
- Decorate the dress with delicate ribbons around the edges.
Stock footage
As you can see, it is easy to sew a dress of a free cut, even without having much experience in the field of cutting and sewing. Now calmly wait for the hot days and wear your new outfit with beautiful shoes and suitable accessories.
- How to choose a vacuum cleaner taking into account the characteristics of the house and coatings?
- What to look for when choosing a water delivery
- How to quickly create comfort at home - tips for housewives
- How to choose the perfect TV - useful tips
- What to look for when choosing blinds
- What should be running shoes?
- What useful things can you buy in a hardware store
- Iphone 11 pro max review
- Than iPhone is better than Android smartphones
 (No ratings yet)