

DIY shoe bag
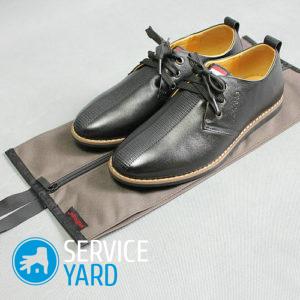
Oh, this removable shoes! The child strives to forget or lose her. You can understand it - carrying an extra load in a boring plastic bag or a standard dark bag is completely uninteresting. And if you try to sew something spectacular, something that no one else has? Most likely, the student will cherish such a change bag much more, because this is part of his personal space. Therefore, do not be lazy and sew a shoe bag with your own hands, but about how to do this, read our article.
to contents ↑What to make of?
To sew a bag for replaceable shoes with your own hands, you need quite a bit:
- piece of fabric;
- braid or beautiful cord;
- patches for application;
- sewing supplies.
Talk about materials
In principle, a shoe bag with your own hands can be from anything. But if you have a choice, it is better to use a practical and beautiful fabric. She must:
- be strong enough;
- easy to wash;
- do not crumble;
- do not shed.
Important! Other things being equal, it is better to choose a material that does not get wet. But such parameters as the ability to pass air or hypoallergenic, recede into the background, because the child will not put this thing on himself.
Most suitable:
- Bologna;
- synthetic jacket fabric;
- calendared nylon or lavsan;
- raincoat fabric.
to contents ↑Important! The bag, among other things, should be liked by the owner, then he will be more careful about replacement shoes.
The easiest bag
If you are thinking about how to sew a shoe bag for a schoolboy, a pattern may not be necessary.
Pattern
The simplest bag is laid directly on the fabric:
- To begin with, it is useful to determine the size. For a younger schoolboy, a bag with a width of 20-25 cm and a length of 30-40 cm will be quite enough, but you can make it bigger.
- It is always better to cut the fabric along the lobar, but in this case it is not necessary - serious mechanical loads that can stretch a thing very much are not supposed.
- For marking you need a ruler and chalk, which is successfully replaced by soap, pencil or even a ballpoint pen (if, for example, you are going to sew a bag of leather).
- You need to carve out a rectangle whose width is equal to the width of the bag, and the length is twice as long as the finished product will have.
- Do not forget about allowances.
The simplest layout option looks like this:
- Fold the cut in half with the front side inward.
- Draw a perpendicular to the bend (a tailor's square is very useful for this purpose, but you can also use the school one).
- From the beginning of the perpendicular along the fold line, set aside the width of the allowance, from this point also draw up the perpendicular.
- By folding, set aside the width of the product and the width of the second allowance.
- On all perpendiculars, set the length of the product and connect the dots.
- Put up the hem allowance - 3-5 cm.
- Cut out the part.

Jewelry
If you are going to decorate the bag with embroidery or applique, it is better to do it right away. But beads or beads can be sewn and then. For application fit:
- pieces of fur and leather;
- shreds;
- braid.
Important! Plots depend on the tastes and age of the child. For girls, you can choose floral ornaments, fantasy compositions from beads and beads, your favorite cartoon characters. Plots from cartoons are suitable for boys. But you can also sew the emblem of your favorite football team, for example. Ships or space rockets may appeal to both.
Making a decoration:
- Draw a sketch or download something suitable from the Internet, transfer the contours to the fabric.
- Cut out the details of the applique from different shreds.
- Sew them with a buttonhole stitch, tight stitches, or glue them.
Important! For application, it is necessary to choose shreds that do not crumble.
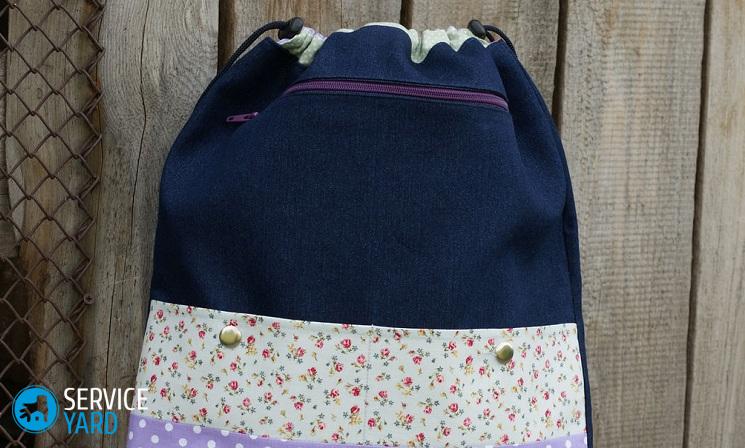
Sew bag
Such a bag has only two seams, plus top processing. By the way, side sections can be overcast before you begin to assemble the product, and some materials do not show off at all, so the sections can be left as is.
Here's what you have to do:
- Fold the workpiece face inward, aligning the side slices.
- Stitch the seams.
- Bend the top by 0.5 and 3 cm and sew.
- Make a hole for the cord and snag it.
- Insert a beautiful cord.
DIY shoe bag is ready!
to contents ↑How to sew a shoe bag from old pants?
It is not necessary to buy a new fabric for a bag. You can, for example, use old jeans if they have a piece of a leg without holes on them. Such a bag is best made in the form of a sack, that is, with a round bottom. In addition to the trouser leg, you will need more dense fabric or leather.
Pattern:
- Measure the leg width and multiply the resulting measure by 2.
- Calculate the bottom radius by dividing the resulting measure by 6.28.
- Cut out a circle of such radius from dense fabric or leather, do not forget about the allowance.
Assembly
The most difficult thing is to ensure that the denim does not crumble. There are several options:
- immediately process the slices with an overlock;
- sew the bottom, align the allowances and sheathe them with a double braid folded in half.
In all other respects, labor assembly does not amount to:
- Bottom the bottom of the denim cylinder.
- Stitch the details.
- Process the stock.
- The top can be hemmed, for example, with a wide ribbon - it does not crumble and it is not necessary to overcast it.
- Make one or two holes for the cord in the drawstring from the wrong side.
- Insert the cord.
Leather shoe bag
You can make a leather bag without sewing accessories. Fragments can be connected not with seams, but simply with a strong thick thread or a strong cord. Such a bag consists of two parts:
- round bottom;
- rectangular main part.
Such a bag is covered quite easily; you can not do templates from paper:
- Decide on the radius of the bottom.
- Draw a circle of such a radius on the piece of leather without any allowances.
- Calculate the length of the main part - it is equal to twice the radius of the bottom, multiplied by 6.26.
- The width of the main part is arbitrary, but such that the bag really fits shoes and, possibly, some of the toys.
- Draw a rectangle with the given parameters; allowances are also not needed.
- Cut out the details.
Important! A sewing machine in this case is not needed, but it makes sense to think about how to make holes. For example, you can take a machine with which eyelets are inserted, or a hole punch - it pierces some types of skin. On the contours of both parts, make holes at a distance of no more than 1 cm from each other, but it is possible more often.
Weave the details
How to connect parts together? Can be used:
- thin braid;
- do-it-yourself cord made of thick cotton threads;
- leather cord;
- synthetic twine.
The easiest and cheapest option is the last. Synthetic twine is bright and durable, it costs a penny, it is in any hardware store.
Operating procedure:
- Turn a leather rectangle into a pipe - determine where you will have the upper part, connect the neighboring holes and tie a good strong knot from the wrong side.
- Close the cut - you can use any method of tying shoelaces.
- When you reach the bottom, do not tear off the cord, but begin to attach the bottom.
- Attach the cord well at the very end.
- In the holes that are located on top, also thread the cord, you can thicker.
Stock footage
In a word, in order to make an original bag for replaceable shoes, you do not need large expenses. By the way, it can not only be sewn, but also knitted or weaved - from thick cotton threads or the same universal synthetic twine.Be sure that your absent-minded son or a dreamy daughter will make a bag made with your hands try not to forget and not lose.
- How to choose a vacuum cleaner taking into account the characteristics of the house and coatings?
- What to look for when choosing a water delivery
- How to quickly create comfort at home - tips for housewives
- How to choose the perfect TV - useful tips
- What to look for when choosing blinds
- What should be running shoes?
- What useful things can you buy in a hardware store
- Iphone 11 pro max review
- Than iPhone is better than Android smartphones
 (No ratings yet)