

How to sew a fleece sweatshirt with your own hands?
If you decide to do needlework, sew something for yourself to replenish your wardrobe, then a sweatshirt or sweatshirt will be an ideal option. It is not difficult to find a pattern for such a jacket, and everyone knows about the wonderful properties of such a popular material as fleece. Experienced needlewomen consider this option for making clothes ideal, this is a real find. In fact, this is an indispensable thing in any wardrobe. This article will describe in detail how to sew a fleece sweatshirt with your own hands step by step.
to contents ↑What is a sweatshirt or sweatshirt?
This word came to us from the English language, it was formed from a combination of two phrases: a shirt and a sweater. That is, this is a kind of sweater. People often use the word sweatshirt. Previously, these things were also worn, only designers improved them a bit, adding pockets, stripes, a hood, thermal printing, a zipper to get a more modern model.
to contents ↑Important! Such clothes are sewn only from dense knitwear, footer or fleece.
What is fleece?
Fleece is a dense pile fabric, often used for the manufacture of sportswear. Even though the material is one hundred percent synthetic (polyester), it has a number of beneficial advantages:
- Due to the fact that the fleece is pile on both sides, it has good thermal insulation, keeps heat, even when wet.
- Conducts moisture, but does not absorb it.
- Slowly gets wet, dries quickly.
- It has a high level of breathability.
- The material is pleasant to the body, soft. This is an ideal alternative to wool.
- Does not cause allergic reactions.
- It weighs a little.
- Elastic, compact.
- Durable and durable.
- After washing does not require ironing, as it does not wrinkle.
- With proper care, things do not lose shape.
- Moth does not like this fabric.
How to tailor fleece?
Before you sew a fleece sweatshirt with your own hands - female or male, carefully read the rules for cutting this material, since this process has a lot of nuances.
Features of fleece cutting:
- The canvas has a certain pile direction, which is why the elements of the pattern must be laid out strictly in one direction, that is, from top to bottom. Except for fabric limitations, model selection, or pattern direction. In such situations, a slight deviation from the warp threads and cutting of all parts in the transverse direction is allowed. The finished pile is almost invisible.
- Fleece is a dense fabric, therefore, in the process of cutting, when it folds in half, the details can shift. To avoid this unpleasant moment, it is better to chop them with pins and cut it in one layer.
- Before work, it is recommended to wash the material in warm water and apply a little nap to the edge of the iron.
Important! The fleece will be ironed at medium temperature to avoid melting the threads.
- Before stitching the parts on a typewriter, it is necessary to sweep them or chop them with pins, because because of the high density, the size of the pile, they can slide out under the foot.
- When sewing fleece, gaps often occur, so do this with needle No. 75.
- Edges are best handled on an overlock because there is a chance of fabric shedding. In addition, this will increase the aesthetic qualities of the product.
Knowing these simple secrets and rules, you will definitely cope with the cutting of this high-quality, finicky material.
to contents ↑Do-it-yourself fleece sweatshirt
To sew a sweatshirt with your own hands, prepare everything you may need in the process of work:
- fabric of the necessary size with allowances;
- long lightning;
- threads
- sewing machine or carpet;
- sewing supplies;
- iron.
Next, we will stop at each stage of sewing separately.
Open hoodies
There is nothing complicated in this process, you can use a ready-made pattern or make basic measurements and, in accordance with them, prepare the basic details necessary for sewing a sweatshirt.
You should be able to:
- shelf;
- back;
- sleeves with cuffs.
Important! 2 cm allowances should be made on the sleeves, 2.5 cm on the bottom of the product, 1 cm at the seams. The main thing - do not forget to follow the above cutting rules.
Tailoring sweaters
The basic process of working on a sweatshirt is also divided into several important stages, each of which deserves due attention:
- Stitch reliefs on the back and shelf, connect the parts along the side seams. Iron the relief allowances towards the center, the side seams to the back.
- Stitch the elbow seams on the sleeves, stitch the cuffs to them. Iron the seams of the sleeves into a smaller part, the allowance for connecting the cuffs to the sleeves. Sew the second seam.
- Sweep the shoulder seams, try on the sweatshirt. If necessary, make changes: specify the width and length of the product, sleeves, raise or deepen the neck and armhole, determine the hood or collar.
- Fold the product in half so that the side seams align. Make a neck, make corrections if there are any inaccuracies during the fitting. Stitch the shoulder seams, iron them on the back.
- On a fabric, build a rectangle so that its length corresponds to the length of the neck, the height is 8 cm. Fold the fleece in half, for convenience, apply the length of the rectangle divided in half on it from the fold of the fabric. Make a deflection with a rise. Apply centimeter allowances. In total, you will get two parts (upper and lower collar), while the lower part should be 0.1 cm less than the upper. Connect the collars along the upper cut.
- Align the lower edge of the upper collar with the neckline. Then the center of the back with the center of the collar, the edges of the sides with the ends of the collar. Stitch the collar in the neck, cut the sections of the shelves and the bottom.
- Sweep, then stitch the zipper into the jacket, while grinding the edges of the sides and the ends of the rack. Sew 0.7 cm stitches from the front of the zipper to secure the allowances. Gently tuck it in. Make a roll along the upper edge towards the lower collar, fasten its free edges to the neck with ordinary stitches. Lay the line on the front of the machine on the machine, strictly according to the sewing line of the upper part of the collar.
- Stitch both sleeves in the armholes, combining the center points of the sleeves with the shoulder seams.
- Bend the bottom of the sleeves and sweaters to the allowance width, overcast, sew on the front side with a flat or double seam on the machine.
- Remove the remnants of the thread and the chalk lines, steam off the pile in those places where it is jammed.
Stock footage
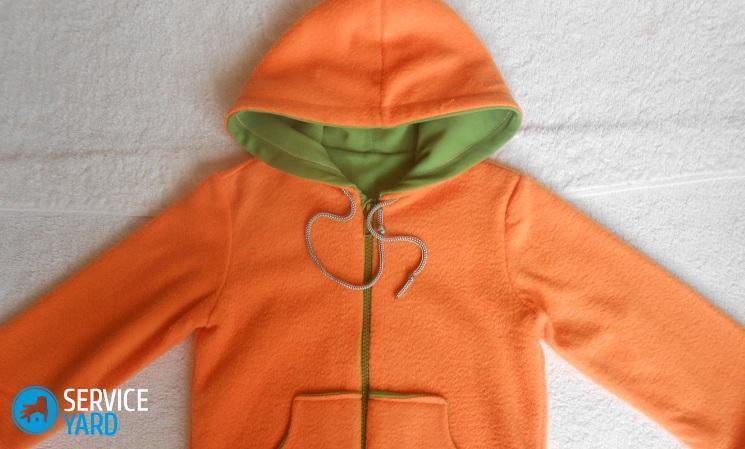
So you got a wonderful, lightweight, free, spacious, comfortable and practical do-it-yourself sweatshirt. It should be washed at a water temperature of no higher than 40 degrees, it is better to choose a mode for delicate fabrics. Do not use bleaches; rinse is recommended with a gentle conditioner.
- How to choose a vacuum cleaner taking into account the characteristics of the house and coatings?
- What to look for when choosing a water delivery
- How to quickly create comfort at home - tips for housewives
- How to choose the perfect TV - useful tips
- What to look for when choosing blinds
- What should be running shoes?
- What useful things can you buy in a hardware store
- Iphone 11 pro max review
- Than iPhone is better than Android smartphones
 (No ratings yet)