

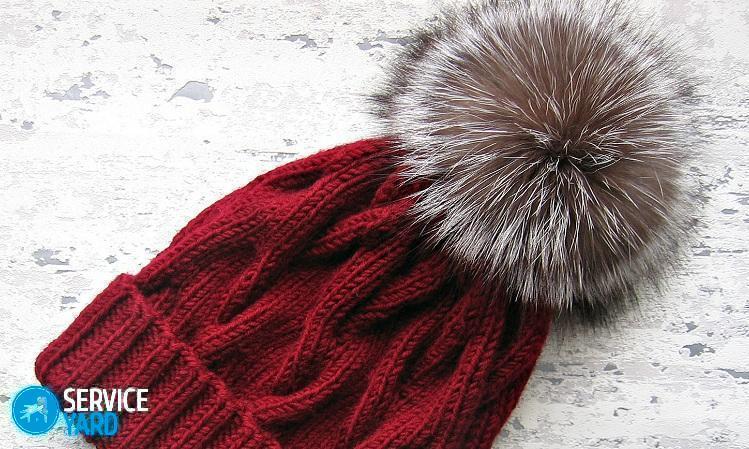
How to make a fur pompom on a hat?

More recently, hats decorated with pompons were considered exclusively part of the children's wardrobe. But modern realities are such that they are worn by almost all women and girls who want to look stylish, bright, and bold. If you like to do needlework, then this article will certainly be useful for you, because in it we will describe in detail how to make a fur pompom on a hat yourself, we will give some more interesting ideas for creating jewelry.
to contents ↑Create a chic do-it-yourself fur pompom
If you want to complement your wardrobe with an original accessory, then try to make a fur pompom for a hat with your own hands. Modern fashion only welcomes the use of fur accessories.
Materials for work
The manufacturing process of the pompom is divided into several important stages, but it all starts with the purchase of a piece of faux or natural fur.
Also required for work:
- soap or pen;
- round pattern;
- threads to match the fur;
- needle;
- sharp scissors;
- a piece of tape or lace;
- synthetic winterizer as a filler.
How to prepare the fur for work?
Each girl at home will find an old, already unnecessary thing from the fur. So, if you decide to make a pompom from your grandmother's hat or collar, you will have to prepare the material so that the product as a result looks neat and beautiful.
Follow this pattern:
- Wash. For this, prepare a solution consisting of 1 teaspoon of ammonia, 2-3 tablespoons of salt, 1 spoon of hair shampoo, 2 tablespoons of soda and a liter of warm water. Soak the fur in it, use a small brush to clean it. Then rinse off the rest of the solution with plenty of clean running water, let the fur dry naturally.
Important! Carefully ensure that during cleaning, the villi are not damaged, the base remains intact.
- Staining. If you are not comfortable with the color of the fur, then it can be easily changed. Use for this ordinary hair dye. Prepare the paint of the desired color according to the instructions in the box, apply it on the fur. Perform all manipulations with gloves in order to rub the paint into the fibers as best as possible, this will also prevent the appearance of unpainted areas. Wash off the paint after a specified period of time.
Important! Do not use a hair dryer to dry the fur, as it can ruin it.
How to make a pompom?
At this stage, we will consider in detail how to make a pompom from fur on a hat. The master class below will allow you to do all the work efficiently and quickly:
- With the base up, spread the fur on a flat surface. It is advisable to fix it with pins, for example, on an ironing board.
- Using a round pattern, such as a cup or saucer, draw a circle on the surface.
- Carefully cut the circle with sharp scissors, being careful not to damage the fur located below. If you are not comfortable using scissors, use a clerical knife.
Important! If you cannot get a perfectly smooth circle, then you should not get upset, because this will not affect the appearance of the product.
- Take a needle with a thread, sew the base with large stitches in a circle. Make sure that during the work the thread is always inside the circle, while the front side was not noticeable.
Important! If the thread clings to the fur, try to release it as carefully as possible.At the beginning of the work, do not make a knot, because it will slip through the base anyway.
- Lock the thread with the locking stitches.
- Determine by eye how much sintepon will be needed to fill the pompom, then tie it with tape or lace.
- Sew the circle to the very end, tighten the thread, thereby forming the future decoration.
- Place the synthetic winterizer inside the pompom, leaving the ponytails of the tape outside, tighten the thread to completely close the hole.
- The remaining ends of the tape will come in handy for attaching the product to the cap.
Self-made yarn pompom
If the idea of how to make a pompom on a fur hat came to your liking, but there was no suitable material at hand, then use ordinary threads. You can make decor for a headdress from ordinary yarn, and to perform work you will need rectangular or round patterns.
In principle, you can make a template yourself.
Important! Remember that when using any of the most popular methods, you will never get a perfectly even pompom. you’ll still have to straighten it and cut it with scissors manually. To get a velvet beautiful product as a result, use only thick soft threads.
How to make a plain pompom from yarn?
First, prepare a piece of thick cardboard, a ruler, sharp scissors, a pen, yarn and an awl. The procedure looks like this:
- Cut two rectangular shapes from cardboard. Note that the bubo will be the same size as the width of the rectangle. Leave a few centimeters for stock.
Important! The length of the patterns does not affect the size of the finished product, but it is better to make it at least 15 cm, so that later it is convenient to wind the threads.
- Take a ruler, determine the center of our rectangle, at this point make an awl with a puncture. Then cut it to the puncture point on the right side.
- Pierce the rectangle on the left in two places at a distance of a few centimeters from the edge, make cuts with scissors.
- Thread a long thread into the needle, fold it in half, thread it into the finished template.
- Wind the thread from the ball onto a cardboard template.
- Move to the right, towards the large cut, the wound thread.
- Then tighten the yarn with a needle and thread as tight as possible.
- In the center, sew the pompom several times, fasten the thread, but do not cut it.
- Insert scissors between the two templates, carefully cut the threads.
- Remove the product from the patterns, straighten it properly and trim with scissors.
Everything is ready! It remains only to sew the pompom to the cap with a needle and thread.
How to make a multi-colored pompom?
In this case, use threads of several colors, which are combined in color and texture with each other. With this element you can not only decorate the hat, but also make the interior more comfortable.
Take, in addition to yarn, a sheet of cardboard, two cups with different diameters, a pair of compasses, a needle, and scissors. The manufacturing scheme is as follows:
- Cut out two identical rings from cardboard.
- Fold them together, then wrap them with thread.
- Wind the threads to the desired thickness, then insert scissors between the rings and cut the threads along the outer edge.
- Scissors trim the product, sew it to the headgear.
Stock footage
We examined the simplest, at the same time interesting and successful options for making pompons for adults and children's hats. Everyone will choose the ideal option specifically for their case, and will bring the idea to life without problems.
- How to choose a vacuum cleaner taking into account the characteristics of the house and coatings?
- What to look for when choosing a water delivery
- How to quickly create comfort at home - tips for housewives
- How to choose the perfect TV - useful tips
- What to look for when choosing blinds
- What should be running shoes?
- What useful things can you buy in a hardware store
- Iphone 11 pro max review
- Than iPhone is better than Android smartphones
 (No ratings yet)