

How to fix a heel on a knitted toe?
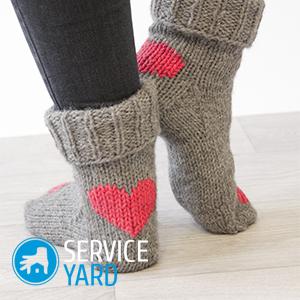
Warm, cozy woolen socks often save us in the cold season. But here's the bad luck: in these products, the heel quickly wears out over time. Unfortunately, this is the most vulnerable spot in socks. To make woolen things last a long time, use an extra nylon thread to make them. It’s not for long, but it will prolong their life. But what if the socks are almost new and the backdrop is torn? Do not despair and throw things away. Today we will tell you how to repair the sock and fix the heel on a knitted toe and return things a second life.
to contents ↑Method number 1. Jurab's Back
How to repair and sew a heel on a toe manually? Any needlewoman who knows how to hold knitting needles can fix the heel in a woolen sock. It is quite simple, you just need to dissolve the torn part and tie a new heel with yarn, from which a sock or any other product matching the tone is made. With good dexterity, this process does not take much time.
For work you will need:
- 5 knitting needles or circular knitting needles.
- Yarn suitable in color and quality.
Step-by-step instruction:
- Dissolve the heel. For this:
- Thread the side loops onto the knitting needle. You need to do this from two sides. If you have circular knitting needles, then use them.
- Cut one thread with scissors and gently pull it out of the row.
- Pull the thread and loosen the backdrop. The loops will remain on the knitting rods.
- Gather loops with the next knitting needle on the back of the sock.
- Distribute them into four rods equally.
- The first two rows go on five knitting needles without reduction. And so that there are no holes between the sides, knit a twisted loop in this place.
- Redistribute the loops so that on the side rods there are, for example, 6, and on the rest - 20 pieces.
- On knitting needles with a large number of loops, knit 2 pieces together. On the side knitting needles, do not reduce or add anything. Walk this way in a circle.
Important! As a result, a new backdrop should be formed on two sides: 1 loop should remain on horizontal rods, and 6 on each side.
- Go the next row in a circular, reducing the last loop on each side of the horizontal knitting rods. On 2 needles, 6 stitches should remain.
- Make another half row on one spoke.
- Using a knit stitch, connect all remaining loops. You need to do this this way: remove one from the rod, thread a needle with a knitted thread into it. Remove the loop from the second knitting needle, also thread the needle and thread into it.
- Connect adjacent loops on each side in pairs, ending with a seam.
The backdrop is ready, the sock is like new!
to contents ↑Important! To make the heel more accurate, fewer loops can be left on the side knitting needles.
Method number 2
This method is also suitable for those who have an idea how to handle different knitting tools. The technology does not have any particular difficulties, but it is absolutely necessary to be careful and attentive when working to fix the heel on a woolen toe.
For work you will need:
- 4 knitting needles number 2.
- Color matching yarn.
Step-by-step instruction with video
You will be able to fix warm and soft socks quite easily if you follow this instruction:
- Loosen the side and back of the heel.
- Assemble the loops on 2 knitting rods.
- Dial a few rows to the level at which you want to form the backdrop.
- Divide the loops into 3 parts, for example, 9 + 10 + 9.
- Dial 9 + 9 loops in the front row.
- Remove 1 eyelet as the front and knit the first loop of 3 parts as the front.
- Pull through the knitted loop removed.
- Turn over knitting and remove 1 loop.
- Make 8 loops from the central part and 2 together from the wrong side. On each row there should be a decrease, then on the one, then on the other hand.
- After the heel is closed, carefully sew the loops of the backdrop with the loops of the forefoot.
Method 3. If the damage is slight
If the toe on the heel has just worn out, and there is no hole yet, then you need to darn it right away. Darning for a while will prevent the appearance of holes. And taking advantage of our tips, you are less likely to have to buy new things, because you can already deftly and quickly restore their integrity in a matter of minutes:
- Insert something round from the wrong side of the product, such as a Christmas ball.
- Using a large long needle and a knitted thread in tone, gather the loops on the needle and go through the stitches in parallel, then one way, then the other.
- Then bind the original longitudinal stitches with transverse stitches.
- The tip of the needle should go carefully: up and down so that the threads intertwine.
- Next, go diagonally with small stitches, and then go along the other diagonal.
Stock footage
We hope that our tips have helped to solve the problem, and now the socks warm you again!
- How to choose a vacuum cleaner taking into account the characteristics of the house and coatings?
- What to look for when choosing a water delivery
- How to quickly create comfort at home - tips for housewives
- How to choose the perfect TV - useful tips
- What to look for when choosing blinds
- What should be running shoes?
- What useful things can you buy in a hardware store
- Iphone 11 pro max review
- Than iPhone is better than Android smartphones
 (No ratings yet)