

How to install a drive on a computer?
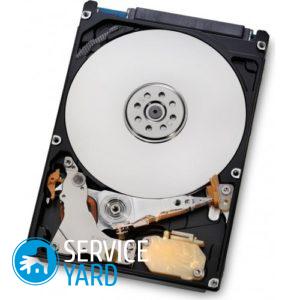
Everyone today uses the Internet to download programs, films and music. Despite the fact that new features and more compact flash drives have appeared for this, the use of disks for the same purposes is still popular. But the drive, like other devices, tend to break down, so today we’ll talk about how to install the drive on the computer.
to contents ↑Change the drive
Replacing the drive is relevant among those users who still have not switched to the use of flash cards and torrents. Continuous use of the optical drive for writing or reading can lead to a replacement drive. It is necessary to take some measures to solve the problem.
Important! In order not to lose important files from your storehouse of information, we advise you to carefully approach the issue choosing a hard drive for a computer.
Action plan
The replacement procedure can be classified into two types:
- DVD drive.
- CD drive
to contents ↑Important! For all cases, it is recommended that you look for a DVD class as a replacement. Such an acquisition does not require a large investment from the consumer, and the speed of work and quality will only please you. Please note that the new drive may soon break if you use it very often for its intended purpose. We conclude that an expensive device for this situation will not work. In order to exclude the option of overheating the device, we advise you to find out how to install the fan in the computer case.
First option
How to install a drive in the system unit? To begin with, it is worth getting acquainted with the type of interface that is integrated into your motherboard of a stationary personal computer, because further actions will depend on this.
Interfaces are of two types:
- SATA
- IDE
These days both types are used.
Important! For the replacement to be successful, you will have to disassemble your system unit, carefully examine it and determine the type of drive connection. It is worth noting that there are motherboard models that have both types of connection: SATA and IDE, but this happens very rarely, since the most “fashionable” is the SATA interface.
How to install such a component?
- Prepare a set of screwdrivers. We will need them in order to disassemble the system unit and dismantle the device that has failed.
- First you need to turn off the computer by unplugging the power cord from the outlet.
- Now you need to disconnect all the cables that are connected to the back of the system.
- We take a screwdriver and unscrew the screws that hold the side cover. After removing the component, lay all small parts aside so as not to lose them.
- Next, you need to deal with the old part. It should be fixed somewhere in the upper part of the system unit.
- Grab a screwdriver and unscrew the fastening screws. Remember to disconnect the power wires from the part.
- Take the brand new device and with extreme care (so as not to cause damage) mount it in place of the old one. Some drives can be attached to the case using latches, but in the classics you will have to use a screwdriver.
Important! Remember that the optical drive extends only from the front panel, but not from the inside! If you are not strong in this topic, it will not be superfluous to ask which optical drive to choose for a computer.

The gadget with an IDE interface has a special jumper on its body.You will need to put it in the “Slave” position.
Important! If your device came bundled with a hard drive, then most likely they are fastened with one cable. In this case, you won’t have to change anything.
The procedure is carried out with a set of screwdrivers and screws:
- Carefully position the drive from the front and secure it using the screws.
- Return the system unit cover to its place, remembering to connect all peripherals to the PC.
- We give power, wait until new equipment is recognized and get to work.
Important! To check the work done, go to the “My Computer” label - there you should see an icon in the form of a drive.
Done!
to contents ↑Replacing a SATA Drive
The replacement of the optical drive, which is based on the SATA interface, is carried out in exactly the same way. The only difference between this procedure will only be that there are no special jumpers on the body of this device. In this case, you will have to connect the drive to the computer’s motherboard through a flat cable, which is called “SATA” (where the name of the interface comes from).
to contents ↑Important! A lot of work remains to be done, so it doesn’t hurt to get a mouse assistant. And then find out: how to install a wireless mouse on a laptop.
Stock footage
Now you can easily install the drive on the computer to your friends and family so that they do not seek help from the wizard. Why pay money for what you can do with your own hands?
- How to choose a vacuum cleaner taking into account the characteristics of the house and coatings?
- What to look for when choosing a water delivery
- How to quickly create comfort at home - tips for housewives
- How to choose the perfect TV - useful tips
- What to look for when choosing blinds
- What should be running shoes?
- What useful things can you buy in a hardware store
- Iphone 11 pro max review
- Than iPhone is better than Android smartphones
 (No ratings yet)