Crochet a plaid - for beginners a master class
A do-it-yourself blanket is able to give originality, a special style and color to any interior. An openwork or warm blanket can be either a full-fledged blanket for your baby, or serve as a bedspread on pillows or a sofa. In our article, we will consider how easy and simple to crochet a plaid - for beginners, a master class will be very useful to avoid mistakes and get a beautiful product.
to contents ↑Preparation for knitting a plaid
It is best to use crocheted plaid using soft acrylic or wool blend yarn. The coloring of a batik-type plaid, which is characterized by a smooth transition of one color in a skein to another, looks unusually colorful and quite original.
Important! The main condition is not the pricklyness of the product, otherwise - for convenience it will be necessary to sew a lining.
Such a product can be made for a newborn child, knitted for an adult family member, or can simply be used as an interior item. The yarn consumption is affected by the selected plaid size.
to contents ↑Important! If there are residues of monophonic yarn, each row or several rows at once can be knitted in a different color.
Step-by-step knitting master class according to the scheme
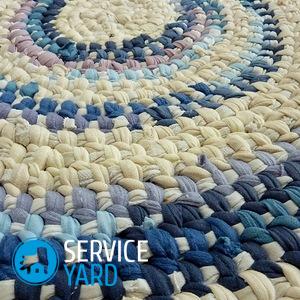
Consider a step-by-step description of the pattern, which is very popular among needlewomen. The pattern starts from the center. For those craftswomen who do not know how to read schemes, there is a description of how to step by step crochet a plaid with your own hands:
- From five air loops we form the central ring.
- First row: “we knit 3 double crochets, then 2 air stitches”, so we knit four times. Instead of the first column, only at the beginning of the row do three air loops. Thus a small square appeared.
- Second row: with half-columns we reach the corner, 3 lifting loops, we knit 2 columns, then 2 air loops, 3 columns. Then in each hole we knit 3 columns, while we knit not from the loop, but from a large hole. At the corners, do not forget to make two air loops.
- The third and all other rows: we crochet according to exactly the same principle. We stop the knitting process when the product reaches the required dimensions.
- We turn to the design of the border of the plaid, for knitting which requires only one row. The use of lush columns gives an unusual effect. Consider the border pattern: pillar. single crochet, 4 air loops, a fluffy column we knit in the next loop of the base, then the air loop, then skip 2 loops of the base.
- On other sides, repeat this report. At the same time, we do not forget to “wrap” four columns at each corner. At the end we close the knot, cut the excess thread, knitting is completed.
To knit a product of the required size, you need to make one large cloth, or you can knit several parts that are sewn together:
- The first option is to stitch the squares with ordinary sewing thread, then we sew on a sewing machine, after which the whole panel is tied with a border.
- In another embodiment, the panel is connected with a crochet hook.
to contents ↑Important! In this way, a square blanket is made.But sometimes there are situations when you want to get a product of a rectangular shape. In this case, six identical squares are knitted, which are then arranged in this way: three parts in height, and two squares in width, after which the workpieces are sewn.
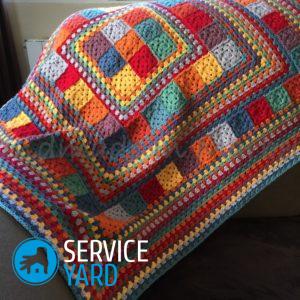
Square blanket
To crochet a plaid, you must first prepare the following materials and tools:
- knitting hook No. 2;
- pink mercerized cotton yarn on a natural basis - 100 grams;
- blue natural mercerized cotton yarn - 50 grams;
- natural mercerized cotton yarn of a turquoise hue - 50 grams;
- white color of natural cotton mercerized yarn - 50 grams.
Important! Instead of cotton yarn, you can use another natural and fine thread, for example, take yarn from flax or a mixture of viscose and cotton.
The related item will consist of individual squares. For the manufacture of a blanket measuring 60x70 cm, 99 pieces of such motifs are required.
How to crochet a plaid with your own hands:
- To start, we knit 6 air. eyelets, which we close in the ring.
- First row: 3 air. lifting eyelets, 3 tbsp. with nak-ohm in the ring, 3 air. eyelets. Repeat the rapport 3 times, finish knitting in a circle the connecting column in the last loop of lifting.
- Second row: 3 air. lifting eyelets, 3 tbsp. with nak-ohm from the pillar. previous row, 6 double crochet of 3 air. eyelets, 2 posts each. out of one air. loops to increase the sides of the square. Between the third and fourth double crochet coming out of the 2nd air. loops add 3 air. loops, as a result - the angle of the next row of the square is obtained.
- Rapport: 3 air. lifting eyelets, 6 double crochet, 3 air. pet., 10 double crochet, 3 air. loops, etc., we repeat to the end of the “square” row, we finish knitting with a connecting column in the lifting loop.
- With each subsequent row, the number of double crochets increases, since there is an increase in the sides of the square. By this principle, we continue to knit, while at the corners of the square we do 3 air. loops between double crochet stitches.
Important! In the manufacture of such a plaid, you can use other options for squares, in addition, you can use the alternation of motives not only in color, but also in the pattern - it turns out pretty original.
After finishing knitting all the squares, we spread the motifs on a horizontal surface in the order in which they should be located in the finished product. After that, we join them together with white yarn in single crochet columns. To connect, we use several methods:
- in pairs;
- in rows;
- squares.
After combining all the motifs into a single fabric, we tie a plaid around the perimeter with white yarn, using a single crochet column.
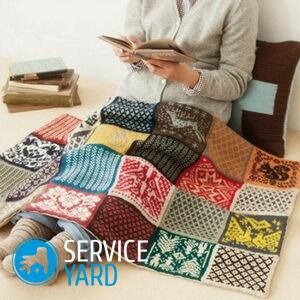
to contents ↑Grandma's Square
The pattern “grandmother’s square” is very simple; craftsmen knitted such a pattern in ancient times. With this pattern, you can beginner needlewomen learn how to crochet.
Important! With this pattern you can knit everything. Various options for bags, wallets, dresses, sarafans, skirts, cardigans, tops, shawls, a poncho, scarves, gloves, slippers, clothes for animal pillows on a sofa, floor mats, chair covers, lamp shades for lamps look very beautiful and original all kinds of baskets, Christmas tree decorations, fringe for towels and many other products.
After knitting the desired size of motive in the last row for a more even row, we knit double crochet or draw out single crochet.
Important! For originality, when crocheting grandmother's squares in a next row, the color of the yarn is changed. In this situation, an important step is the correct transition from one color to another. We knit the last column according to a certain pattern:
- insert the hook into the loop of the previous row;
- pull the loop;
- we knit two loops on the hook in a different color.
Thus, an even border will be observed between parts of different colors.
Square join methods
Let's consider how to hook the “grandmother’s squares” to crochet a plaid with your own hands:
- front faces add two motives;
- we connect the connecting posts, while the hook is inserted under the rear walls of the loops of two motives.
Here are some more tips on this:
- To get a beautiful rib, for some models of pillows and rugs, a combination of motifs from the front is used. In this case, it does not matter how to introduce a hook - under both walls of the loop or under the rear walls, you can connect both without crochet and connecting posts.
- Also, “grandmother’s squares” can be connected in an openwork way. In this case, there are no visible seams on the knitted fabric, like everything is connected by one pattern. All motifs are interconnected by double crochets, or several crochets can be used.
Important! Using this method, an interesting openwork canvas is created and possible deformation of the product during further operation is prevented.
- If the motifs are not intended to be assembled into a single canvas, then very often pico or air loops are used to tie arches. When tying with air loops, the product looks beautiful and light, while at the moment of connection a mesh or zigzags are formed.
Let's consider how to combine motives among themselves:
- We lay out the parts on a flat surface at a short distance from each other.
- Using needles or pins, we attach the blanks to the pattern.
- We tie a single crochet thread to one of the motives, we knit from 3 to 5 air loops.
- Using a connecting column, we attach the connected chain to another motive.
There is a method of fastening parts at the time of the product. With this method, beautiful and even seams are obtained. Consider how to make such a connection:
- In the last row, we leave the parties of the first motive un loose.
- In the corners we connect two parts, while the central air loop of the arch is replaced by a connecting column.
- In the second motif, we knit the first crochet column.
- From the hook we drop the loop.
- Under two loops a pillar. 1st motive we introduce a hook from the face to the inside.
- We grab the removed loop and stretch it.
- We knit a crochet column, while again we remove the loop from the hook.
- The hook is introduced into the next column, while catching the loop.
- According to this principle, we carry out the connection of two motives to the end.
- As a result, a neat twisted seam is formed.
to contents ↑Important! The pattern “grandmother’s square” can be knitted not only in the generally accepted way from the center, but there is also a knitting technique in which the flower is in the middle, or you can start knitting from the corner.
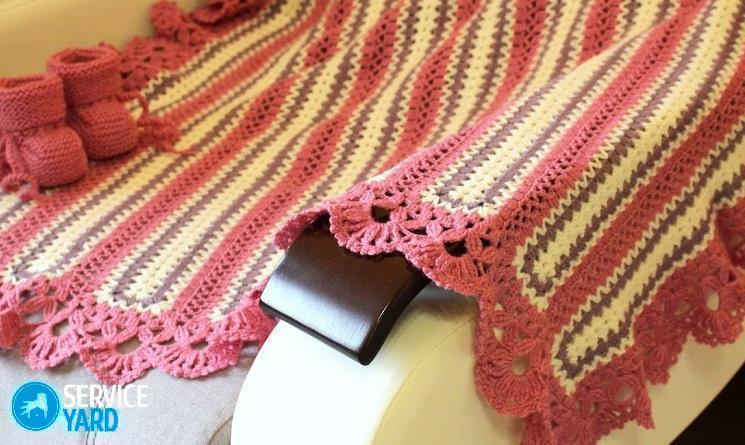
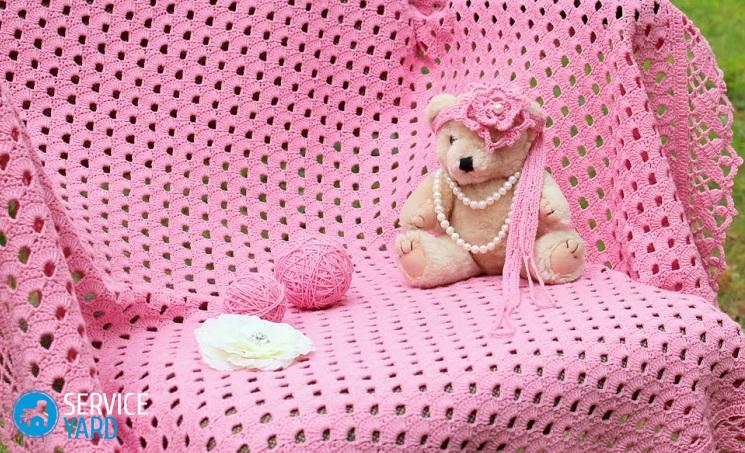
Do-it-yourself beautiful summer camomile plaid on pillows crocheted
To make a beautiful camomile plaid, you will need:
- yarn 100% acrylic, for 338 meters knitting - 198 grams, 4 skeins of one color and 2 skeins of a different shade;
- knitting hook number 4.
The knitting density corresponds to: 1 and 2 rows are 10 cm, the square has sides 43x43 cm.
Consider a description of the knitting pattern:
- The first “camomile” square: we use the thread of the first color, we collect 7 air loops, with the help of a connecting column we close in a ring.
- We knit from 1 to 10 rows and go to the second thread, then we knit the 11th row of the scheme, we finish the work.
- 2-9 motives: the thread of the first color, we collect 7 air loops and connect into a ring.
- 1 to 10 rows, the second thread and 11 rows: at the same time we knit 2 air loops, a single crochet in the arch of the previous row, 2 air loops in an arch of 5 air loops. We connect the corners in the same way, replacing the central air loop of the arch with a single crochet. Next, we combine 3x3 motifs into a single canvas.
- Tie the edges of the product.
Stock footage
In this article, we have proposed several patterns for knitting blankets.You can focus on them or choose the ones that you like from special needlework magazines, taking into account the advice of our specialists.
- Do-it-yourself rug from pantyhose
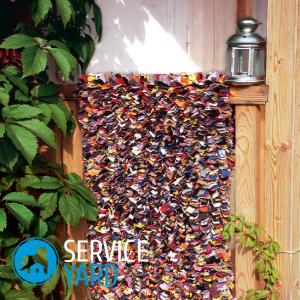
- Do-it-yourself rug from old T-shirts - master class
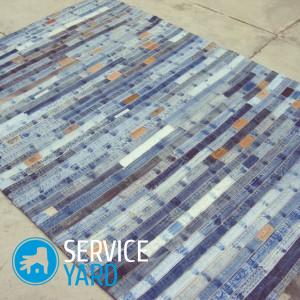
- Do-it-yourself rug from old jeans
- Do-it-yourself blanket from old sweaters
- DIY fleece blanket
- DIY provence pillows
- Do-it-yourself decorative pillow buffs - master class, schemes
- Floor cushions in the interior of your home
 (No ratings yet)