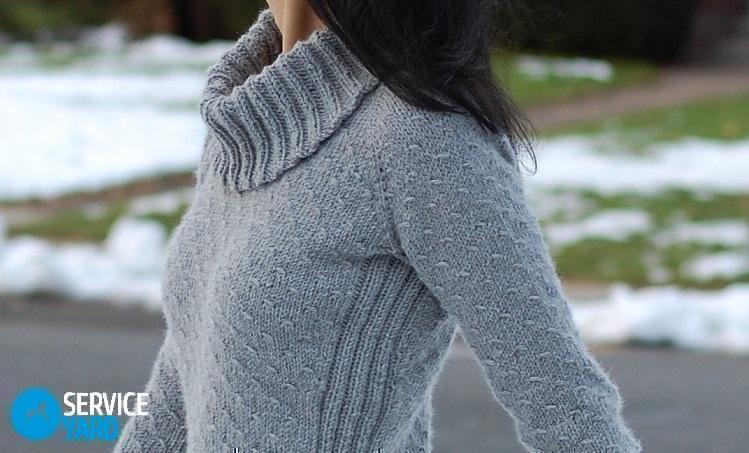
Knitted Raglan Sweater
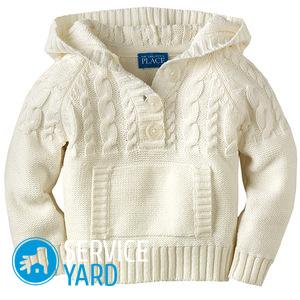
The art of creating knitwear is very ancient. The interweaving of plants, understood by an inquiring human mind, formed the basis of intricate knitting and plain weaving, known to everyone in weaving. Today we’ll talk about how to knit for women different models of a raglan sweater, sweater, jumper or half-top with knitting needles. As you know, there are 2 ways to knit raglan: up from the elastic and down. The latter method (we will consider it) is somewhat more complicated, but, as they say, the result is worth it.
to contents ↑What it is?
Women's semi-overs how to sew? The cut of clothes called “raglan” owes its name to the English commander Raglan, who lost his arm at the Battle of Waterloo and wore clothes of a special cut. It is not known whether he managed to mask the absence of one arm, but many liked the interesting and comfortable cut of his clothes.
Raglan in knitting
Many knitters appreciated all the advantages of such a cut: simplicity and convenience. The method of knitting from top to bottom is especially convenient in the manufacture of children's things. Here are its benefits:
- Lack of seams.
- Save on stitching parts.
- The ability, if necessary, to lengthen or shorten the product.
- Ease of dissolution of the finished product.
to contents ↑Important! The disadvantages of the method include a large number of loops involved in the work. The downside is that the choice of patterns is quite limited. Not all of them are comfortable with circular knitting. However, for a skilled craftswoman, these shortcomings are not critical at all.
Fixtures and tools
To organize the workflow with convenience and comfort, you need this set of tools:
- Circular knitting needles. It is advisable to purchase several pairs that differ in the thickness of the fishing line and the number of knitting needles. The “elastic band” and the upper part of the product are knitted on small knitting needles. Then you have to switch to larger knitting needles.
- For seamless knitting of sleeves - stocking knitting needles.
- Markers for marking shelves, backs and sleeves.
How to calculate a loop test?
Before starting work, knit a sample of 30-40 loops with the selected pattern to a height of about 12 cm. Wait until the knitted sample lies a little, as the knitwear changes its size over time.
Important! Better yet, if you moisten it, dry it and boil it. Now you can easily calculate the density of knitting, that is, find out how many loops per centimeter of knitted fabric.
Since this procedure cannot be avoided, many craftswomen use a template independently made of cardboard or plastic. It is a square with a side length of 20 cm. Inside, a 10-centimeter square is cut out. By applying a frame to the sample, you can calculate the density of the knit in width and height.
to contents ↑Raglan sweater on top: how to calculate the neck?
The most crucial moment when knitting a raglan sweater from top to bottom is the correct calculation of the neck. To do this, measure the circumference of the neck. For example, if the neck circumference is 36 cm, 2.5 loops fall into 1 cm of the canvas, we get the number of loops equal to 2.5x36 = 90 pcs.
Number of loops by segments
When knitting, you need to consider that the neckline in the front is much lower than on the back. The easiest way to properly parse the loops is a percentage calculation:
- For the neckline, from 44 to 45% of the total estimated number.
- For the neck of the back - from 34 to 35%.
- For each shoulder, from 10 to 11%.
Before dividing the loops into segments, do not forget to subtract from the estimated total number of loops those that are on the raglan line. There are a total of 4. The simplest case is a ragged line in 1 loop. The line in 2 loops looks much more beautiful.
Therefore, we get the following alignment:
- The number of loops per raglan line is 4x2 = 8 pcs.
- For further calculation, we take: 90-8 = 82 pcs.
- Before 82x0.44 = 36 pcs.
- Backrest 82x0.34 = 28 pcs.
- Each shoulder segment: 82x0.11 = 9 pcs.
Start knitting
Of course, you can start the product with a “gum” neck, but it is advisable to tie it after the end of work. A detailed video tutorial for beginners on how to do this later in the article.
Gather 90 loops on the knitting needles, knit 1 row with facial loops. Combine knitting in a circle. Using markers, threads of contrasting color or safety pins, mark the lines of the raglan and the central loop of the front. The beginning of the row is the left ragged line.
to contents ↑Sprout binding
To make the future product look good, start tying the sprout. Partially knit, increase the height of the back. Align the number of stitches in the back to the number of stitches for the front neck. Knit the first front row along the back from left to right, between the two raglan lines.
Important! The scheme of knitting raglan loops: one yarn, two front loops, then remove the loop with a twist so that there are no holes on the canvas.
Now turn the work over and start knitting the series on the wrong side, ending it this way:
- Remove the wrapped loop, 2 loops, yarn, 2 loops of the ragled line.
- Raise the 2nd increase of the raglan line from the broach.
- Extend partial knitting by knitting 2 loops and removing the 3rd with a wrap.
- Knit in this way 8 rows. As a result, after each row it increases by 3 loops.
Important! The purpose of this application is to obtain the same number of front and back loops.
- Starting from the 9th row, include in partial knitting before, with the addition of 3 pieces in each row, according to the algorithm already described.
- The last row for partial knitting is 18.
- Starting from the 19th row, knit in a circle.
- In each front row, add 1 yarn on both sides of the raglan line, and in the wrong row, knit them.
- In order not to mix rows, use a counter.
Housing
The standard raglan line length for a women's sweater is from 30 to 32 cm. With proper knitting, the raglan lines of both halves “meet” under the armpits. After you have completely finished knitting the raglan part, you can proceed to the body of the product.
Remove the hinges of the sleeves on the fishing line, pin or additional knitting needles, proportionally distributing the raglan lines between the remaining parts.
to contents ↑Important! You can make the sweater more fitted by calculating the reduction of loops to the waist and the gradual addition to the hips line. Do all reductions and additions along the seam line.
Sleeves
You can knit them in straight rows, and then sew, but there is also a seamless option. In this case, seamless knitting needles help. At the same time, do not forget about the bevels - make reductions in each 6 row at the “imaginary” seam.
After you are knitted to the cuff, begin to perform a 2x2 elastic band. The gum can be simple, English or Ethiopian. The algorithm for performing the second sleeve is similar.
to contents ↑Gateway
Transfer all neck loops to the spoke. Carefully remove the auxiliary row. Start knitting an elastic band on the same principle as on the sleeves.
The ragged line itself is a wonderful decoration of the product. We considered the simplest option. More experienced knitters form this part in the form of braids or a cascade of holes.
to contents ↑Stock footage
Perhaps the description of the knitting pattern for raglan sweaters from above seemed to you too complicated. In fact, picking up circular knitting needles, you can do this job without difficulty.
 (No ratings yet)