DIY tile top

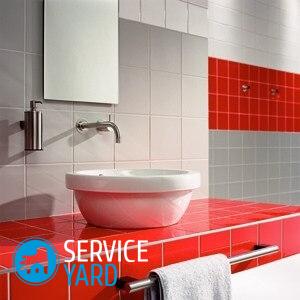
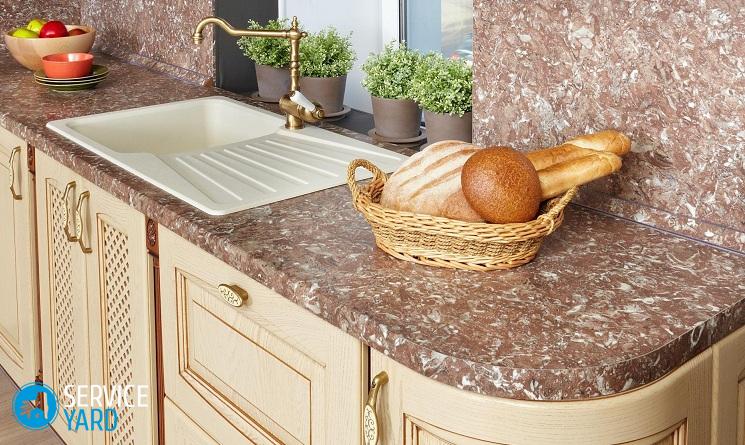
Every housewife knows that there should be two aprons in the kitchen. One is her personal one, which leaves the clothes clean during the preparation of breakfasts, lunches and dinners. The second “apron” protects the walls from various contaminants. It is very practical and convenient when the continuation of this “apron” becomes a kitchen countertop made of tiles. Such furniture will not only give the kitchen freshness and comfort, but will also serve faithfully for many years. If you decide that this is exactly your option, then we recommend that you read this article to the end. She describes all the subtleties of arranging a kitchen with such an element as a do-it-yourself tile top
to contents ↑Benefits of Tiling
The kitchen is perhaps the most specific room in the entire apartment. Furniture, in particular, sets, must withstand a lot of adverse factors. Exposure to steam, water, various fumes during cooking, exposure to high temperatures. To reduce the risk of damage to furniture, a kitchen worktop made of tiles can do it yourself.
This type of finish has several advantages:
- You can do all the work associated with updating the furniture yourself, while the parameters of the countertop - shape, size, height, thickness, you will customize to your requirements.
- Ceramic tile - durable material. She retains her original appearance and qualities for a long time, even if she is tested for strength every day.
- Tile is a very durable material and is highly resistant to mechanical stress. To damage the countertop from the tiles with your own hands, you will have to make a lot of effort.
- Such a facing is not afraid of the effects of steam or water. Due to its structure and coating, the tile quietly withstands such tests.
- Tile has another advantage that is useful to any housewife. He does not care about any high temperatures. If you need to put a hot pot on such a surface, you can do it calmly without worrying that there will be traces on the table.
- A table made of tiles with your own hands does not require special care. It is enough to wipe it with a damp cloth or remove stains using household chemicals, the impact of which will in no way affect the appearance of the material.
- Today, construction stores can offer a huge selection of tiles. You can choose the color, texture and pattern for any interior. If you did not find a suitable option for sale, then the manufacturers are ready to meet and accept the order for the tile you need.
- Last but not least, plus - the ability to quickly repair such a surface. Any element on which a chip or any other damage has appeared can be replaced in a few minutes. Moreover, this can be done independently, without the help of specialized equipment.

It will be fair if, along with the advantages, we carefully consider the disadvantages of a ceramic tile countertop with our own hands:
- Like any material, even particularly durable, with prolonged and not very careful use, the appearance will begin to lose its attractiveness after a few years.
- The tile is resistant to mechanical stress, but not to strong point impacts with sharp objects - this will lead to chips or cracking.
- The edge of the countertop is the weakest point, on which chips most often appear during operation.
- Mud often accumulates in the tile joints, which must be removed from time to time by general cleaning and paying special attention to this area. Otherwise - a table made of tiles with your own hands will look messy.
- Cleaners with a high abrasive content are best avoided - they can leave scratches on the surface.
As you can see, the list of minuses is almost half that of the list of pluses. In addition, many shortcomings in the operation of the tile can be avoided by observing the precautions and thorough cleaning.
to contents ↑Material selection
The service life and decorative indicators of countertops made of tiles in the kitchen with their own hands depend, first of all, on the materials chosen. Here, experts give some tips that are worth considering:
- The technical characteristics of the tiles are of great importance. Before making a purchase, find out how shockproof the material is, how it tolerates temperature changes, the effects of various kinds of contaminants and household chemicals.
- It is also worth paying attention to the surface of the tile itself. It is better to push the relief tile right away and give preference to smooth material. It is more practical in application, it is easy to remove dirt from it, in contrast to relief surfaces, in the pores of which various kinds of contaminants get clogged very quickly.
Important! When deciding how to make a countertop of tiles with your own hands in the kitchen, consider the option of glazed tiles. It has many advantages over other materials. Such a surface does not absorb dirt and dyes at all. It can also be washed even with a metal washcloth without fear of leaving scratches after such cleaning.
- Many repair experts believe that there is only room for porcelain tiles in the kitchen. It has the same strength as natural stone. It is resistant not only to damage, but also to moisture; it practically does not absorb it. The effects of oils, fats and household chemicals are also not afraid of him.
Going to a hardware store for tile for countertops, do not forget to take into account another factor - the size of your kitchen, it also plays an important role:
- A large square tile measuring 30 by 30, or 60 by 60 fits perfectly into a room that has a large area.
- But in a small kitchen, such large elements will not look entirely appropriate. Therefore, for a small room, choose a material with dimensions of 10 by 10 or 15 by 15 centimeters.
Important! If your soul asks for something unusual and original, you can clad a countertop made of tiles with your own hands with mosaic and smalt, or with a kind of “split” tile, picking up small fragments of different shapes.
Useful Tips
Finishing craftsmen are ready to share a couple of tips from their work experience:
- Even if you really want to save, do not buy the cheapest material. He will face special tests and tiles, the production of which saved on raw materials, will not withstand even half the negative impacts. Do-it-yourself tile countertops will have to be redone in the near future due to the large number of chips and damage.
- If you do not have experience in facing, then it is worth considering that the tile consumption must be calculated in advance. It is experienced specialists who buy the material 15 percent more of the required quantity - you better double this stock.
- Grouting for joints is also not a reason to save your money. The composition is better to acquire, taking into account such characteristics as resistance to moisture and chemicals that are present in household cleaning products.
to contents ↑Important! If after finishing work you still have materials left, do not rush to throw them away. In the process of using a tabletop made of tiles with your own hands, one of the elements can crack.Replacing it with a new one will not cause trouble if you have stockpiles of material. In addition, in construction stores you will not always be able to pick up a similar tile, suitable in color and size.
Base mounting
Before you make a countertop of tiles with your own hands in the kitchen, you need to prepare the surface for laying, or rather, level it. For these purposes, experienced craftsmen advise using OSB-boards, chipboard or ordinary plywood. To give it strength, the sheets are glued together.
The sequence of actions is as follows:
- Having already served its term, the countertop is dismantled.
- Before installing a new align the entire surface of the headset.
Important! 2 centimeters are added to measurements of the height of the cabinet from the floor to the working surface - this is how much usually goes to the tile.
- If the tile is slightly below the general level, it is increased with the help of legs.
- On the plywood sheet, the contours of the new countertop are first drawn, taking into account all the bends and angles. It is necessary to mark the holes for the sink and hob.
- The holes are cut using a jigsaw. The edges are best rounded.
- Fix the base of the countertop with tiles with your own hands using self-tapping screws, placing them at a distance of a maximum of 10 centimeters from each other.
- The edges of the future countertops and holes for household appliances are treated with sandpaper.
- Now the future tabletop made of tiles with their own hands is primed and wait until the primer layer has completely dried.
- As already mentioned, if plywood is taken as the basis, then 2 sheets will be needed. They are overlapped so that the seams of the lower and upper sheets do not coincide. All joints and joints must also be treated with sealant, and then with a primer.
to contents ↑Important! Another nuance: the finished weight of such a tabletop made of tiles with your own hands is considerable, so we strengthen the furniture. Add perimeter legs or support strips.
Cladding
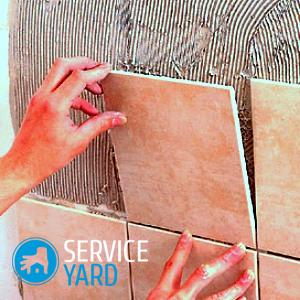
Now that our base is ready, do-it-yourself tiling of the tabletop from tiles. First you need to apply a marking, in order to avoid distortions and a cement layer that will connect the tile to the base. Farther:
- If you decide to also process the ends with tiles, then you should start from the edge. Do-it-yourself tiling of the countertop from the tile starts from the outer corner, that is, in the direction “away from you”. If the whole tile does not fit at the wall, it is cut.
- You can glue the tiles to the base on the tile glue, then the work is not much different from facing the floor, podium or wall.
- You can also use “liquid nails”. This option is quite suitable if the base is perfectly flat.
- For the ends and edges of the countertops made of tiles with their own hands, you can use ready-made plastic or metal corners, borders, plinths. The selection of such parts is quite large.
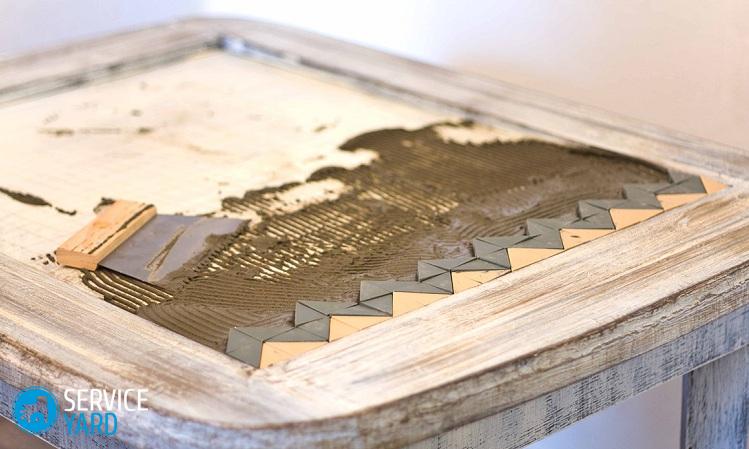
Important! For cladding use a notched trowel. Be careful that glue or cement does not get on the front of the tile. If this happens, then immediately remove the excess composition until it has gained strength.
Tile cutting
In the process of installing countertops made of tiles in the kitchen with your own hands, you will need to master another useful skill, such as cutting tiles. Keep detailed instructions on how to do this quickly and competently:
- Using a felt-tip pen, apply the cut line to the tile.
- We also need masking tape in the process. Glue a strip to the surface of the tile so as not to spoil the top layer of enamel.
- We cut the tiles in small segments, moving exactly along the intended line.
- We fix clamps parallel to this line.
- The wire cutters are positioned so that only part of the entire surface of the clamps is in contact with the mark. Otherwise, the cut lines will be large, and small cracks will form around them.
- Trimming should be done in the direction from the edge to the center, so you have less impact on the surface and avoid chipping.
Important! Even with all the precautions, the teeth of the nippers often leave a rather uneven edge. But to eliminate this defect is quite simple. Take a file or sandpaper in your hands and work on the edge of the tile until you get a flat surface.
Grouting
With this, the work on installing countertops made of tiles in the kitchen with your own hands is not yet finished. Now we begin to grout the seams. Before starting work, check that the glue on which the tile was laid is completely dry and thoroughly clean it of debris and dirt. Remove any remaining dividers, as they may spoil the appearance after completion of work.
Then follow these steps:
- In a previously prepared container we combine water and a dry composition. Mix until a homogeneous mass, which in its consistency resembles sour cream.
Important! Do not immediately cook large volumes. The grout gradually hardens. Better mix the amount of composition that you can use the maximum for half an hour.
- To improve the adhesion of tiles and grout - moisten the surface. This is best done with a spray gun. Do not allow excessive moisture, this can lead to the fact that the grout simply crackes and begins to fall out of the seams.
- If there is plumbing or any household appliances next to the countertop made of tiles in the kitchen, glue it with masking tape so as not to stain it.
Important! It is worth noting that the grout is very dry hands, so it is better to carry out all work with gloves.
- Now we collect the required amount of grout on the rubber spatula and put it on the tile, on the seams. The movements should be smooth, keep the tool at an angle of 45 degrees, so you can fill the gaps between the tiles as much as possible.
Important! Your main task is to fill the joints with grout as much as possible so that there are no voids left. Both between the tiles and at the corners around them.
- Having filled all the seams, wipe them with a foam sponge, always along the seam, which we rinse thoroughly under running water. At this stage, the final shape of the seam is formed.
2 hours after grouting, wipe the tile and seams with a dry cloth. This process is very dusty, so a respirator is required for work.
to contents ↑Advice
In order for the do-it-yourself tile top to serve you for a long time and not need constant repair, it is worth observing elementary rules that will not take much time:
- During cleaning, wipe the countertop with a soft cloth or sponge, then you can avoid scratches.
- It is better to care for the surface not with the help of powders, but using various gels - they do not have abrasive particles in their composition.
- Glossy tiles should be treated only with a spray for cleaning glasses, then it will retain its original gloss for a long time.
- Seams, as we have said, are constantly in need of cleaning. These places can be cleaned with a soft toothbrush or using a folk remedy that is applied to the seams and removed after a few minutes. It consists of water, lemon juice, soda and vinegar.
to contents ↑Important! The use of cutting boards for products and supports for hot pots or pans will help to avoid scratches and chips. Also try not to knock on the tile or drop heavy objects on it.
Stock footage
A beautiful countertop can be a great continuation of the kitchen apron, the interior of the room will look finished and cozy. Moreover, you can not resort to the expensive services of craftsmen-finishers. As you have seen, the process of creating countertops from tiles with your own hands - not so difficult. The main thing here, as in any work, is to pay attention to trifles and observe the sequence of actions.
 (No ratings yet)