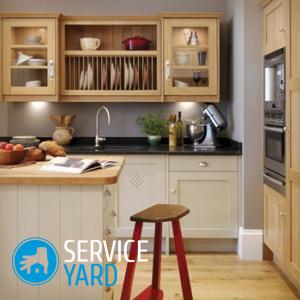
Assembling a corner kitchen cabinet

The kitchen, regardless of area, is conditionally divided into 2 zones - for cooking and eating. In the working area there is a dishwasher, a cooker, tables, a dishwasher, cabinets for storing dishes, a microwave, an extractor hood, etc. There are many objects, as you can see, and the area is limited. Corner furniture helps to solve the problem, allowing you to rationally beat the usable space. Assembling a corner cabinet with your own hands is not such a difficult task, but it requires scrupulousness and patience. If these qualities are available, then the novice master will successfully cope with the work.
to contents ↑Tools and Supplies
In order for the assembly of the corner kitchen cabinet to be successful, at least a minimum set of tools is necessary:
- Screwdriver. Even an inexpensive and primitive tool will make the job much less time consuming.
- Hex wrench. Sometimes it is attached to a set of furniture accessories. If it is not, then you have to buy separately.
- Construction level, tape measure - for measurements and monitoring of work.
- Pencil or marker.
- Jigsaw.
- Hammer.
- Knife.
- Pliers.
- Sealant.
Assembly order
Do not rush to get down to business without first studying the instructions. The instructions not only describe the detailed procedure for assembling a corner kitchen cabinet, but also indicate the purpose of each part. It is very important.
Important! If you make a mistake and the design has to be disassembled and reassembled, this will lead to the fact that the strength of the product will significantly decrease. In particular, this applies to furniture made of chipboard.
Operating procedure:
- Attach the cross-shaped door fasteners first. They are fixed to the side boards of the cabinets. Fixing holes for them are made in advance at the enterprise.
- Install extendable rails on the side walls.
- Insert the fastening furniture choppers into the holes specially designed for this purpose. To make the furniture stronger, grease the chopped wood glue with wood glue.
to contents ↑Important! Do not forget to periodically check the correct assembly in accordance with the instructions and the reliability of the resulting design. Have you checked? Now you can start twisting the furniture with the help of screws. To make the heads of the screws invisible, mask them with special plugs to match the tone of the furniture. They come complete with fittings.
Corner Cabinets: Classification
Depending on the purpose and location, kitchen cabinets are divided into 3 categories:
- Floor (curbstones). These are the simplest designs that are the basis for the countertop.
- Mounted. They are fixed to the wall to a height convenient for work.
- Corner - set to the corner. Can be both mounted and floor.
Depending on the shape, corner cabinets are:
- Trapezoidal. In most cases, these are wall cabinets.
- Rectangular - the easiest to manufacture.
- In the form of the letter L. Such cabinets are almost always used as a base for washing.
The algorithm of how to assemble a corner kitchen cabinet depends on the purpose of the furniture and its shape.
to contents ↑Furniture Installation
It is advisable to start the installation with pre-assembled wall cabinets:
- Do not rush to pre-assemble the doors - this is much more convenient.
- First mount the corner cabinet, and attach the remaining structures to it.If the kitchen is not angular, then start by hanging the side cabinets.
- Installation begins by making holes in the walls of the walls and installing special fittings.
- Once the wall cabinets are installed, attach the doors to them. Is the installation of hinged structures over? Now is the time to assemble outdoor furniture.
- All pieces of furniture installed in the form of a “wall” are fastened together using self-tapping screws or a special furniture screed.
to contents ↑Important! The latter option is simpler and more reliable. For wall mounted cabinets 2 screeds are sufficient, for floor - 4.
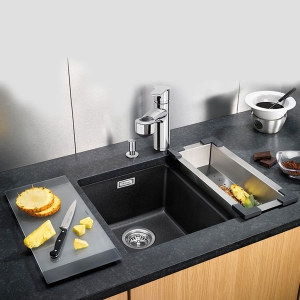
Sink and countertop
This is the final stage of the installation of the kitchen set. To install the built-in sink:
- Drill a hole in the countertop, outline the contours of the sink, and then cut out all the excess with a jigsaw.
- Fix the countertop with special devices, seal the joints between the cabinet and the countertop.
Important! When cutting a hole in the countertop, work with an assistant, as the sawn piece may fall and damage the coating. No helper? Use a wide tape for insurance so that the sawn off material does not fall, but hangs.
- In the same way, prepare the countertop and under the stove, if it is built-in. Fasten the countertop with either a millimeter-shaped overlap, or close to the surface of the wall. At the front, the countertop has a 3 cm overlap. Secure the work blade from the inside with self-tapping screws.
- The last stage of work is the installation of the skirting board between the wall and the countertop. Fix the base of the baseboard using self-tapping screws, and then mount the decorative part.
to contents ↑Important! It is convenient to place wiring inside the baseboard. Hide the side parts with special nozzles.
Stock footage
Any man who has a desire to equip his house will cope with the assembly of a corner kitchen cabinet. The main thing is to carefully study the drawings and the construction device and select reliable fasteners for connecting all parts.
 (No ratings yet)