Assembly of a kitchen set
So, the long and tedious repair in the kitchen is finally completed. Most likely, you will want to update the furniture. Of course, to install a headset, you can call a specialist furniture maker or use the services of a store for an additional fee. But if you have the time, skill and necessary tools, then you can easily cope with such work as self-assembly of a kitchen set. It is not as difficult and costly as it may seem.
to contents ↑What tools will be needed?
To successfully cope with the installation of a kitchen furniture set, you need such a minimum of tools:
- A screwdriver is the most inexpensive.
- Hammer with an adapter for a drill equipped with a drill for wood.
- Jigsaw. If it is not, then - a hacksaw.
- Hex wrench for furniture mounts. Sometimes it comes with a hardware kit.
- Knife cutter.
- Pliers.
- Hammer.
- For measurements and control: tape measure, construction level, marker, square, ruler.
Cabinet assembly procedure
If your experience in installing a kitchen set is minimal or completely zero, then be sure to read the instructions. The good instructions describe in detail the work procedure, the schematic layout and purpose of the parts:
- Fasten the door mount to the side boards. Screw them with 2 screws.
- Fasten the rails for the sliders in advance on the side walls. It is better to do this in advance, since doing it later will be inconvenient.
- Install furniture choppers in all through holes. It is advisable to put them on glue so that they sit stronger.
- Inspect the structure to see if everything is done correctly. If there are no questions about the correctness, then tighten the parts with furniture screws. So that they are not so noticeable, use special accessories - plugs, painted to match the furniture.
- If the cabinets are on legs, screw the legs and adjust them in height. In budget kitchens, the legs are regulated using plastic glides.
- Fasten the back wall of the fiberboard sheet.
How to mount drawers?
The very principle of assembling drawers is the same as ordinary cabinet furniture. The walls are pulled together with furniture screws. The procedure is as follows:
- Assemble the walls (except the facade) and install the bottom of the fiberboard into the structure.
- Fix the front part with an eccentric screed.
- Install the guide rollers on the lower corners of the drawer.
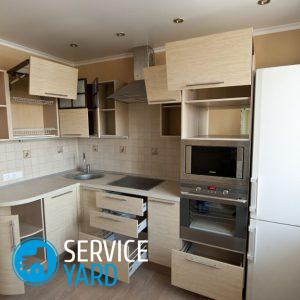
Furniture Installation
How to assemble a kitchen set - figured out. Now is the time to start arranging the furniture. It is convenient to mount hinged cabinets without doors, so do not rush to install doors. Then proceed as follows:
- Install a side cabinet, as a rule, it is designed for washing. Do not forget to make holes for the pipes in advance.
- Install the floor cabinets without forgetting to adjust their height.
- Tie cabinets together. It is advisable to use for this furniture intersection coupler. If there is no screed, use 30 mm self-tapping screws.
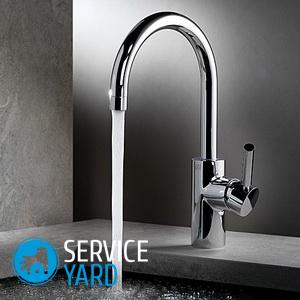
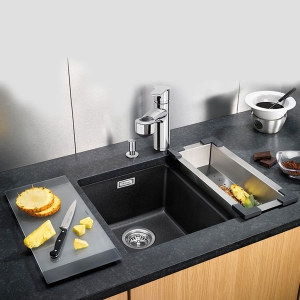
Kitchen installation - sink, stove
If the sink is built-in, then you must first prepare a place in the countertop:
- Use a pencil or marker to mark out, then saw out the mounting hole with a jigsaw.
Important! To prevent a piece of particleboard from falling off or damaging furniture, work with an assistant or stick masking tape on the countertop.
- After you finish cutting, a piece simply hangs on tape.
- Do not forget to seal the joints so that excess moisture does not spoil the furniture.
- Fasten the built-in plate in the same way, having prepared the mounting hole in advance.
to contents ↑Important! It is advisable to install the stove in the last turn, so as not to accidentally damage the equipment.
Mounting countertops:
- Fix the tabletop close to the wall or make an inlet of 1 mm. If there is a gap in the wall, that's okay. The baseboard will hide it.
- Using a jigsaw with small teeth, saw off the countertop in accordance with the dimensions according to the scheme.
- If you are installing a corner kitchen, you can join 2 countertops located at an angle to each other with a metal bar. It is screwed to the side of the countertop.
- Close the end parts of the plate with a special metal strip. In other places where there is no exposure to high temperature, stick the furniture edge.
Wall panel
This is an alternative to a working “apron” made of ceramic tile, mosaic or glass. As a rule, panels are sold in segments of 3 m and allow you to protect the wall located above the desktop from pollution. The panels are mounted on dowels.
to contents ↑Important! Mark up so that the hats are hidden behind the cabinets. The distance between the edge of the panel and the dowel is approximately 10 mm.
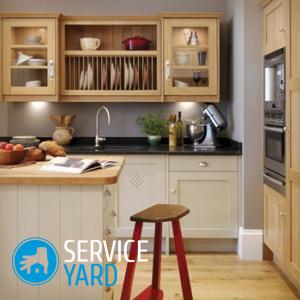
Wall cabinets
The minimum distance from the countertop to the wall cabinet is 600 mm. Otherwise, cooking will simply be inconvenient:
- Measure a distance of 600 mm from the countertop and make markings on the walls. Mark the top line of wall cabinets. Draw a line of fastening.
- Drill holes. Fasten the bar. It is designed for mounting adjustable suspensions. It is advisable to fasten to anchors - they are more reliable than dowels.
- Hang the wall cupboard onto the mounting rail.
- Start the installation from the corners. With a non-standard room configuration or uneven walls, you have to use a bezel to mask the gap.
- After all the cabinets are mounted, fasten them with ties.
Doors
At the end of the installation, you can hang the doors on the cabinets:
- Fix the hinges with self-tapping screws in the grooves specially made on the facade.
- Slide the door onto the cross-shaped plate screwed in from the beginning before assembling the kitchen set. Tighten the bolts.
- Close the door, check its position.
- Using two bolts, adjust it vertically and horizontally.
The final stage
Mask the gap between the wall and the table with the baseboard. Fix the lower part with self-tapping screws, then mount the upper part, decorative. The plinth is convenient for placing hidden wiring. The last moment is the installation of a kitchen hood and household appliances.
to contents ↑Stock footage
As you can see, installing a kitchen with your own hands is not such a difficult task. The main thing is not to rush and act on the principle: "Measure seven times, cut once." This will avoid annoying mistakes.
 (No ratings yet)