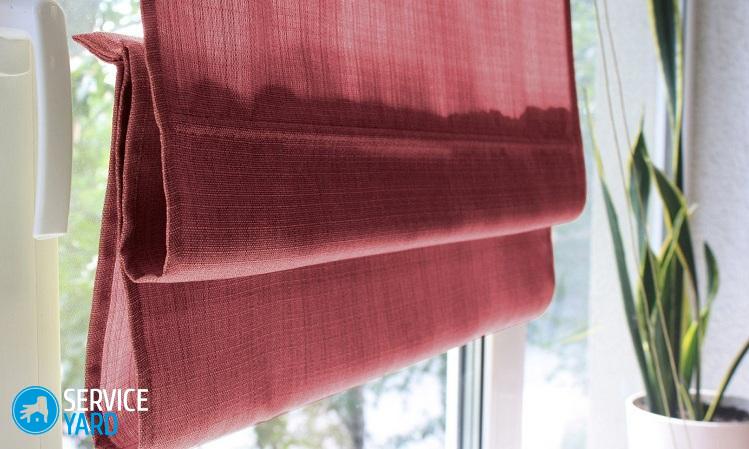
Do-it-yourself roman blinds

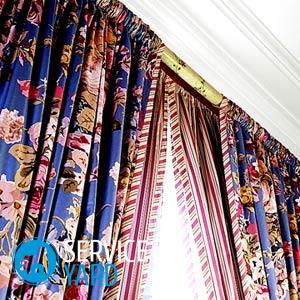
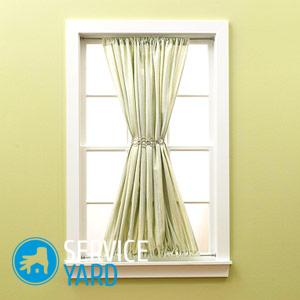
Homeliness is a combination of the most various accessories and home decoration. Well-chosen window curtains will help to decorate and transform any interior, make it more beautiful and elegant. One option is the do-it-yourself Roman curtains. The main distinguishing feature of this decoration for windows is strict and elegant simplicity. Roman curtains are universal. They look good in the living room, nursery or in the bedroom. The compact design allows you to easily fit them into the kitchen interior. But with all the simplicity of manufacturing, there are certain nuances that must be observed. Only in this case can success be achieved. We will talk about them in this article.
to contents ↑How to choose the right fabric?
You can sew Roman curtains from any fabric, whether it is the thinnest tulle or a dense curtain curtain:
- Dense matter is preferable because it holds its shape well.
- Light translucent fabric is also good in its own way. It perfectly transmits sunlight and protects the room from the eyes of strangers.
- Black out fabrics with their absolute opacity - on the contrary, block UV rays. Such curtains protect upholstery and furnishings from burning out under the sun.
- For the kitchen, a fabric with a dirt-repellent effect is preferred, which retains a presentable appearance for a long time, tolerates washing well. Synthetics have all these qualities.
- If you like natural fabrics, then you should pay attention to combined and mixed materials, with a slight admixture of synthetics. However, even this small admixture significantly improves the operational quality of products.
There are also completely non-standard solutions. Consider one of them.
to contents ↑How to make a roman curtain from wallpaper?
Repair in the apartment is finished, but you still have unused wallpaper rolls? Throwing them away is unreasonable. Part can be set aside for wall repairs, and the remainder allowed for the manufacture of unusual and original window decorations, for example, for giving.
So you will need:
- The pan is medium sized.
- Wax.
- Corrugated cardboard.
- Paint brush.
- Clothesline.
- Threads.
- Hole puncher.
- PVA glue.
The procedure is as follows:
- Heat paraffin. Lay the corrugated board on a horizontal surface.
- Apply preheated paraffin to the sheet. Attach the wallpaper to the resulting base.
- Cover the surface with a layer of paraffin and apply another layer of wallpaper.
- Iron the workpiece with an iron, after which paraffin will bond all 3 layers even stronger. Now turn the cardboard over, do the same manipulations from the back.
- Using a hole punch, make circles and string them on a previously prepared thread, not forgetting to fix with glue.
- The final stage - cut the resulting garland to the size of the window, fix the thread on the base or cornice.
Curtain from the remnants of the wallpaper is ready!
to contents ↑Sewing Roman curtains with your own hands: master class
Now consider the classic version of the Roman curtains. We divide the entire sewing process into several stages.
Window measurement
To the obtained measurements of the window opening, add:
- For side seams - 50-70 mm each.
- For allowances in the upper and lower parts - 100-150 mm.
The size of the allowances in height is 20%.
Important! Before cutting the canvas, it is advisable to decant it so that possible shrinkage does not cause confusion in your calculations.The decating process involves soaking the fabric for 3-5 minutes in slightly warmed water, drying and ironing.
The main secret of the correct manufacturing of the Roman curtains is the correct calculation of folds, which, in fact, we will do.
Fold line
Before stitching Roman curtains, outline the places for folds, as well as places for rings, in advance. Make markup from the inside out.
Important! For a beautiful drapery of fabric, it is necessary that the distance between the lines of the folds be the same. Equally important is the equal width of the folds between each other.
Double-bend the fabric at the side edges. At the same time, adjust the thread tension so that the stitches do not tighten the sides.
Attaching Velcro
Nail one part of the Velcro using a furniture stapler at the bottom of the bar where the curtain will be attached. After that, process the upper cut of the curtain and attach the second part of the Velcro. This will allow you to quickly and easily remove curtains.
Make a curtain rod from a painted wooden bar or a lambrequin strap with Velcro.
Drawstring Making
A drawstring is made in the lower part so that a weight bar can be placed in it. The width for the drawstring is selected accordingly. As a weighting agent, an aluminum profile can be used.
Important! If the fabric for sewing curtains is white and / or transparent, it is advisable to paint the profile in the color of the curtains or white paint.
Finishing border:
- Make a finishing border from the inside of the product.
- Insert the pre-prepared pins into the resulting pockets and close the holes.
Important! Close up the drawstring on one side so that you can remove the rails before washing the product, and then insert them back.
Rings:
- Placements of rings on the fabric were noted at the initial stage of work.
- Sew rings to the fabric manually.
- The rings are fastened to a wooden beam with nails.
- Rings for the cord are arranged symmetrically with respect to the center of the product.
- The distance from the last rings to the edge of the curtain is 50-100 mm.
Pulling cord
Here the procedure is as follows:
- Fix the curtain on the timber with Velcro.
- Start threading the cord from the bottom edge, tying a knot on the bottom ring and securing it with glue.
- Similarly, pull the cord through all the rows of rings in the “bottom to top” direction, pull all the cords tight to evenly distribute the folds in width. Fasten them in this position with ribbons.
Timber fastening:
- Fasten the beam to the window frame or above the window opening.
- Remove the ribbons that keep the curtain folded and it will straighten.
- Gathering the cords together, align their tension.
- Pass the cords through the handle to adjust the height of the product. tie the second knot at a distance of 450-500 mm from the original.
Now it remains to install the fasteners on the window frame, wrap the cord around it and fix the curtain.
to contents ↑Stock footage
As you can see, there is nothing particularly complicated in making Roman curtains with your own hands. At the same time, such a design will look beautiful only if accurate calculations and extremely accurate execution.
 (No ratings yet)