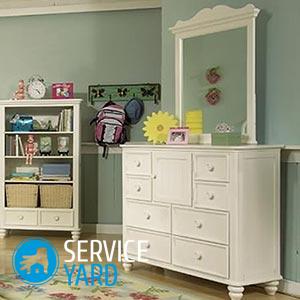
Dresser Drawer Repair

The retractable structure is not envied - it is often pushed and pushed. It so often happens that we simply do not calculate strength somewhere in a hurry or late. That is why the functionality of drawers suffers. Sooner or later, the mechanism will not withstand such a load and various cracks appear in the structure, erased guides, broken side walls, falling back canvases. To restore their former location and performance will help repair chest drawers. That's what we’ll talk about today. In our article you will learn about the most common problems of sliding furniture, how to eliminate them, and also get acquainted with the main recommendations for the reconstruction of drawers.
to contents ↑How to fix a drawer with a false bottom?
What to do if crawling drawers in a closet or desktop? The most problematic place of the retractable structure is the bottom. We can safely say that 90% of manufacturers moderately simplify the manufacture of furniture by strengthening the drawer with a false bottom, which is located on the bottom of the sliding mechanism and on the sides. This configuration greatly simplifies the process, and the bottom takes on the entire load of not only the placed items, but also the pressure of the sliding elements.
How to fix a chest of drawers with a similar type of bottom mounting? Most often, the cause of the breakdown was insufficiently strong and poorly installed fasteners. The bottom is fixed with nails to the front and back of the box, and several guides hold it on the sides. Yes, indeed, at first, such a scheme works quite well, but then it fails: the nails begin to loosen, and the bottom leaves, even if the chest of drawers is not overloaded. Let's figure out how and how to repair this breakdown:
- Staples. This is a great option for repairing sliding furniture. For work, you need to take special red-hot staples 1 cm long. In this case, you can safely use nickel-plated red-hot staples - they are even better than the previous ones: they are very durable and do not rust at all. Working with this type of mount is one sheer pleasure. To do this, you will need to remove the old fasteners and drill the bottom brackets around the entire perimeter of the structure, capturing the area under the guides.
Important! Removing such braces is not difficult for you. They are held by three screws on each side. Punch the sides of the box in strict order so as not to disturb its geometry.
- Wood screws. If it is difficult for you to get staples or a construction stapler, then the screws will be your salvation in the repair of the drawer. For work, screws with a diameter of 3-4 mm and a length of 15 to 30 mm are best suited. In order to repair drawers in the kitchen, you just need to take a screw 15 mm long. However, in the case of working with a porous chipboard of low quality, it is better to stock up with a 30 mm screw.
The two most common methods given are also suitable for replacing the bottom of the box - it will be necessary to saw out a material of a suitable size and fix it with the above material on a furniture box.
to contents ↑How to fix a chest of drawers with a mortise bottom?
The second type of bottom fastening in furniture is a mortise bottom, which most often is plywood, which is glued to the walls of the box.Manufacturers rarely use this method of attachment, but it still exists. Such a bottom very rarely causes problems and in most cases they occur due to its destruction. So, if manufacturers used laminated particleboard for the bottom of the chest of drawers, then you must have encountered a situation of tearing out glued zones from grooves. Of course, they can be put in place using the methods described above for fixing the false bottom, but it is better to change the particleboard.
What does not need to repair sliding chests of drawers?
We figured out how to quickly and easily independently repair a drawer that staggers and constantly falls. In some cases, there is no more option left than a complete replacement of the bottom. Let's discuss what is not recommended to do such work:
- Nails You should forget about this option, since it does not fit at all. Today, only the lazy use nails to repair their furniture. Due to the fact that over time the wood can change its previous shape, the nail caps will come out and damage the guide mechanism. No matter how long the nails are, they will not fix the structure so firmly as, for example, building brackets.
- Glue gun. It does not fit for one simple reason - the glue will not hold the bottom of the pull-out furniture well, as it is not able to withstand so many heavy loads. When using hot glue to repair a drawer, you may run into the problem of the composition leaking out of the bottom.
Dresser Drawer Repair
Today we will show you how to independently repair a drawer of this design:
- Compensation bar.
- Bottom of the drawer.
- Side of the drawer.
- Side guide
- Slide guide.
Preparatory process
The very first thing you need to answer these questions:
- What parts of the furniture structure need repair?
- How are the drawer guides and its sliding surfaces arranged?
After you answer the above questions, you will need to do the following:
- Check the strength and rigidity of the sliding furniture, the reliability of the mounting rails.
- Determine using a level or plumb line whether there is a skew of the retractable mechanism. If you find it, then check the reason for its appearance. Sometimes this is due to improperly adjusted legs. Then you need to disassemble the furniture, eliminate the cause of the detected skew and reassemble the structure. The presence of a skew significantly wears dressers, which will then become difficult to move in any direction.
Important! If your box is made of natural wood, then in the process of repairing it, clean the surface of the fungus, repair holes and cracks, and at the very end cover the furniture with a special protective agent.
Minor troubleshooting
More often the problem of retractable furniture lies in its lower part. The bottom, made of plywood, decreases over time, gaps appear where all small objects from the box fall. Experienced manufacturers, knowing about this problem, install a bottom with a margin where excess material is hidden on the back wall of the box. It is thanks to such a safety net that you can eliminate the gap by performing the following manipulations:
- We pull out the nails that hold the bottom of our box.
- We push the bottom a little forward, insert it into the grooves of the front part. Carrying out these actions, do not forget to check whether there is a gap between the bottom and the back wall of the chest of drawers.
- Hammer in the nails.
Important! If the bottom of your drawer is made strictly in size, then cut another canvas or put a small wooden pad.

Instructions for disassembling retractable furniture:
We determine the method of connecting the details of the dresser. If the “tongue-and-groove” method was used, then at the connection point we insert a small wedge and do not hammer it hard until all the elements are wet.After the separation of all parts, we remove the remnants of the adhesive, treating the surface with a wet brush. After checking the box for dryness, we collect all its parts, adjusting simultaneously two side guides.
Side Wall Repair Instructions:
Most often, the side walls of the drawers suffer from cracks and chips. So, if we found this chip, then we need to glue the fallen off part with ordinary PVA glue, and after that - paint the surface with a pumice stone. If you did not find a breakaway piece of material, then cut out a similar insert from wood and glue it to an empty place. Detach cracked parts completely and then glue.
Important! You can use the second option: pull the cracked parts as far as possible from each other, apply glue into the damage and connect with clamps.
Guide for repair of guide elements
As an example, we consider the old classic options that have been tested by time - wooden guides that are fixed on the sides on the inside of the box and have a bevel. Let's look at how to restore such guides:
- We remove the guide, which requires repair. Turn it over and set it back to its original place.
- If the guide does not want to be inserted in any way, then we pass a plane along its surface and attach the gasket.
- But if we didn’t succeed with a planer, then we clean and apply the polymer resin (ED-5 or ED-6) on the guide, press down on top with your hand and put a thin wooden plate.
Tips for repairing drawers:
- If you can’t pull out the nails in any way due to the fact that they are very rusty, then use a special hacksaw for metal and cut off the nail head. After this procedure, you can easily get nails with pliers to get the bottom.
- If after disassembling the structure you cannot remove the glue with a brush dipped in hot water, then remove it with a sharp knife or a chisel.
- If the drawer is covered with paint, and the parts are connected in a tenon-groove manner, first remove the old coating with a hot hairdryer, and then glue the parts.
- Before gluing the side parts of the chest of drawers, check if the upper and lower parts are level by attaching a building metal ruler or level to them. In case of their irregularities, remove the mowed part with a plane.
Stock footage
Now for sure it will not be difficult for you to do the repair of drawers with your own hands. We wish you easy work!
 (No ratings yet)