DIY chair repair

If you have an old comfortable armchair in your house, do not rush to get rid of it, even if it has lost its former attractiveness. After repair, at a relatively low cost, you will get an unusual thing in a vintage style. At the same time, it is not necessary to go to a specialized workshop, especially since the services of furniture makers are not cheap. Do-it-yourself chair repair is quite possible. The repair algorithm depends on the design of the product. In the article, we will consider one of the simplest cases - restoring a chair with armrests made of wood. With a skillful approach, all the work will take only a few hours.
to contents ↑Tools and materials
In order for the DIY restoration work to be successfully completed, you will need such consumables and tools:
- Drill.
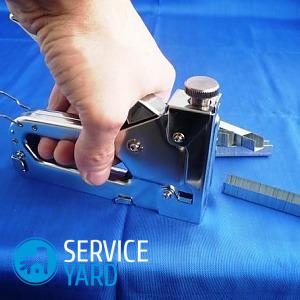
- The stapler is construction.
- Stain of the desired color.
- Furniture lacquer (also available in a bottle).
- Grinder machine.
- Screwdriver.
- Upholstery material (very good if the curtains and upholstery are from the same material).
- Foam rubber.
- Plywood shield.
- Glue on wood.
Now - the algorithm for restoring a chair with wooden armrests.
to contents ↑Product disassembly
Remove the spunbond or calico from the bottom of the seat. Then loosen the nuts, remove the backdrop from the plywood upholstered in fabric. After that, unscrew the corresponding nuts, remove the armrests.
Loosen the bolts that connect the backrest to the seat. As a result of disassembly, individual details should be obtained:
- Back.
- Seat.
- Two armrests.
- Backdrop.
Upholstery dismantling
There are two ways to remove the upholstery in order to make a chair repair with your own hands:
- Using a large screwdriver and pliers, just tear off the upholstery.
- Carefully remove the upholstery using a staple remover.
to contents ↑Important! In any case, proceed with the utmost care, as there is always a lot of debris under the old upholstery.
Repair Algorithm:
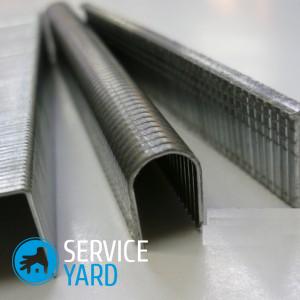
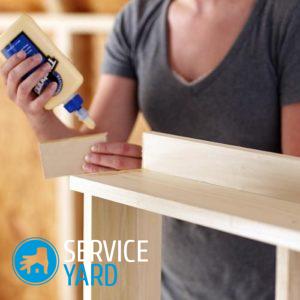
- To get started, inspect the wood components for cracks and breakages. Glue and fix the cracks with 16 mm staples.
Important! If during the dismantling process you notice that the parts made of chipboard have crumbled, you will have to replace them. Use a furniture board for this.
- Further work on the restoration of the old chair is the sanding of parts. This is the longest and most laborious process. Using a drill with a nozzle or grinder, clean the surfaces from the old varnish until a distinctive wood texture becomes noticeable.
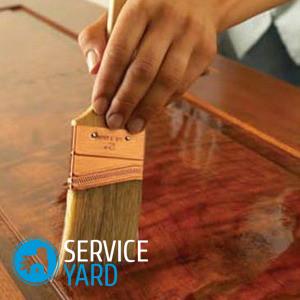
- From the furniture board, cut out the details of the desired shape and cover them with a stain. Leave for 5-6 hours to dry. After the necessary time has passed, apply a coat of varnish.
Important! If you want the texture of wood to be clearly visible, you do not need to apply the lacquer coating with too thick a layer. Refrain from using a shiny coating. For complete drying of the applied varnish coat, 22-24 hours should pass.
- After the parts have completely dried, collect the legs for the updated chair, make holes for fastening with other parts. Using glue for furniture, fasten the parts together and leave for several hours until dry.
- Check belt tension. If they are loose, pull out the brackets on one side and pull them with stronger pliers.
to contents ↑Important! If the belts are torn, they will have to be replaced.You can use for this special furniture belts, strips of dense textile or rubber strips. To extend the life of the belts, make a drum from a thick, durable fabric, cover them with belts and secure with brackets. Thanks to this “trick”, the belts will last longer and the worn foam rubber will not crumble.
Restoring filler and upholstery:
- Assess the condition of foam rubber or foam rubber. If the filler is very worn, it must be replaced.
Important! To choose the right foam rubber by thickness, measure the thickness of the old filling and add another couple of centimeters to it, taking into account the material drawdown over time. The thickness of furniture foam is from 1 to 3 cm. To increase the density of the structure, you can glue calico or spanbond between the old layer of foam rubber and the new foam.
- Secure the new foam with staples around the perimeter.
- Use the staples to secure the trim. The interval between them is 2-3 cm. This is the optimal distance.
- Using a screwdriver, make holes for the bolts in the new upholstery.
- Fasten the material to the holes with brackets.
Chair mounting
Reassemble the parts in reverse order. If old nuts and bolts are in poor condition, replace them. Be sure to use washers! Without washers, the nuts will be pressed into the tree, and the frame will loosen.
to contents ↑Stock footage
Restoration of the Soviet armchair is over! It is not that difficult. All you need is a desire and a minimum of skills. Now you have a new unique interior item - a vintage armchair.
 (No ratings yet)