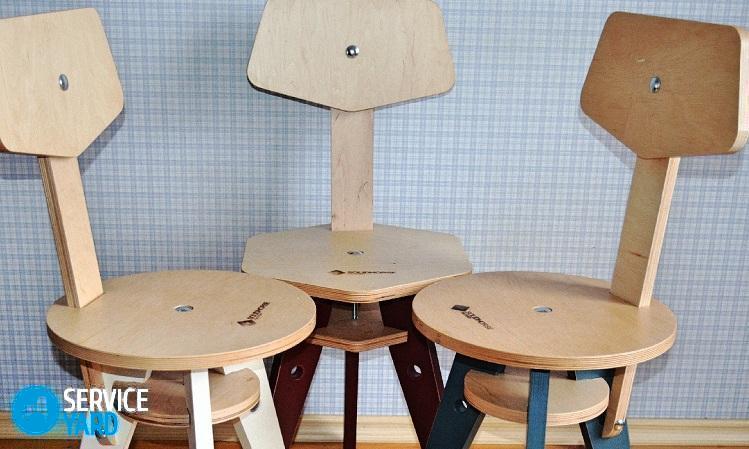
DIY plywood folding chair - drawings
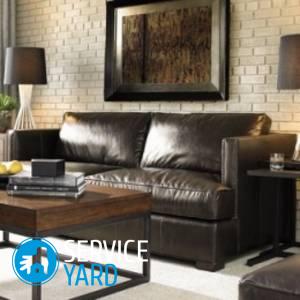
The assortment of furniture on the market is so great that, it would seem, there is no need to “reinvent the wheel” and do something with your own hands when you can buy everything that you like. But all that furniture stores provide us with is boring and stereotyped. A creative person who loves his country house or home will always find the time and opportunity to make, for example, a folding chair from plywood with his own hands, the drawings of which can be found on the net or also made independently.
to contents ↑Important! Plywood - these are sheets of wood of different species that are glued to each other perpendicularly (this arrangement makes this material more durable). Its use is quite widespread: thicker sheets are used for flooring rough flooring or erecting partitions in the house. Plywood sheets up to 10 mm thick upholstery the walls. Furniture at home is best made from plywood 10 mm thick, since it is quite flexible and durable. You may not be able to stop on a pair of plywood chairs and want to expand the assortment of handmade furniture, then be careful to check out our other articles:
What will be required for manufacturing?
Before starting work, it is necessary to prepare the following materials:
- Plywood - 1 sheet.
- A bar for legs measuring 40 by 60 cm, 2 pieces of 3 mm.
- Foam rubber 50 to 50 cm in size.
- Decorative upholstery - leatherette or furniture upholstery 60 by 60 cm.
Important! The beam must be dried and carefully sanded. It is advisable to take plywood from birch, since it is stronger than other types, quite easy to process and is optimal for painting or finishing in any other way.
From the tools you will need the following:
- Chisel.
- Screwdriver.
- Jigsaw.
- Sandpaper or grinder.
- Hammer.
- Stapler with staples.
to contents ↑Important! It is very good if you have a jig for assembling furniture. It will make it possible to clearly drill holes for fasteners, so that the product will be assembled as efficiently as possible.
The nuances of the preparatory phase
Where to start making a chair from plywood with your own hands? To begin with, on a 1-by-1-meter paper sheet, draw the details of your product in a 1: 1 scale, and then cut them out.
The model we presented consists of the following parts:
- Two rear legs 80 cm high.
- Two front legs 44 cm high.
- Four slats for reinforcing the construction of a 40 cm long chair (drawers).
- Seat size 36 by 40 cm.
- Trims for reinforcing the seat structure: 2 pieces 40 cm, 2 pieces 28 cm.
- Backrest measuring 30 by 45 cm.
Features of the manufacture of parts:
- Cut two beams of 80 cm for the rear legs. At a distance of 20 cm from the base of the leg, cut out the holes for the mounting strips. To do this, fold the legs in a row and outline the boundaries of the grooves. Hollow out the holes on the two adjacent sides of the legs of the chair with a chisel and hammer with a size of 20 by 40 mm and a depth of about 20 mm strictly in the middle of the beam. As a result, it should turn out so that on the side of the beam of 60 mm the hole is horizontal and 40 mm vertically.
Important! Thoroughly clean them from wood dust, otherwise - the strips will not fit into the grooves firmly.
- To make the front legs, saw off two 44 cm timber. At a distance of 20 cm from the base, as on the rear legs, make holes for the slats.
- Measure 15 mm from the top of the front legs, use a chisel and a file to cut the spikes measuring 20 by 40 mm to attach to the base of the chair seat.
- The planks that give the chair strength, make of timber. Cut 4 pieces with a length of 38 cm. Measure 10 mm on both sides, cut with the help of a saw and a chisel the spikes that will be inserted into the grooves of the legs during assembly.
Important! This must be done with maximum precision so that the spikes enter the grooves only with force and with a hammer.
- Despite the fact that an abrasive bar was chosen to create the chair, the already made planks and legs are again treated with sandpaper, since burrs could form during operation.
- Cut the back with a jigsaw. To do this, draw the details on plywood according to pre-prepared paper templates.
Important! Work smoothly with a jigsaw, and then process it with sanding paper from all sides, thereby smoothing out the bumps that have formed.
- To bend the back, first soak it. To do this, place the part in water at a temperature of about 60 degrees and stand for 3-4 hours. After that, give the back the desired shape, fix it with a tourniquet until it dries completely.
- Cut the plywood seat out of a paper pattern. Prepare 2 planks of timber of 40 cm and 2 planks of 32 cm in order to strengthen the design of the chair. On the larger ones, cut spikes of 20 by 40 mm on both ends and grooves of 20 by 40 mm in size on the other two, retreating from the edge of 10 mm.
to contents ↑Important! Treat all finished parts with sandpaper, open with varnish of the desired color, wait until it dries completely.
Assembly recommendations
To assemble a chair from plywood with your own hands from prepared parts:
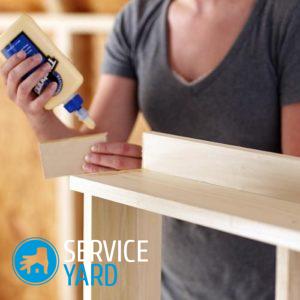
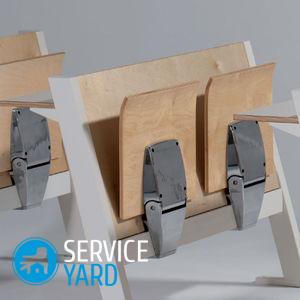
- To get started, assemble the base, consisting of 4 legs and strips, reinforcing the structure. After pre-processing the spikes on the planks with furniture glue, insert them into the grooves on the legs.
Important! Success in assembling a chair from plywood by 50% will depend on how accurately you cut parts for it, and the second 50% on the choice of glue. How to do it right, read our article "TOWhat glue is best used for furniture repairs. ”
- Now assemble the frame for the seat from the remaining 4 slats, in the same way, pre-lubricating them with glue. Seat base along the edges with adhesive and fasten with frame.
Important! You can also strengthen the structure using self-tapping screws.
- Cut the foam to fit the seat, glue it to the base of the chair.
- Cut the cover from leatherette or fabric, and then fasten it to the frame with a stapler, turning the edges so that the grooves remain free. The seat is ready.
Important! The appearance of the future chair is still in question, because much depends on the upholstery. Our archives will help determine which upholstery suits your product:
- Glue the spikes of the front legs, insert them into the grooves. Fasten the rear legs to the seat using self-tapping screws screwed into the end of the frame.
Important! The back can also be made soft, like a seat, or can be left unchanged. This is at your discretion.
- Attach the back of the chair to the top of the rear legs with self-tapping screws.
Stock footage
To make a chair out of plywood with your own hands, you need to carefully approach the selection of quality materials. Do not be too lazy to draw details on a sheet of whatman paper, measure out all sizes up to a millimeter. Before assembly, be sure to sand all parts with sandpaper and varnish. As a result, you should get an exclusive, comfortable chair with low costs for its manufacture.
 (No ratings yet)