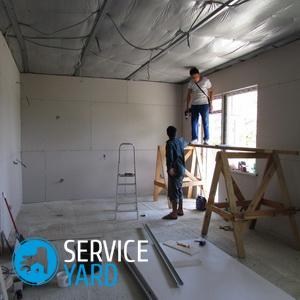
Wall Mounting Drywall

One of the fastest, easiest, and most cost-effective ways to do finishing work indoors is to install drywall on the walls. This building material allows you to quickly install a solid and fairly versatile wall, due to which an absolutely flat surface of the main load-bearing partitions is formed, as well as organize additional heat and noise insulation. And in order for you to succeed and the finished result exceeds all your expectations, we will tell you how to install drywall on a wall with your own hands.
to contents ↑Drywall for wall cladding - general information about the material
Drywall is a universal material for wall decoration due to the following qualities:
- Availability;
- The ability to get a completely flat surface;
- Environmental friendliness;
- High resistance to external environmental factors;
- Simplicity of operation;
- Ease of installation;
- The possibility of spot repairs with the lowest cost of time and money.
In addition, drywall allows you to put noise insulation and all the communications you need into the empty space between the sheets and the rough coating. As for the decorative finish, you can cover such a wall with absolutely any material.
to contents ↑Important! Drywall allows you to design a variety of niches, shelving and arches directly on the surface of the wall. This is a huge advantage of this material compared to others, which allows you to equip small rooms with minimal loss of free space.
Tools and materials you need to work
To install drywall on the wall, you will need special tools and materials that will greatly facilitate the process.
Instruments:
- A screwdriver for attaching drywall to the grill and mounting the frame;
- Spatula of medium size;
- Toothed spatula for spreading glue on the surface of sheets;
- Construction or office knife;
- Electric drill with a perforator;
- Concrete drills;
- Nozzle mixer for mixing glue;
- Capacity for adhesive, about 8 liters in volume;
- Paint roller;
- Scissors for cutting metal;
- Plane;
- Grout for processing joints;
- Sander;
- Notch.
Drywall
In building materials stores, you can find different colors of drywall sheets. This is due to the fact that this material is produced taking into account the conditions of the room in which it will be operated.
For example:
- Gray. It is used mainly in residential areas with normal humidity. Designate it GKL.
- Light purple or pink. This is a heat-resistant material that is used for cladding stoves and fireplaces. GKLO designation.
- Green shades. Such drywall is used for cladding the walls of rooms with high humidity, for example, a bathroom. Defined by the acronym GKLV.
- Blue or dark gray. This material combines immediately the properties of moisture resistance and heat resistance. It is used most often for the decoration of baths and boiler rooms, designated GKLVO.
Important! Drywall is best taken at 10-15% in excess of the amount you need.
Metallic profile
You will need the following types:
- Guide.
- Rack.
- Ceiling.
- Protective corner.
Additional consumables and accessories:
- Direct suspensions.
- Sealing tape.
- Dry building mix (in the case of frameless installation of drywall sheets).
- Primer for pretreatment of walls and preparation for subsequent puttying.
- Plaster-based putty for sealing joints.
- Reinforcing mesh or tape.
- Self-tapping screws for working with drywall.
- The expansion bolt shield for fastening of racks.
- Thermal insulation material.
Installing drywall on the wall in a frame way
This type of installation is considered the most common, since such a design is more reliable, especially if you want to make decorative wall cladding with tiles.
Important! The only drawback of installing drywall on the frame is the complexity of the installation itself and the need to purchase additional materials.
In order to make it more clear to you, we have divided the further process of action into three stages.
Stage 1. Construction of the circuit and markup
Before starting all work, it is very important to draw a future layout of the drywall sheets on the wall. Thanks to this action, you can use the material more rationally and economically.
Important! Pay attention to the fact that the wall is sheathed exclusively in a checkerboard pattern, and sheets of drywall are laid strictly vertically. These details should also be indicated in the schematic drawing.
After you have drawn the location of the drywall on the wall, you should determine the future location of the metal profiles. The markup should be done as follows:
- Step away from the work surface so that you can easily lay insulation materials and communications. Drill screws in the corners.
- Connect a plumb line to one of the screws. At the point of contact with the floor, fix the same screw. Do the same with the opposite angle.
- Between the upper and lower screws, pull similar cords and mark the base lines along which the supporting profiles of the frame will be laid in the future.
- Then, by the same principle, transfer the entire layout to the wall surface.
- When finished, remove the screws.

Stage 2. Mounting the frame from profiles
After you have transferred the marking to the walls, adhering to it, you can install the profile for drywall on the wall. The sequence of actions is as follows:
- Measure and, if necessary, cut the profiles to the length you need.
- Take the guide profile, which will be mounted to the floor, glue it with sealing tape. Fix it to the floor along the marked lines. The fastening step must be at least 1 unit per 60 centimeters.
Important! Pay attention to the fact that if the base of the floor is concrete, the holes for fastening should be prepared in advance, and for stronger fixing use plastic dowels.
- Fix the ceiling guide profile in the same way.
- Now you can begin to install vertical profiles. To do this, determine the center at the place where the profile will be fixed, install a suspension in it. Moving from the center point up and down, every 60 centimeters set the frame elements.
Important! Installation of vertical metal profiles should begin from the corner of the room.
- Insert the metal vertical profile simultaneously into the upper and lower profiles, placing it between the suspension petals. Check the level of its accuracy, and then fix it to the suspension.
- Install the remaining vertical profiles in the same way.
Important! If you plan to make decorative wall cladding with tiles, the pitch of the racks is best reduced to 40 centimeters.
- If the room has a window opening, mount the jumper so that it is between the window sill and the vertical profiles. It will be the main supporting profile of the window opening. Install the frame near the doorway in the same way.
Important! In addition to the window and doorway, such a frame element should be installed at all joints. They should be fixed with rack profiles using “crabs”.
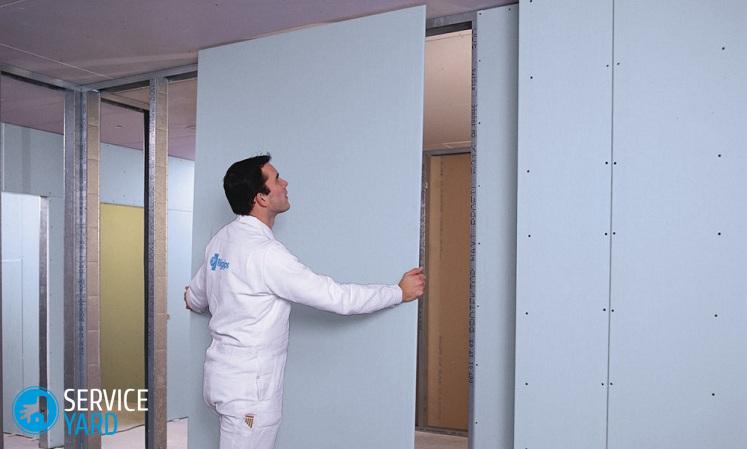
Stage 3. Wall Cladding
Before attaching the drywall sheets to the wall, insulating material should be laid.
Important! It is best to use polystyrene, cork or mineral wool for these purposes. It should be laid in empty strips of the metal frame, while threading through the profiles and fixing the curved legs of the suspensions.
Now you can proceed with the installation of drywall on the wall with your own hands. The sequence of actions is as follows:
- Install the bottom sheets on the wall with a gap of about 10-15 millimeters from the floor.
- Fix the drywall with a special screw.
- Sheathe the remaining part of the wall in the same way.
- At the end of the work, plaster all joints and clean the surface with an emery mesh.
That's all, the walls are ready for the subsequent decorative coating!
to contents ↑Important! Pay attention to these tips:
- Fastening with screws should be made in all racks and jumpers;
- The self-tapping screw should be located at least 10 millimeters from the edge of the sheet;
- The step between the screws should be about 25-35 centimeters;
- If it was not possible to fix the self-tapping screw, then it is better for you to immediately remove the old one, and screw the new one into the hole located in increments of 5 centimeters.
Frameless mounting method
This cladding option is suitable for small rooms, since the fastening of the drywall sheets to the wall is close. If you decide to use this technology, consider the fact that the method you have chosen has its own nuances:
- The height of the room should not exceed the length of the sheets. This is due to the fact that horizontal mounting in this installation option is unacceptable.
- If the curvature of the walls exceeds 5 centimeters, it will need to be pre-aligned before sheathing. Therefore, in this case, it will be more expedient to cover the walls with a frame method.
For wall sheathing with drywall in a frameless way, you should adhere to the following procedure:
- Prepare the base. To do this, remove old wallpaper, paint, and other debris from the wall surface.
- Prime the cleaned surface.
- Using a plumb line, measure the depth of the bumps.
- Pre-mark the walls.
- Cut sheets of drywall, cut openings for sockets and switches.
Now directly cover the walls. It can be done in three ways:
- If the wall irregularities are approximately 4 millimeters, plasterboard can be fixed with plaster putty. To do this, using a notched trowel, apply the adhesive mixture in the center and around the perimeter of the sheet. Next, the sheet should be raised and pressed against the wall. With a level, check the correct position and, using a rubber mallet, with gentle strokes, align the sheet vertically. Subsequent sheets of drywall are stacked flush without joints.
Important! If you plan to hang something on this wall in the future, then the sheet should be puttied completely.
- This type of cladding is used in cases where the curvature of the walls reaches 2 centimeters. Therefore, it is advisable to use a stronger adhesive for such surfaces. As for the sheathing process, in this case, glue is applied to every 25-35 centimeters in the form of piles with a diameter of 10-15 centimeters and a height of 2-2.5 centimeters. The process of wall stickers is the same as in the previous method.
- This technology is used when the roughness of the walls is about 4 centimeters. In this case, the drywall sheets are cut into strips 10 centimeters wide and glued in increments of 40-60 centimeters. Using a level, the stripes are aligned vertically with each other in one plane. This frame is given time to dry for 2-3 days, after which, using putty, fix it to the wall.
Stock footage
Plasterboard wall cladding - This is a creative process, and if you feel within yourself the strength to conduct it yourself, then you can boldly get down to business, even if you have not come across this material before. The most important thing is to prepare all the necessary tools and correctly determine the installation method. Only in this case will you be able to prepare the wall for further finishing work in a short time and without much physical effort.
 (No ratings yet)