DIY Chest Bed - Drawings
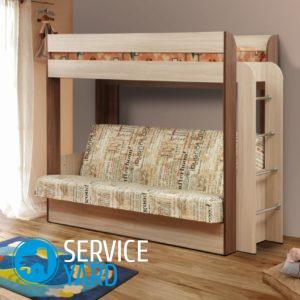
Multifunctional furniture has always been popular. Lockers with hidden drawers, folding sofas and armchairs, cabinets, which, if necessary, turn into tables or folding beds - the list goes on. The bed-chest was invented by sailors. Initially, it was just a box with things on which you could sit or sleep, but now it is a stylish and very functional piece of furniture in an old or romantic style. To make a do-it-yourself chest bed, drawings are optional, but you can make them if necessary. How? Let's discuss it.
to contents ↑Chest functions
Chests have been known for a very long time. They were taken with them on trips, given as a sign of special location, merchants carried their goods in them, and the girls folded the dowry. The form could be different:
- In most countries, they preferred a rectangular box with a securely closed lid - many things were placed there, and if necessary, it was possible to lie down or sit down.
- Other nations had chests in the form of a barrel. No less things were placed there, but it was impossible to lie on such an object. But it could be rolled.
In a modern apartment, of course, a rectangular box is preferable. It will fit things that are not needed every day, and if necessary, you can very quickly organize an additional sleeping or sitting place.
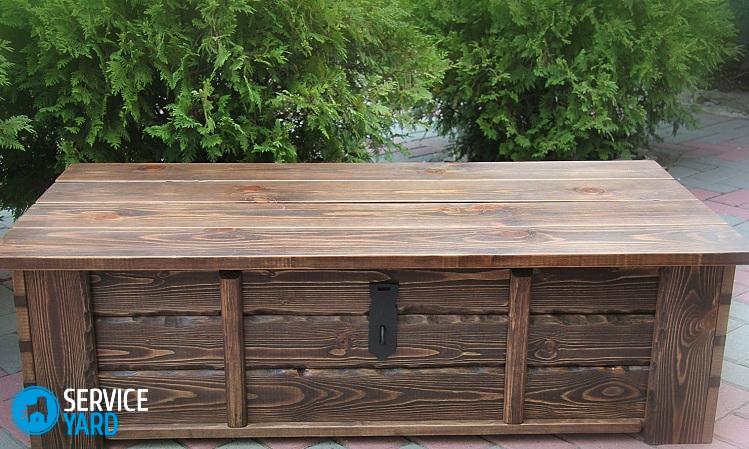
A do-it-yourself chest bench is done in much the same way as a chest bed, the difference is only in size.
to contents ↑What to do?
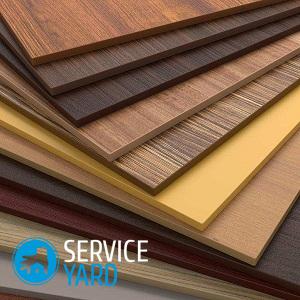
In the old days, chests were made of natural wood. Now you can safely continue this tradition, fortunately, in construction stores you will always find boards from the most diverse breeds and all possible sizes. But other materials are also suitable:
- plywood;
- laminate;
- Chipboard.
Important! Before embarking on the implementation of your ideas, it is worth exploring the issue of materials, because the durability of your product and its estimated cost will depend on this choice. Weigh the pros and cons, our materials will help you:
Depending on what materials you have, you need to choose one or another design of a chest-bed:
- wireframe;
- frameless.
The frame version is used for thin materials - plywood and laminate, because otherwise they will bend. For the frame, you will need more rails or timber. For boards and chipboard, the frameless method is quite suitable. In both cases, the sex test is very suitable, which perfectly fits.
to contents ↑Important! The thickness of plywood or chipboard should be at least 16 mm.
We make calculations
Making a rectangular box with a lid will be much easier if you properly calculate the dimensions and make a scan:
- Determine the place where the chest-bed will stand - it is best to outline with chalk its future position on the wall and on the floor.
- Draw two more horizontal lines on the wall, thus marking the height of the legs and the bottom of the cover.
- Measure the floor length and width.
- On the wall, measure the height of the box (from the legs to the bottom of the lid) and the lid.
- Subtract twice the thickness of the beam from the height.
Do a scan
First you need to make a drawing to scale. It is best to take graph paper for this purpose. A scale of 1:10 is convenient when 10 cm of a board corresponds to one centimeter on a sheet. Then everything is simple:
- Draw a rectangle whose length and width correspond to the length and width of the future chest at the selected scale - this will be the bottom.
- Draw the front and back parts - their lower sides are in contact with the long lines of the existing rectangle, and the short ones are equal to the height of the body.
- Draw the sides, respectively - the lower sides of these two parts coincide with the short sides of the bottom, and the sides are equal in height.
- Circle the contours with a bold pencil, and the fold lines with a dotted line.
- In the same way, build a scan of the cover: first - a large rectangle that will be exactly the same as the bottom, and then - attach the other sides to it.
- On all sides, sign the dimensions, but not on the scale, but as they will be in reality.
to contents ↑Important! If you have a good spatial imagination, you don't have to do a sweep.
Cooking Tools
Before you begin, take care of the tools that should always be at hand. It is also necessary to allocate at least a small space under the workshop in order to assemble a chest bed with your own hands.
Important! It is advisable that where you work, there is not very high humidity. When working with wood, sharp changes in temperature should be avoided. The chest, of course, is not a musical instrument for which high humidity can be simply disastrous. But suitable conditions avoid many problems.
You will need the following tools:
- jigsaw or hacksaw for wood;
- drill;
- Sander;
- screwdriver (you can use a drill at low speeds);
- hammer;
- pencil;
- long ruler;
- gon.
In addition, we need fasteners, as well as carpentry glue. As fasteners are used:
- self-tapping screws;
- metal corners;
- wooden scarves.
Mark the frame
For the frame structure of the chest, we take a 5x5 bar. You need to choose it carefully - knots do not particularly harm the case, but there should be no noticeable chips and glues.
Body
For the case you need 12 parts:
- 4 pieces equal to the length of the chest;
- 4 pieces equal to its width;
- 4 - equal to the height minus twice the thickness of the beam.
Important! For a large chest, you will need more lateral struts - one for each short side and 2 for each long. Their length is equal to the height of the box minus twice the thickness of the beam, since they are placed between the upper and lower bases.
Cap
For the frame of the cover, you will also need 12 parts. But there is also a semi-frame option if the height of this part is equal to a single or double thickness of the beam. In both situations, side ribs can be dispensed with. In the first case, only the frame is made, in the second - the frame is doubled, that is, 4 or 8 parts are needed, respectively.
to contents ↑Important! The double-frame option may be too heavy.
We assemble the frame of the box
To connect the parts you need screws. Before you start assembling the chest bed with your own hands, sand the elements. This can be done with a large and small skin, but a grinding machine is much more convenient:
- Start the assembly from the base - connect the bottom parts, observing right angles.
- Assemble the top in the same way.
- Compare fragments - the contours must exactly match.
- Place the corner ribs, attach them to the bottom, then secure the top frame of the frame.
- Put intermediate supports.
- Strengthen the support bars from the inside of the frame, except for the corner ones, with triangular or T-shaped plywood scarves on the screws - this will reduce the tendency of the structure to loosen.
We cover the skin
Despite the fact that you have a drawing of a chest bed, it is better to cut the lining after the frame is ready - you need to measure it carefully so that there are no gaps in the finished product.
Plywood or boards should be the same in thickness. Size the parts:
- 1 bottom;
- 2 sidewalls;
- 2 identical parts for front and back.
Sheathe box
The casing is mounted on self-tapping screws of short length:
- Attach the bottom - first screw the screws on the long sides, then on the short ones.
- Attach the ends.
- Attach the front and back.
to contents ↑Important! If you do not lining from solid sheets, but from individual boards, it is best to join them in the area of the struts.
Legs
They can be of any shape - carved, in the form of barrels, rectangular or square. The easiest option is the last one. You can use the legs from the old sofa, if they are strong enough and are suitable in color and style:
- Stick rubber or felt pads on the underside to prevent your chest from damaging the floor.
- Tighten the legs, and for fidelity, coat the joints with joiner glue.
- Check how horizontally the bottom is located - if it is tilted, under the dubious leg stick another gasket.
to contents ↑Important! A chest can be without legs at all, such a design will be even simpler.
How to make a cover for a chest from plywood?
The lid is made almost the same as the box. Start with a wireframe, i.e. a rectangle. In addition to it, for a large chest, 2-3 cross-braces will be needed, which are placed between the long sides.
You need to cut:
- 1 rectangle for the top - in size it is equal to the bottom;
- 2 sidewalls;
- front and back.
Connect the side bars, frame parts of the front and rear parts into a rectangular frame. As in the manufacture of boxes, it is convenient to use self-tapping screws. Insert the spacers, and then sew the cover.
to contents ↑The lid should open
You can, of course, just put it, but it is difficult and inconvenient. It is much more interesting to make a real chest with a hinged lid. You will need:
- 3-4 window hinges;
- mortise lock, latch or latch.
We attach window hinges to the back side. It is better to immerse them by sawing a recess of the appropriate size in the skin - only the axes should protrude. All this is screwed on with the same screws.
Place a device on the front with which the chest will close. Chests with mortise locks are usually shown in pirate films, but they are not as convenient as, say, a latch or a latch. You can attach one latch in the center, or you can attach two in the corners, as you like.
to contents ↑Final finish
Do-it-yourself chest bed is almost ready, but you don’t really like what it looks like? It doesn’t matter, it can be decorated.
Important! It is unlikely that the appearance of unpainted plywood or chipboard will greatly decorate your home or delight the eye. But, after all, painting is a delicate matter, and therefore a number of rules should be observed for the successful implementation of an idea. Learn about all the intricacies of painting at home.
Wooden parts will look much more interesting if they are covered with a stain, fortunately, in construction stores you will probably be offered a stain of various colors, including walnut or ebony. In addition, the walls can be painted, pasted with a cloth, burned or cut patterns on them.
to contents ↑Important! Joints can be repaired with a decorative glazing bead. But nothing prevents making forged linings or their plywood imitation.
DIY laminate chest
Can a laminate chest be made? Why not? True, this material is unlikely to be suitable for a chest-bed - it is deformed due to the large weight. But you can make a small chest in the hallway. Lying on it is definitely not worth it, but sitting down to lace up your shoes is fine. Such a chest is made in the same way as plywood, only a beam for a small product needs a thinner one.
Important! This option is also good for the nursery - your little nephew or daughter of a girlfriend, who is sometimes left for the night, weighs a little and is unlikely to be able to push through the lid.
If you really like this material and you just dream that a large chest-bed is exactly from it - well, this is also possible, but subject to certain conditions:
- Do not make a lid out of a laminate.
- It is quite possible to use it for sidewalls.
- You can make a double cladding - a layer of plywood, then a layer of laminate. But the design will turn out to be very massive.
to contents ↑Important! Well, here, the chest is ready, An original and non-repeatable style and design which pleases the eye and amuses pride. But something else asks for it in the kit, check out our selection, maybe you decide what it will be.
Stock footage
In a word, a chest bed or a chest bench can be a very interesting and useful item in your apartment. And you can do something unique quite quickly and without large material losses, because even boards from old furniture that you decided to part with can come up.
 (No ratings yet)