DIY rocking chair with pendulum mechanism

It is difficult to find a person who would not want to swing on a warm summer evening in a comfortable chair with a cup of tea in his hands. But such furniture, unfortunately, is not available in all houses, most likely, because it is expensive in stores. In this material we will tell you how to create a rocking chair with a pendulum mechanism with your own hands from accessible and understandable materials. We will bring to your attention the two most simple designs, the final choice is yours.
to contents ↑Varieties of Rocking Chair
Many at the mention of this phrase recall furniture from the countryside or everyone’s favorite film about a skilled detective who liked to reflect on another matter, wrapped himself in a warm blanket and smoked a pipe. But we decided to dispel this stereotype, to present a rocking chair as an ultramodern and fashionable furniture. It is suitable for any interior due to the abundance of models on the market. Before you start work and make a pendulum rocking chair with your own hands, familiarize yourself with the most popular varieties of such products.
Types of armchairs:
- Model on skids. This design can be safely called traditional, since the seat in it is attached by means of curved guides, that is, runners. The main advantage of this design is its low cost and easy assembly. The only minus - when swinging, the runners are very scratched.
- Pendulum models. The designs are more complex, they have a fixed base and seat, which are connected independently of each other. Such furniture is safe and stable, while it does not harm the floor.
How to assemble a wooden chair on skids on your own?
Have you decided to make a swinging rocking chair on skids? Drawings can be found on the Internet, then simply use the proposed scheme or adjust the proposed sizes at your discretion, taking into account your own physique and personal preferences.
Build according to the suggested instructions:
- Radius selection for runners. Make diagonal cuts on the rail, then insert the ends of the plywood strip there. Position the cuts apart enough so that the plywood arches with the required radius. The depths of the cuts should be at least 3 cm.
Important! Try to make cuts strictly perpendicular to the longitudinal direction of the main rail, since its curvature will cause the skids to simply skew.
- Setting a landmark. Insert a 1.2 m plywood strip into the prepared cuts. Note that the distance from the lamella to the rail should be 15 cm at the largest bending point. Attach the design to the workbench, circle the radius, marking the center on the curved strip. On the workbench, according to the circled radius, lay out the stocks, using screws, screw them to the table. Screw the plywood onto the stocks.
- Installation of limiters. Put the same size bars on the table surface to prevent the slats from slipping, fix them with screws on the table.
- Bonding runners.Take 8 slats, grease them with glue, attach to the strip that is fixed on the stocks, align them according to the marks set in the center. Install the first clamp directly in the center, tightening the bar firmly. Fix the clamps at the edges of the lamella, but do not over tighten. Align the clamps from the center to the edges and tighten. As soon as the lamella package is fully locked, tighten the outermost clamps.
Important! Leave the blank as it is in a stationary state for several days, so that the glue is completely dry.
- Combination of runners. Clearly according to the marks on the centers, set home-made runners opposite each other, fix them through clamps with transverse crossbars. Check how well your design is swinging. Trim the ends of the runners at right angles, glue them through the grooves of the knobs.
- Preparation of reinforcing elements. If you install the seat directly on the skids made of wood, then they are guaranteed to crack. Therefore, cut out amplifiers from the board, in other words, the same runners, only less long ones. Using the router, make grooves for connecting the runners to the amplifier with cotter pins.
- Connection runners with amplifiers. Coat the surfaces of the elements to be glued with glue, insert the cotter pins into the technological holes. Connect the skids to the amplifiers so that they stick together along the entire length. Pull the parts with clamps until the glue completely dries.
- Creating side racks. From the plywood, cut out the template drawings according to the shape of the side stand. According to the scheme, cut out, cut six racks. Grind wooden blanks with the attached template using a milling cutter. Make a groove at the end of each rack for the spikes previously mounted in the amplifiers.
- Bonding side racks. Glue the groove in the side racks with glue, apply it also to the spike and near it. Put the stand on the spike, press firmly to the body of the amplifier. Follow the same steps for both runners.
- Base compound. Connect transverse extensions with side rails. Do it with screws, screwing them from the outside.
- Assembly seat. Cut two sidewalls from a solid board. From the inside, cut a solid longitudinal groove in them. Connect the sidewalls together by inserting the rails and fixing them with glue. Install the rails as tight as possible so that there is no gap.
- Assembly of all elements. Use glue and spikes to dock the seat with the side supports. Cut and install the armrests. Cover the chair with varnish.
Here is such a wonderful, durable, stable and comfortable you will get a pendulum rocking chair with your own hands.
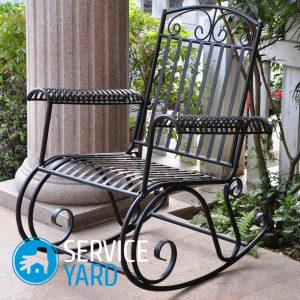
to contents ↑How to make your own metal chair pendulum type?
To create such an interior item, you will need:
- metal profile 15 by 30 mm;
- steel strip 30 mm wide and 3 mm thick;
- pipe with a diameter of 32 mm;
- bar 12 mm.
Naturally, a grinder with a disk for working on metal, a welding machine, a measuring tool and a clamp can not do without work. To work with pipes, you still have to find a special tool for bending the profile.
You will need to perform such actions in strict sequence:
- Making a full-size drawing. First of all, we create a drawing before making a pendulum rocking chair. On a flat floor, draw the side of the chair. To simplify your work a little, lay some home chair on your side and circle the seat with the back.
Important! Please note that the less curved elements there are in your product, the easier it will be for you to assemble it.
- Creating a housing for bearings. Measure the width of the bearing and cut 8 rings from the pipe, that is, their number should correspond to the number of bearings used. Weld a plug on one side of the part; use a washer for this. It is important that the center hole in the washers is slightly smaller in diameter than the existing bar.
- Assembly of the side parts of the seat and back. Bend the profile according to the existing drawing, weld two identical sidewalls. Attach them to the drawing and check the correct assembly.
- Preparation of the sidewalls of the base. Using a special tool, bend the profile according to the drawing, make four such parts.
- Assembly seat. Cut 5 jumpers from the profile to the desired chair length. Weld the jumpers to the sidewalls, weld the chair parts on a metal frame. Bend the handrails from the remains of the profile, weld them on the sides of the already assembled product.
- Seat trim. Cut the pieces from the steel strip so that they match the length of the jumpers and weld them to the seat frame.
- Installation of the lower support. Weld together the finished curved sections of the profile in 2 pieces. Weld on the same piece of profile to the end surfaces of curved parts, as a result - you get a design that resembles a bow. Use the jumpers to weld the two sidewalls at the top and bottom. Place the finished chair on the welded base, weld the transverse jumpers on it from below.
- Attachment of movable suspensions. Weld bearing units with rods inserted into the lower part of the chair and the upper part of the curved sides. Connect the nodes on the sides and the chair with the same length of the pieces of the bar.
Stock footage
If everything is done correctly, observing this scheme, you will have a pendulum rocking chair with your own hands, which will delight you and your loved ones for many years through the use of high-quality and incredibly durable materials.
 (No ratings yet)