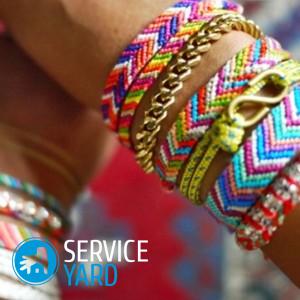
How to weave baubles from beads?

A bauble made of beads has always been and will be one of the girl's jewelry. Of course, weaving from beads is much more complicated than from satin ribbons or floss threads. But it’s absolutely realistic to learn such skill on the basis of the simplest schemes, which we will talk about today. If you do everything right, you can easily tell your friends how to weave baubles from beads. Moreover, in its meaning you can invest a certain meaning and your positive energy. Let's look at the available workshops for beginners.
to contents ↑Weaving Methods
On beaded bracelets, you can create various patterns of both a strict nature and more delicate ones - openwork. So, for example, you can weave baubles for various purposes - for work in the office or for everyday use.
The genius of beadwork is that you are the author of your new jewelry due to the fact that adding or removing certain colors and techniques, you thereby create a completely new pattern. Despite the wide variety of varieties of bead bracelets, all production is based on two basic principles:
- One end. This principle involves weaving ornaments with a single thread or fishing line. It is on one piece of material that beads are strung, and the second thread remains in a free position (does not participate).
- Two ends. In the technique of this principle, two guiding threads are used, which take an active part in stringing beads, interwoven with each other to create an openwork accessory.
How to weave baubles from beads? For beginners
Now we will consider the simplest and most affordable way to weave a bead bracelet. It can be done not only by a girl without special skills, but even by a child.
Materials and tools:
- Beads to choose from (plain or color).
- Metal clasp.
- Three cuts of fishing line 50-60 cm long.
Working process:
- We collect three identical fishing lines in a bundle, connecting exactly the ends.
- We pull out the middle line 2 cm and form a loop from it, into which we thread it through the fastener hole.
- For each vein we collect beads, reaching a length of 25-30 cm.
- Again, we divide the veins into three strands, and then weave an ordinary pigtail out of them.
- We fix the ends with a strong knot and carefully fix already one bundle at the end of the second fastener part.
Technique “flower”
Another easy way that you will like. So, let's read the step-by-step instructions:
- We collect 8 small beads on a thread or fishing line, and then close them through the first part in a circle.
- We pass the needle through the beads so that it passes through them and comes out at the very bottom.
- Now we collect on the thread the ninth detail of a different color. Mentally divide the ring in half and pass the needle through the fourth bead (opposite the eighth in the previous row).
- We collect six beads on the needle, close the circle, passing the thread through the fifth and fourth.
- We circle the circle to get out of the last fifth part.
- We collect the sixteenth bead of a different color on the needle, and then we go through the twelfth part, which is located in the opposite row.
DIY bauble is ready!
to contents ↑Important! To make the bracelet even wider, repeat the last four points.
How to make a bauble of beads “cross”?
- We collect on the beads a simple chain consisting of 20 beads. We take the blank in the left hand so that the typed beads are at the bottom of the palm.
- We lead the needle into the fourth part from the end, and then tighten the thread.
- We collect one more bead on the fishing line.
- Insert the needle into the second bead from the last dialed chain. Performing the actions of this paragraph, we move in the opposite direction of the bead low.
- We cross the chain of the length we need. For our further actions, we need a thread with two needles at the ends. With it we will add rows.
- We pick up a few details on the fishing line and move them to the middle. We introduce the end of the left thread into the right side bead of the very first link of the original chain. Add one more bead to this end, introducing the right end of the fishing line into it.
- We put on the part already on the right end, and the left - we lead through the second bead of the second part of the base chain. Add one bead to this end, into which we draw the right fishing line (thread).
- Repeating the above steps, weave the desired number of rows, creating one wide canvas.
In this technique, you can change colors among themselves, add large-sized details, creating your own original drawing.
to contents ↑Important! Do not rush to be upset if you do not have a clasp for the bracelet. You can also do it yourself. To do this, you need to weave a small bead loop on one end of the product, and on the other - attach a bead, which can hardly pass into the previously made ring. Such a design will be the original castle.
“Beautiful pattern”
First of all, we will get acquainted with the list of necessary materials and tools:
- Beads.
- Thin needle with a wide eye (for beads).
- Threads.
- Book.
- Wide tape.
- Scissors.
Step-by-step algorithm of actions:
- We take a book or notebook on which it will be convenient to place the threads and fix them with tape. We fasten a thin thread with a wide tape on the back of the book. We wrap the book with threads, the number of which should be one more than the number of parts across the width of the bracelet. There are 13 beads in our pattern, which means weaving 14 threads, the last of which we fix with tape to the same book. We straighten the threads, bring their distance to the size of the beads.
- We put something under the bottom of the threads so that it is convenient to work with them.
- Cut the thread 2 meters long. We fix it to the leftmost thread, string the details.
- We carry the threads with small details under all the threads, and after that we trim them so that each bead is between two shared threads.
- We draw the needle through all the collected beads (go back).
- We collect the second row of beads, draw it again under the threads and go back, passing the needle through all the details.
- We carry out the above actions until we reach the desired length.
- We fix the thread with a strong knot, and then cut all the threads strictly in the middle. We knot knots with all the threads on both sides of the beginning of weaving.
That's all the work! A bauble with an original pattern is ready!
to contents ↑General recommendations
Beadwork is painstaking work. The workplace should be equipped in the most convenient way:
- Firstly, it is necessary to provide good lighting, since any microscopic work greatly strains the eyesight. Beadwork is desirable in daylight. It so happens that we cannot afford it, therefore, there should be a table lamp with “warm light” on the table.
- Secondly, you need to purchase a small piece of plain fleecy matter. On it, you will be easier to perceive small beads. It can be velor, felt, velvet, felt or tapestry. Due to its texture, these fabrics do not allow the beads to crumble on the table.
- Thirdly, you should equip your workplace with a convenient storage system for various materials, tools and additional devices. So everything you need will be at your fingertips.
to contents ↑Important! For beginners, it is advisable to acquire or make a beadwork machine yourself. It can be replaced with a book, a cover from a cardboard box or the box itself.
Stock footage
So you have mastered weaving baubles from beads for beginners. You just have to decide on the scheme, stock up on everything you need in order to create your own creation! Beadwork is not only possible, but also necessary to experiment!
 (No ratings yet)