How to glue tiles on drywall in the bathroom?

To carry out repairs in the bathroom, you must carefully familiarize yourself with the properties of building materials - all of them must be of high quality and have moisture resistant properties. Ceramic tile today is rightfully considered one of the most sought-after finishing materials. Walls made with this finish have excellent performance properties. Tiles are especially popular as finishing plumbing facilities, however, for a quality installation of it on the wall, the surface should be perfectly flat. In our article we will tell you how to glue tiles on drywall in the bathroom, how to choose the right material so that the repair will serve for many years.
to contents ↑Can tiles be glued onto drywall in the bathroom?
The process of leveling the walls is quite complicated, it takes a lot of time, it requires the use of a large number of building materials, and most importantly, without much skill, high-quality work can become an impossible task. In order to simplify this process, you can apply the method of wall decoration with drywall, on which tiles are subsequently laid.
The decision to use gypsum board sheets is no coincidence, the material has universal properties and a simple installation system. Surely, you will immediately have the question: is it possible to glue tiles on drywall in the bathroom? We will answer with confidence: of course it is possible!
Important! For rooms such as a bathroom, a moisture-resistant type of material is used that does not deform when exposed to liquid. In construction stores, the product has a special marking that distinguishes it from ordinary drywall. Moisture-resistant drywall has a green surface and a blue marking, consisting of the abbreviation "GKLV", as well as numbers indicating its size.
A large number of positive properties of this material will also help to choose in favor of using such sheets as a base for laying tiles.
Advantages of GCR:
- First of all, it is worth noting that the name GKL displays its components. Each sheet consists of several layers of cardboard with gypsum layers between them.
- To achieve special strength during the manufacturing process, reinforcing, antifungal and hydrophobic components are added to the dough from gypsum.
- Between each other all layers are connected with a special environmentally friendly adhesive composition.
- Builders call drywall universal material, it can be used to install partitions between rooms, wall finishes and false ceilings.
- High moisture resistance is achieved by the addition of special components in the manufacturing process.
- The building material has a high level of noise absorption, in some cases it is used as additional sound insulation in the room.
- For the production of sheets using high quality raw materials, without the addition of harmful and toxic substances.
- GKL installation does not take much time.
- The low cost of goods and easy installation allow you to use the material in the process of construction work without significant financial costs.
- GKL is widely used as the basis for any type of finishing: tile, wallpaper, decorative plaster.
- The structure of the material provides the ability to install the material on a curved surface.
Having such a number of positive qualities in the arsenal, it may seem that this is the best building material. But do not idealize it too much, as there are also negative aspects of its application, which we will discuss later.
GKL disadvantages:
- With prolonged exposure to moisture or water, the surface begins to absorb it. Over time, the material loses its properties, swells and deforms.
- The surface trimmed with gypsum board will not withstand strong impacts. It is also not worthwhile to mount heavy objects, boilers, cabinets on such a basis.
How to glue tiles on drywall in the bathroom? Required Inventory
Before sticking the tiles on the drywall in the bathroom, it is worth taking care of the necessary tools and materials in advance.
Important! The durability of your work directly depends on compliance with the installation technology and the quality of materials.
For work you will need the following tools:
- Drill or hammer drill. Pay attention to the fact that the tool has a special mixer pad - you will need it for the preparation and mixing of solutions.
- Level (laser or water).
- Spatulas (flat, serrated and for jointing).
- Brush or roller.
- Tile cutter or other device with which you can cut tiles in size.
- Ruler and pencil for marking.
- Sandpaper.
In the article we will not consider the sequence of installation of guides for gypsum plasterboard, as well as their installation on the frame. By default, drywall is already installed on the wall, and you only need to lay the tiles. To do this, you will need the following materials:
- Tile or plastic tile.
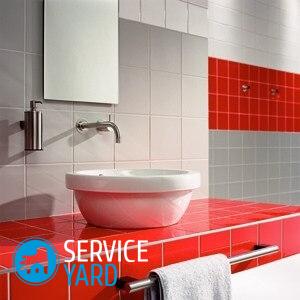
Important! Ceramic tiles in the bathroom look more presentable, in addition, it has greater strength and reliability, which can not be said about plastic tiles. But the cost of a tile is several times more expensive than a plastic counterpart, so each person must decide for himself what is a priority.
- Putty.
- Reinforcing fiberglass mesh for sealing joints in the Civil Code.
- Primer. The best option for use in the bathroom are moisture resistant mixtures.
Important! Do not purchase mixtures containing alkyd substances. They negatively affect GCR; when applied to the surface, the sheet will certainly deform.
- Glue. It is chosen based on the type of tile. Glue is produced in the form of a paste or powder.
- Remote crosses.
Important! The most optimal option for use in the bathroom are small crosses.
- Stitching. The color is selected based on the tone of the facing material - a tone lighter or darker.
How to stick tiles on drywall in the bathroom? Work stages
After you have bought or prepared the necessary tool, and the tile is in the room, you can proceed directly to the most responsible process - glue the tile on drywall in the bathroom. The tile laying process includes several steps that must be implemented in sequence. If you deviate from this rule, the repair will be done poorly, over time it will have to be repeated.
To lay the tiles, you must carry out the following work:
- To calculate the number of building materials.
- Putty GK surface.
- Primed walls in addition.
- Fasten the guides.
- Prepare tile adhesive for drywall in the bathroom.
- Install the tile.
- Stitch seams.
Each stage requires special attention, so we will consider them in more detail separately.
How to calculate the number of tiles?
Before kneading glue and proceed with the location of the tiles on the wall, we recommend that you accurately count the number of tiles in rows on each of the planes:
- The width and height of the wall must be divided by the corresponding tile sizes.
Important! It is very difficult to choose a tile so that all the tiles are laid whole, and only some of them cut.
- To make the tile look beautiful on the surface, do not mount the tile cut more than half.
Important! In the case when after miscalculation this cannot be avoided, then one whole tile is removed from the row, and the cut parts are installed at the edges, the width of which is not less than ½.
Putty GK surface
Despite the fact that drywall is a fairly even material, joints must be putty before finishing:
- Additional putty helps to enhance the solidity of the surface, does not allow GCR to deform and crack from exposure to moisture.
Important! Putty should be made with a mixture specially designed for use on drywall.
- To properly place the tile on the drywall in the bathroom, the raw materials are kneaded according to the instructions on the packaging. If the material has a pasty consistency, it must first be thoroughly mixed.
- Use a flat spatula to clean the seams from contamination, slightly expand for better adhesion of the putty.
- Apply a thin layer of the solution, install a reinforcing mesh or a sickle on it and apply the putty again.
- Leave the surface to dry.
- At the end, grind the drywall seams with a fine-grained sandpaper.
Important! It is better to start grinding the surface one day after applying the putty.
Drywall Primer
To tile firmly and reliably held on a drywall basis, it must be treated with a special primer.
Important! The primer, which is planned to process GCR, should be compatible with both the main surface and the adhesive mixture that you will use in the future.
When working, consider the following:
- It is better to apply the product on the wall with a paint roller. So the process will take less time and will have better quality, which cannot be said about working with a wide brush.
- It is recommended to apply the primer in several layers, at least in two. Each subsequent primer layer is applied after the previous one has completely dried.
Rail mounting
Guides are installed in order to lay the first and subsequent rows of tiles evenly, without distortion:
- The basis for the guide can be a bar, a wooden plank or an aluminum profile.
- To evenly attach the bar to the surface, use the level and pencil to make appropriate markings.
Important! If you are not a professional tile laying master, start installing tiles from the second row.
Preparing glue for tiles on drywall in the bathroom
The choice of glue is one of the most important stages of mounting tiles on drywall. The quality of all repairs in the bathroom depends on it. On the shelves in the store there is a huge assortment of adhesive mixtures, but it is better to choose glue for tile on drywall in the bathroom from the following options:
- "Liquid Nails". They are mainly used for gluing several tiles. Applying such a solution to treat the entire bathroom, you will need a large amount of the mixture, which will significantly affect your budget.
- Special glue for tiles. This mixture glues tiles to any surface with the highest quality. But tile glue has a high cost, which makes repairs more expensive and affordable for not everyone.
- Cement based mix. Masters who are professionally engaged in the repair of premises most often use cement mortars. They have an affordable cost and are easily diluted with water.
Recommendations for the preparation of the adhesive mixture:
- To prepare the glue, it is enough to dilute the powder with water in a large container and mix thoroughly.
Important! Carefully examine the proportion of raw materials and water on the packaging.
- If you use cement mortar, then dilute the mixture for laying tiles in the bathroom in small quantities. Otherwise, it will freeze, and, alas, it will not work.
Tile installation
After preparing the adhesive mixture, you can start laying the tiles on the wall:
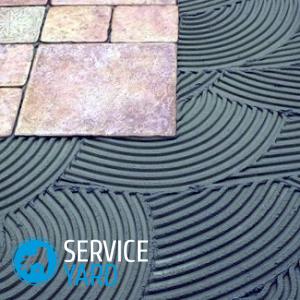
- Apply a thin layer of the solution to the wall, smooth with a notched trowel.
- Strictly press one tile firmly along the marked guide.
- We do the same with the subsequent tile. Check for evenness with a level.
Important! You can correct the unevenness within 10 minutes, then the glue hardens, and any violation can lead to cracks on the tile or even to split it in half.
- To ensure that the distance between the tiles is the same on all sides, install special crosses.
- Next, the process is repeated on all sides of the bathroom.
Important! If you need to trim the tile, it must first be soaked in water, the cut in this case will be more even.
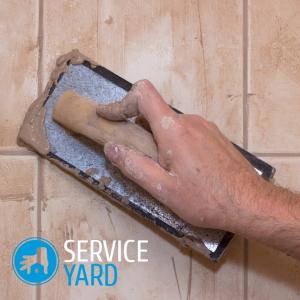
Stitching
The final stage of laying tiles in the bathroom is the stitching. It can be started only after the adhesive mixture has completely dried.
Important! On average, for the glue to completely dry, you need about a day, then you can remove the installed crosses.
Here are some tips for this process:
- The seams between the tiles are cleaned of excess solution and filled with grout.
Important! Grout, as a rule, choose a tone lighter or darker from the primary color of the surface.
- Means for grouting dries quickly enough, therefore, while you are processing the entire bath, the first seam will have time to dry.
- Immediately you can start cleaning the surface. To do this, you will need a damp sponge.
to contents ↑Important! For additional protection of the joints of the tiles, we recommend treating them with a special moisture-proof sealant.
Stock footage
Now you know how to glue tiles on drywall in the bathroom. With the help of GKLV, you will quickly smooth out the surface of the walls and you can proceed to tiling with tiles or plastic. Following the sequence and technology of installation, the repair in the bathroom will serve you for more than a year.
- Mounting the frame under drywall on the wall
- Ceramic tiles - fashion collections and the best manufacturers
- Which tile is better for the bathroom - which manufacturer?
- How to cover the seams between the tiles in the bathroom?
- Tile design in the bathroom
- Glue for tiles in the bathroom - which one to choose?
 (No ratings yet)