How to make a battery charger?
There are times when a car enthusiast does not have a charge for the battery of his car. Some do not purchase it because they do not see the need for such a purchase. But practice shows that every driver at least once had a problem with the battery, which suddenly sat down. Nobody forces you to buy an expensive device for charging, but you must have it on hand. What then to do? Why not just do it yourself? So you can save money, and certainly be sure of the quality of the assembly. How to make a battery charger? This article will help you figure this out.
to contents ↑What are the causes of battery drain?
Long-term use of vehicles can lead to the fact that the generator refuses to do its job. All this can result in the fact that at one point you will not be able to start transport. And the effect of temperatures can spoil the future trip, if outside the window minus thirty degrees.
For “resuscitation” of vehicles it is necessary to have a charging device at hand. It is not very difficult to create charging, but for this you will need to understand various nuances and acquire certain components and tools. Let's talk about all this in more detail.
to contents ↑Types of chargers for car batteries
Progress never stands still. Technology is developing at a tremendous speed, and charging devices based on transformers have long lost their relevance. Today, they were replaced by pulse and automatic chargers.
Impulse
Pulse devices are small in size, able to provide a full battery charge. The charging process takes place in the following two stages:
- Constant voltage operation.
- DC operation.
The design itself consists of simple similar schemes.
Important! Car owners, especially novice drivers, regularly face various problems, but most of them are very easily solved. To prevent such situations from taking you by surprise, we suggest that you familiarize yourself with our other articles and keep such information in mind:
Machine
The automatic device is notable for its ease of use. It is a diagnostic center with great functionality. Assembling such a device yourself is very difficult.
The most “smart” devices will tell you about a connection error if you connected the poles incorrectly. In case of improper connection, the supply of electric current does not even begin.
Important! Also, such devices can measure the level of charge and capacity, and some even have timers.
How to assemble the charger yourself? Let's look at the most common ways to create.

Charging from a computer power supply
You will need an old computer, which, however, was lying around with “unnecessary” junk. Don't have one? No problem! You can buy an old power supply for a ridiculous amount.Old PC devices can be used to create a wide variety of chargers. You just need to get a chip that will be used as a controller.
Important! Perfect for this TL494 or Ka7500.
Assembly features - set and type of components:
- The power of the power supply unit should vary from 150 watts or more.
- The resistor in it must be replaced by a tuning.
- The circuit is nothing complicated. A voltage of 12 volts is supplied to the upper terminal, and terminals 14 and 15 are simply cut off, since there is no need for them.
Important! Only the sixteenth output should be left, because it is it that is connected to the main wire, but it will need to be disconnected.
- The back wall of the unit must have a potentiometer-regulator. You will also have to take two cords and skip them: one is useful for connecting terminals, and the other is network. This wire allows adjustment.
- Two resistors are needed for manufacturing. According to its users, the 5W8R2J is the best option. Do not forget about the tuning resistor, which will have to be fixed on the same board, after getting rid of the printed track.
- Before soldering, it is necessary to tin conclusions: 1, 14, 15, 16. The open circuit voltage will determine the full charge, which can be set using a variable resistor.
- It is best to ensure that the insulation is of a different color. According to the canons: red is positive, and blue is negative. Of course, this is not important, but what if a pedantic radio operator suddenly lives inside you?
Important! Try to avoid confusion with the wires, as there will be a risk of malfunctions and damage to the device.
How to assemble a charger in other ways? Read on!
Adapter
A 12 volt adapter is considered the best option for manufacturing a charger (charger). But here you have to take into account all the technical parameters of the battery:
- The wires of the source device must be removed from the insulation at the very end and exposed. About 6 centimeters will be enough for convenience.
Important! Rain, snow, chemicals from ice on the road give their result in the form of corrosion of the body, thresholds and underbody. To prevent this process, learn about rust remedies.
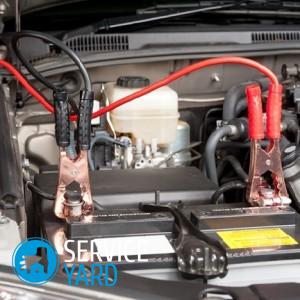
- Wires with different charge signs need to be located at a decent distance from each other, somewhere around 40 centimeters. At the ends of each of them you need to wear a crocodile terminal.
- Following the sequence, you must correctly connect these terminals to the batteries.
Important! To avoid damage to property, carefully monitor the temperature of the battery.
Using a light bulb and diode
The method is “simple” because of the availability of the necessary materials: a bulb and a diode.
Important! The power of the bulb should exceed 200 watts.
Do not charge batteries with a small charge capacity in this way. This is fraught with the fact that he will begin to "boil."
Important! The charge current should not be more than a value that corresponds to one tenth of the total power.
The second important component is a semiconductor diode that will conduct electrical current. It remains only to install the wire, terminals and plug.
Important! Follow safety precautions and properly connect devices based on the polarity of the wires. It is also recommended to use rubber gloves when using the charger.
When manufacturing, pay attention to the diode. Usually there is an arrow on it that indicates a plus. A semiconductor diode passes electric current only in one direction, focus on this and use a tester to determine the polarity of the clamps.
to contents ↑Important! The charging process lasts about 7 hours. After this time, you must turn off the power to protect yourself from overheating of the battery.
Stock footage
Now you know how to assemble a do-it-yourself charger in three different ways.This activity not only brings useful fruits, but also is a very interesting experience for any car owner.
 (No ratings yet)